
Step 1: Open the Automations Tab
Go to the Automations tab in the Spidra dashboard and click the Add automation button.
Step 2: Choose Automation Type
From the preset dropdown, select the preset you want to connect. Then, choose Webhook as your destination and click Next to continue.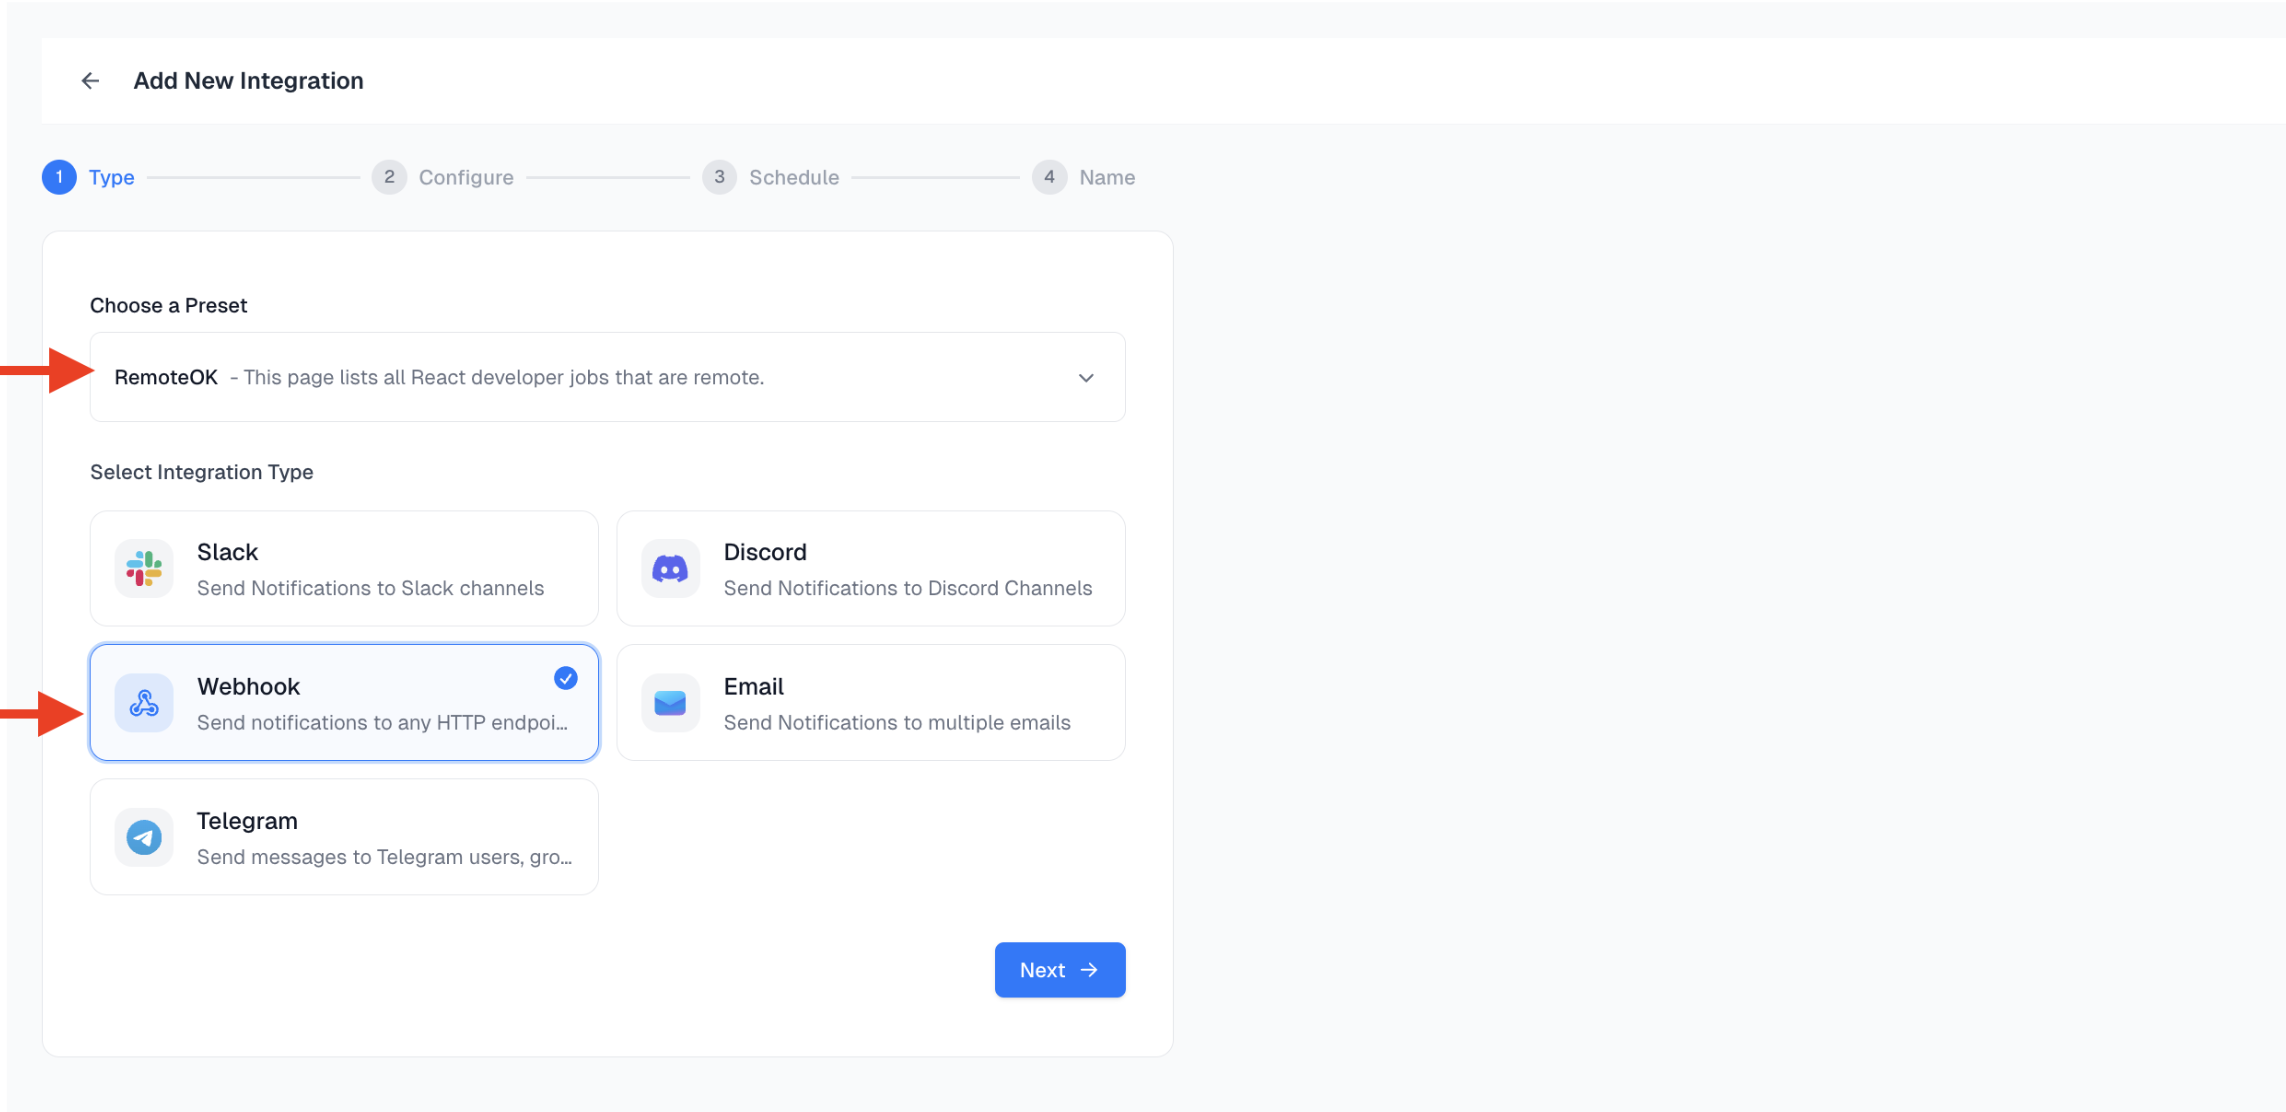
Step 3: Configure Webhook Endpoint
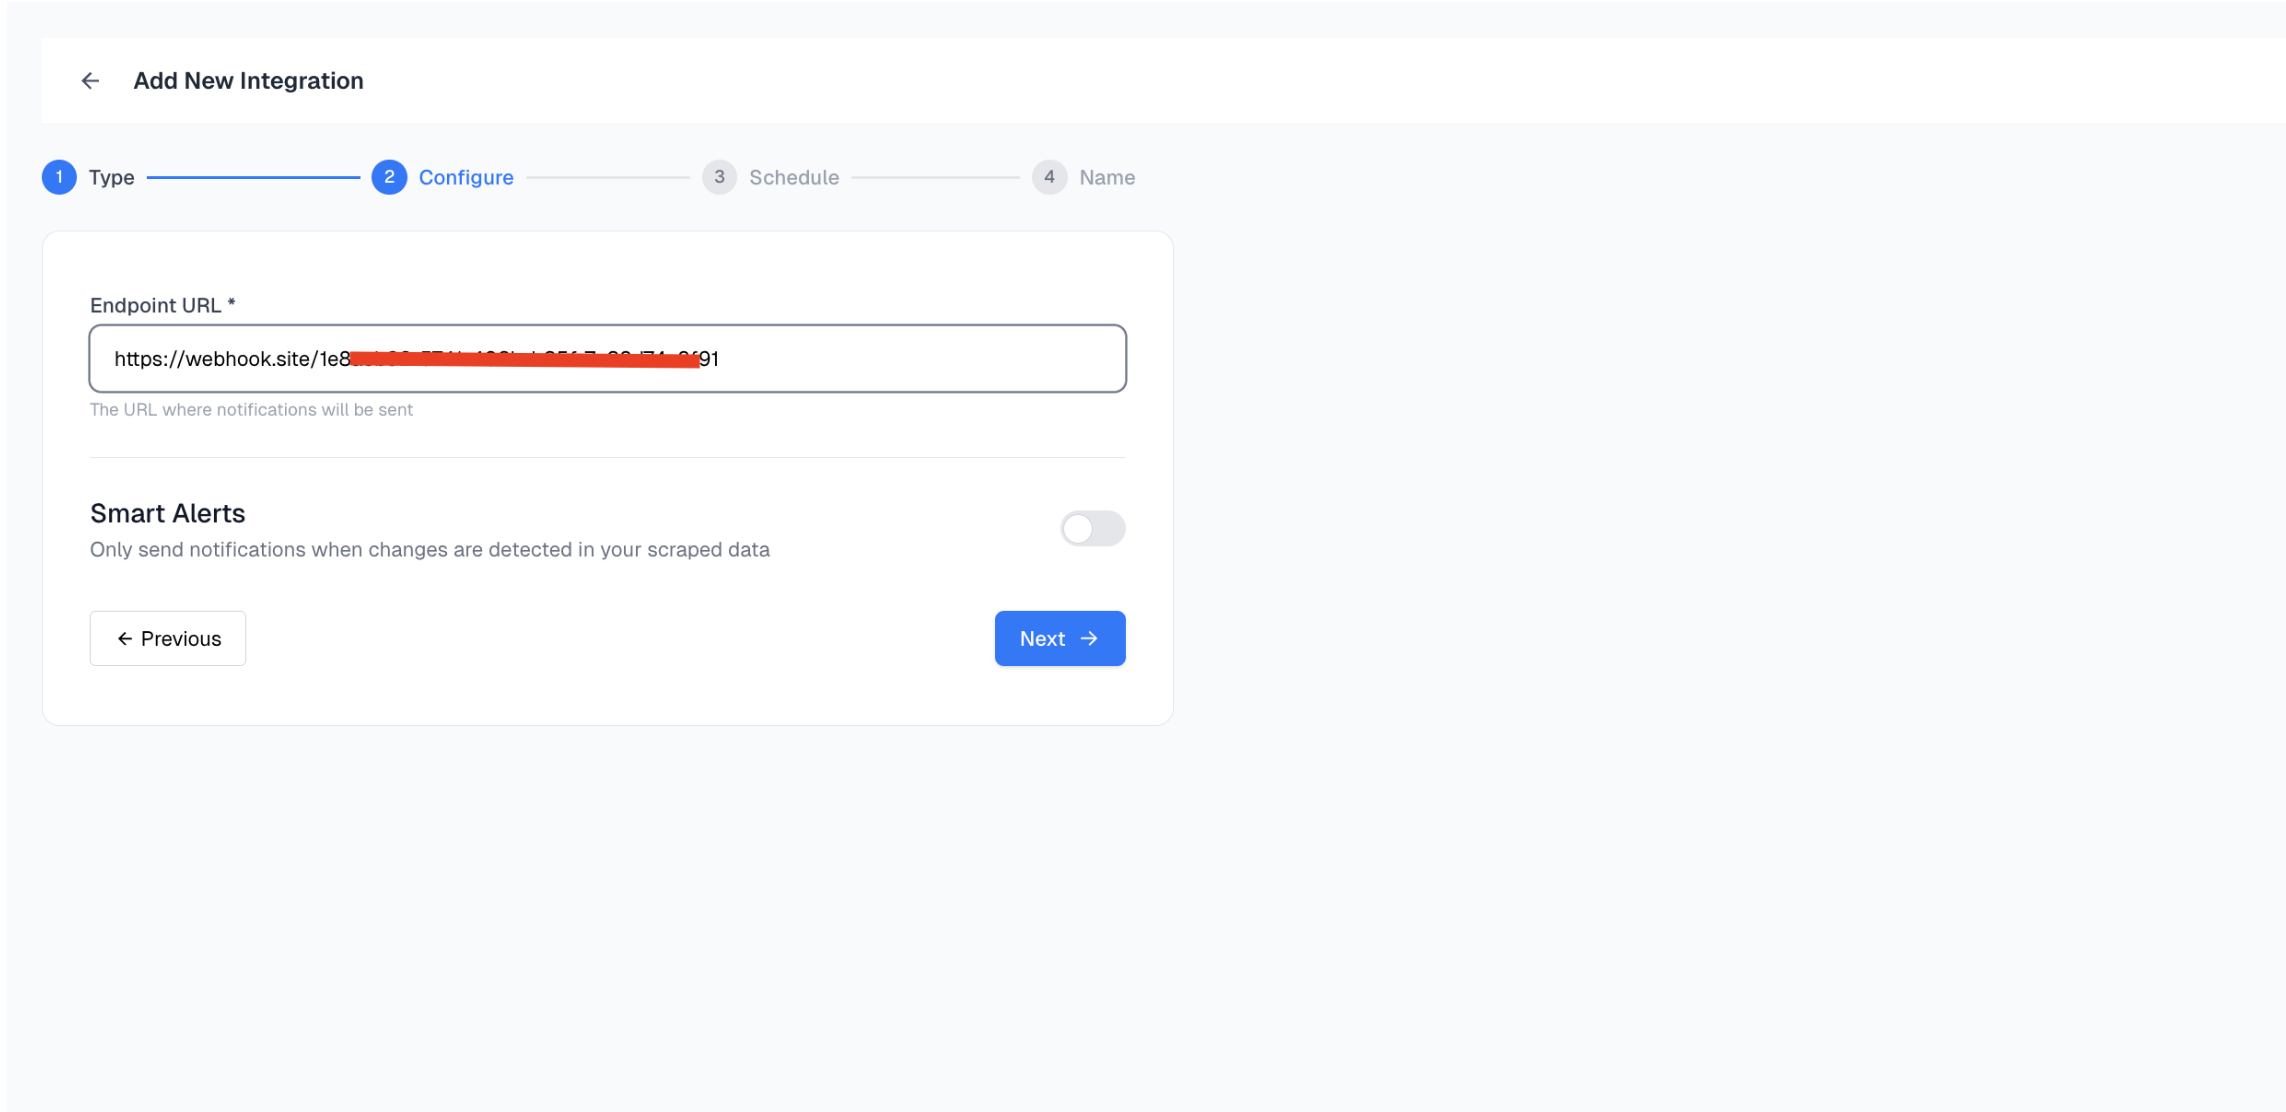
Paste your Webhook Endpoint URL into the configuration field. This is where Spidra will send the scraped data. We recommend using Webhook.site for testing purposes. It instantly provides you with a unique temporary URL that displays incoming requests in real time.How to Get a Test Webhook URL:
- Open https://webhook.site
- Copy the unique URL provided at the top of the page.
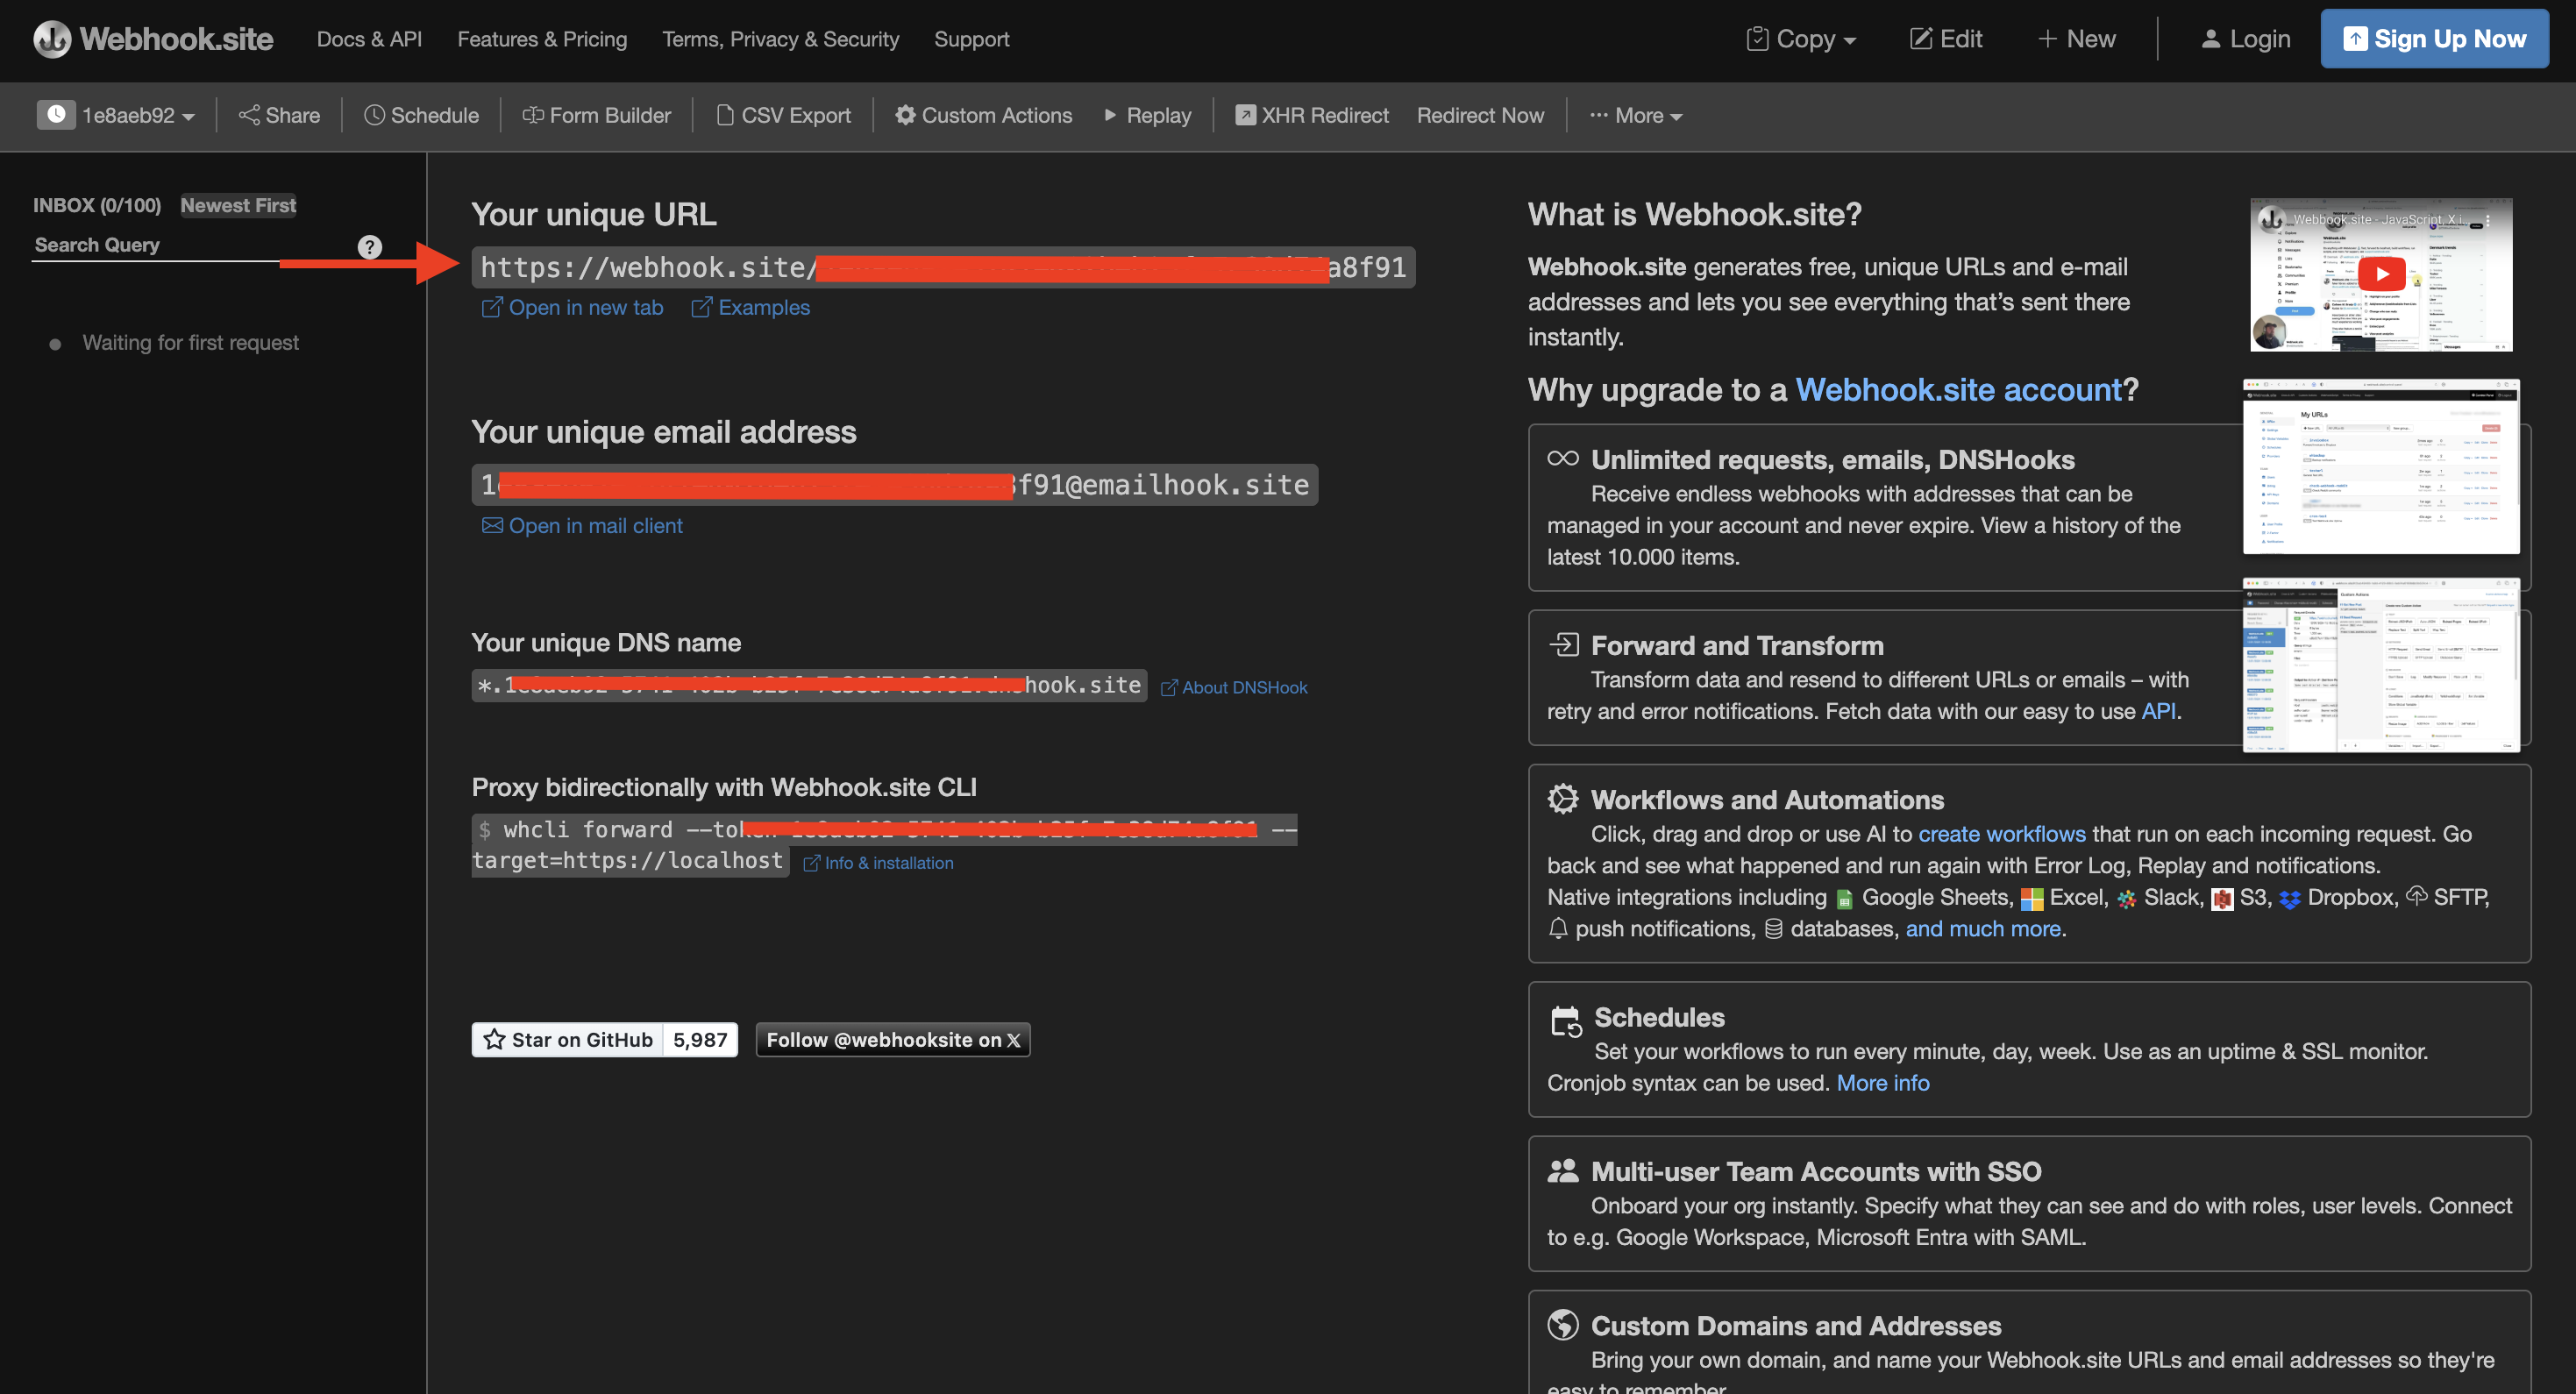
- Paste this URL into Spidra’s Webhook input field.
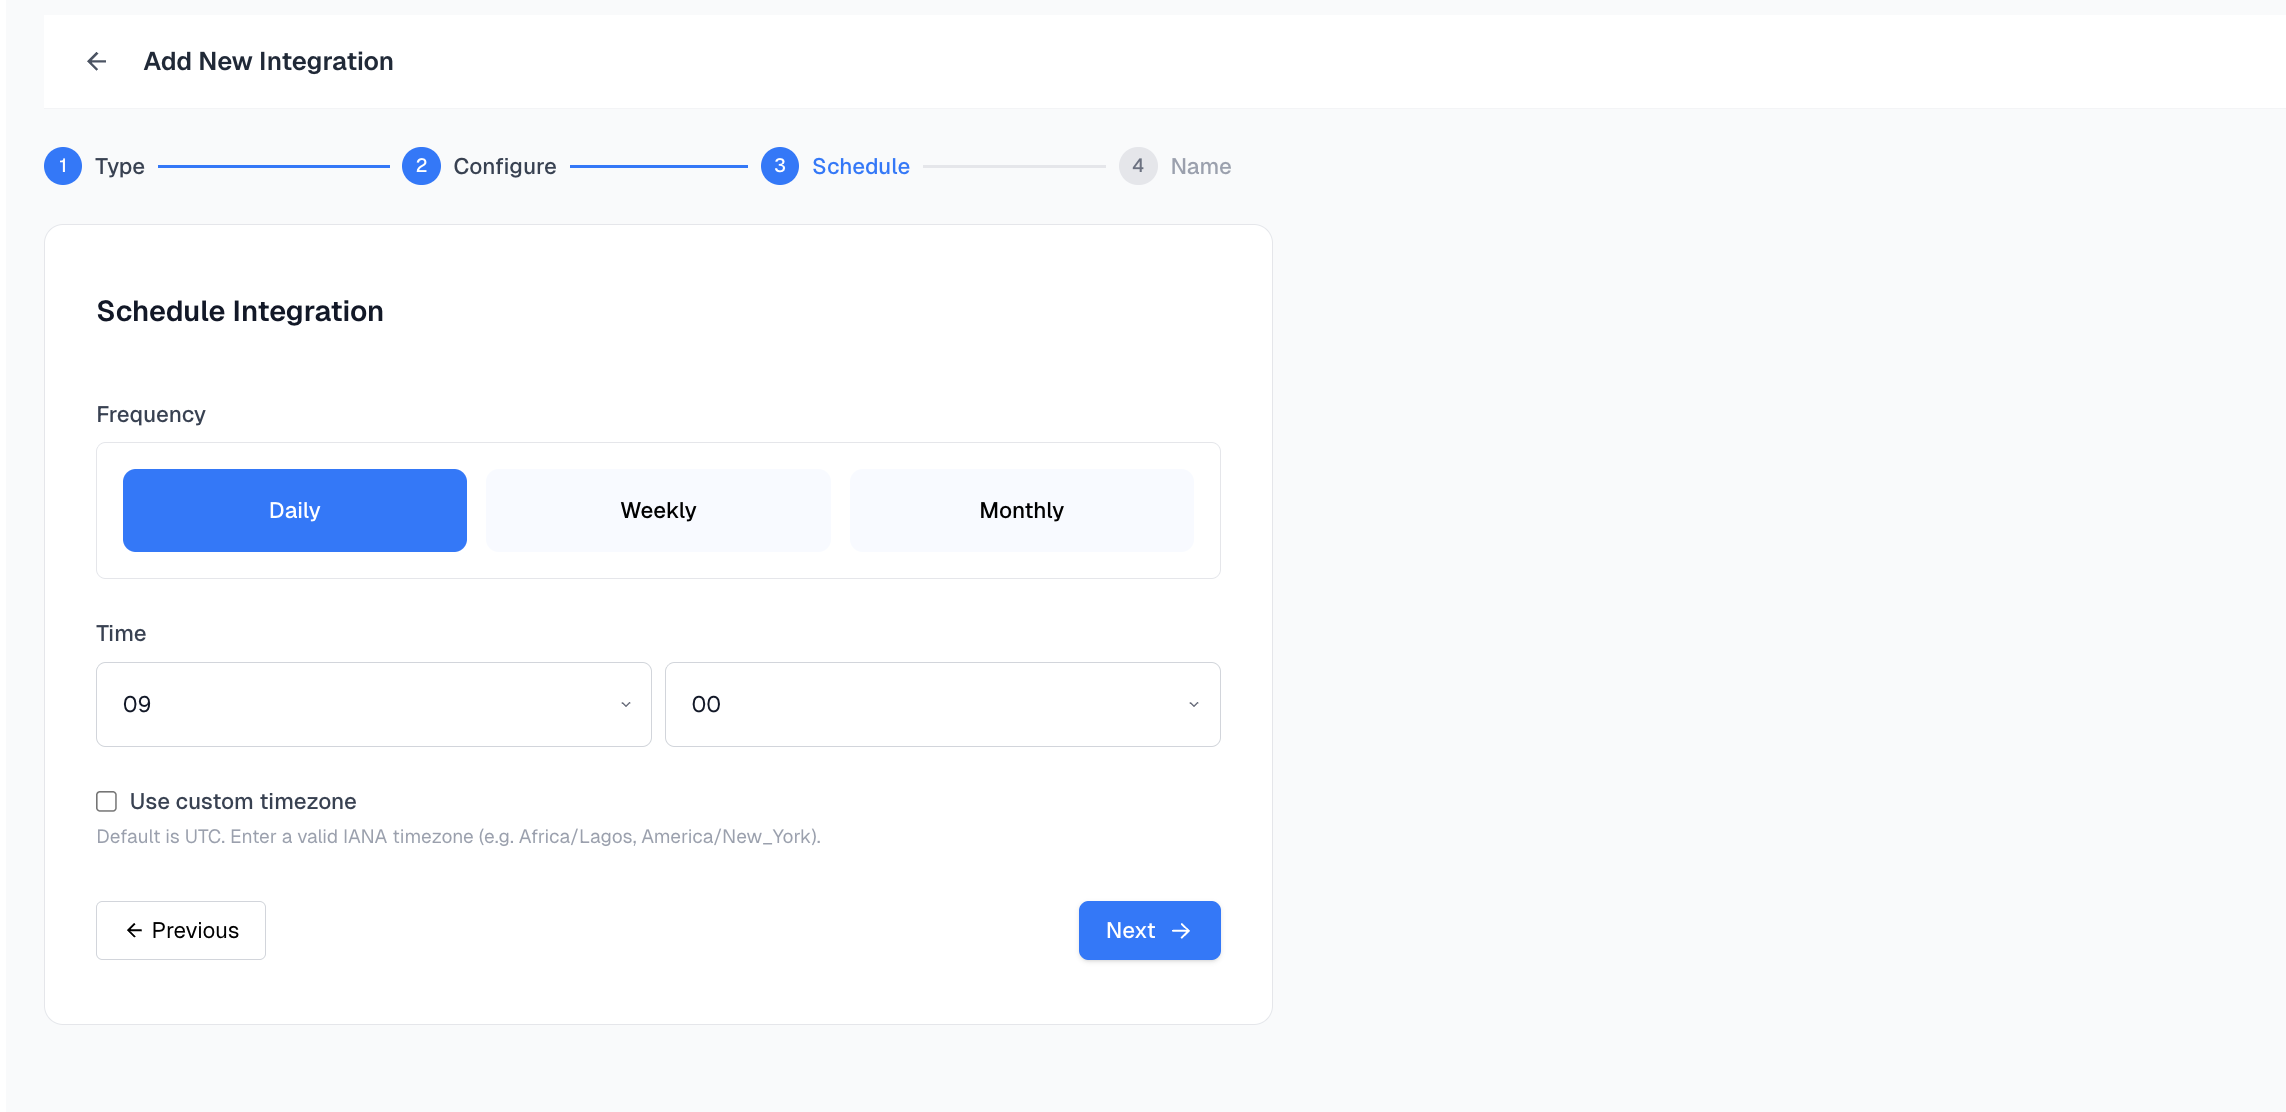
Step 4: Schedule the Automation
Set how often you want this webhook to run:- Daily
- Weekly
- Monthly
Africa/Lagos or America/New_York.
Step 5: Name Your Automation
Give your automation a descriptive name, this helps you identify it later in your automation list.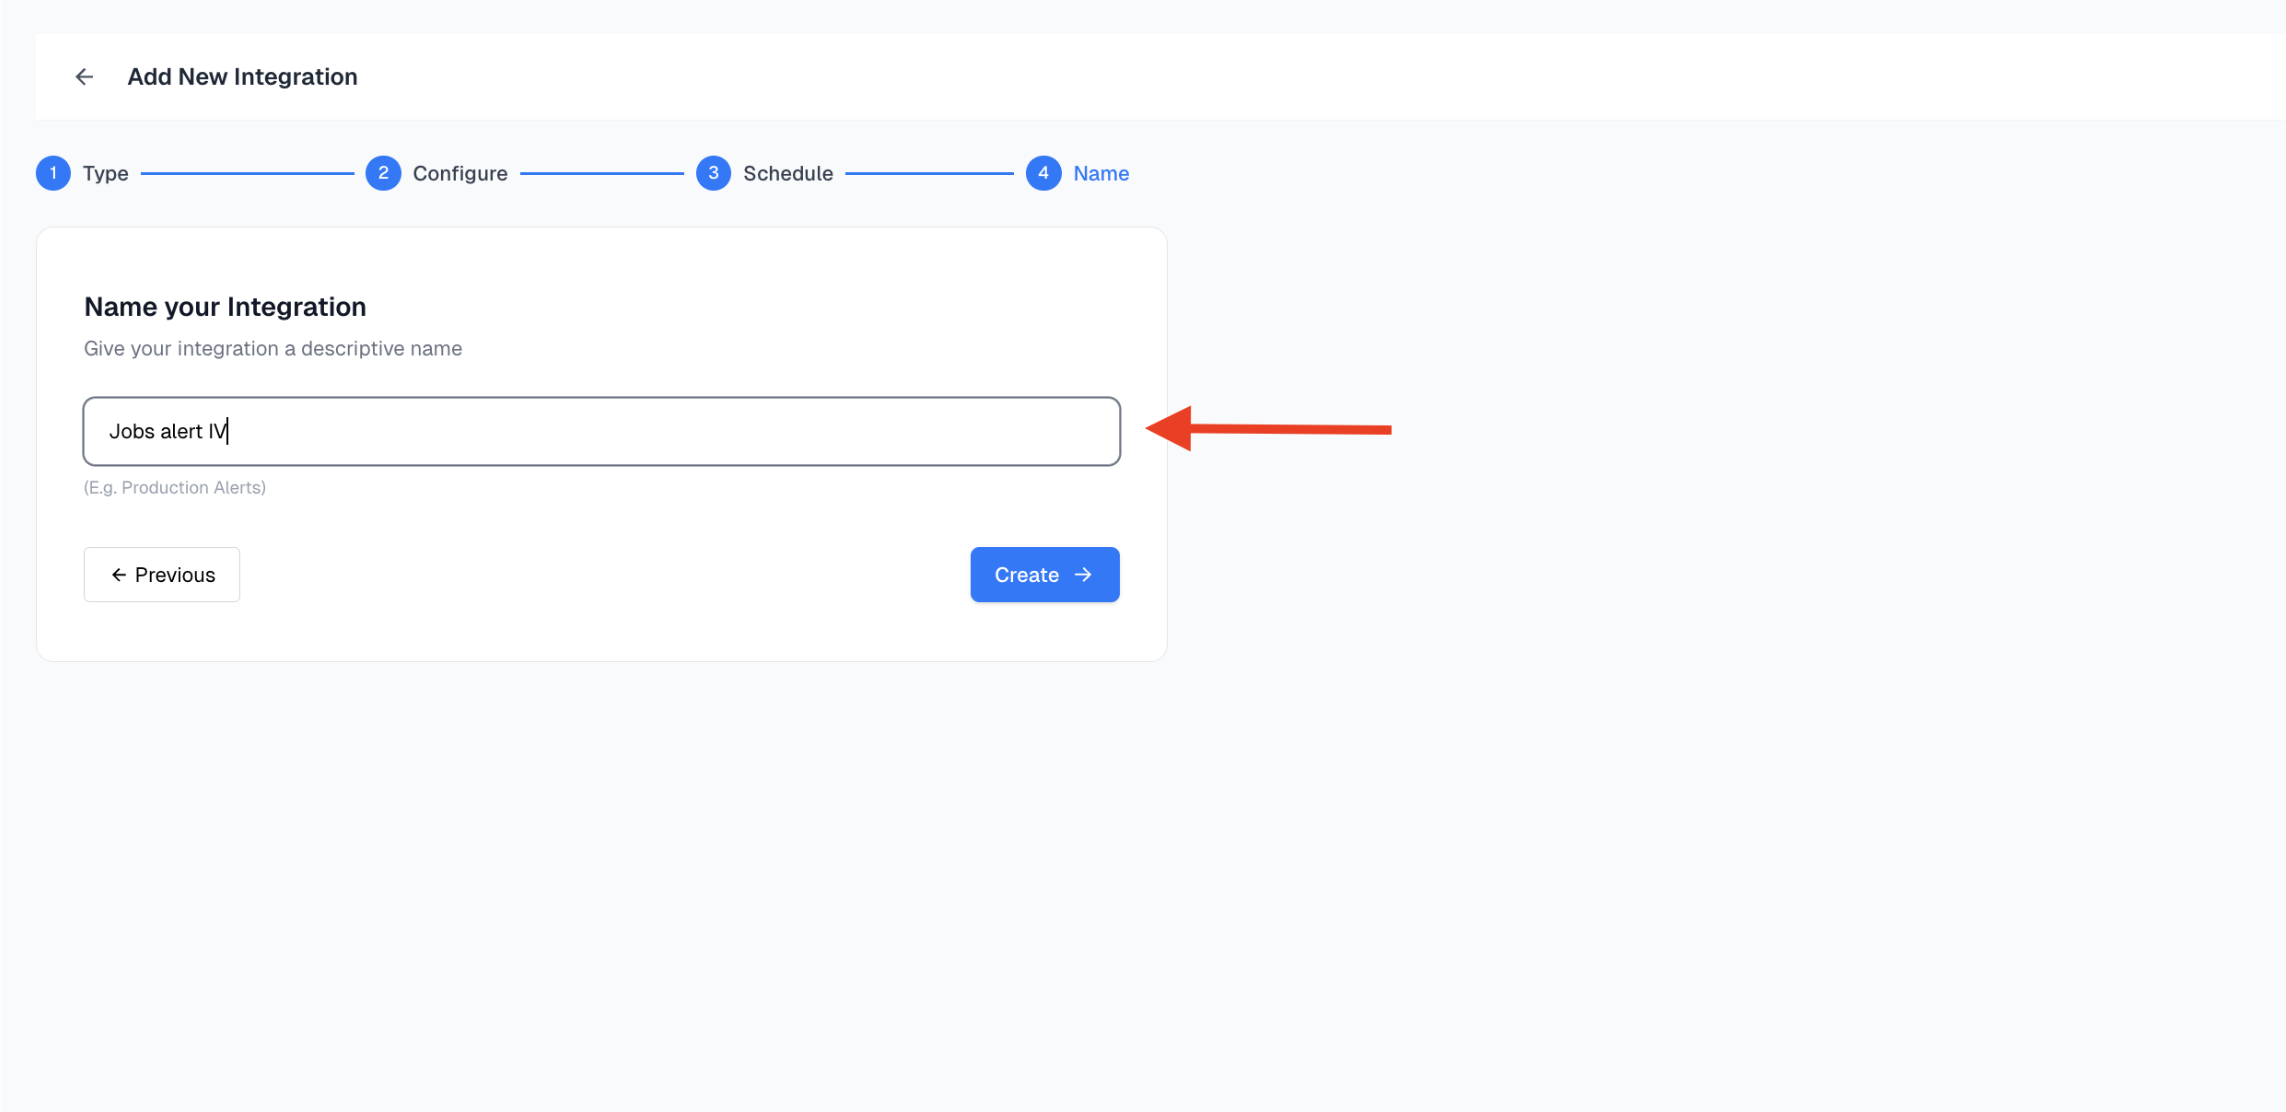
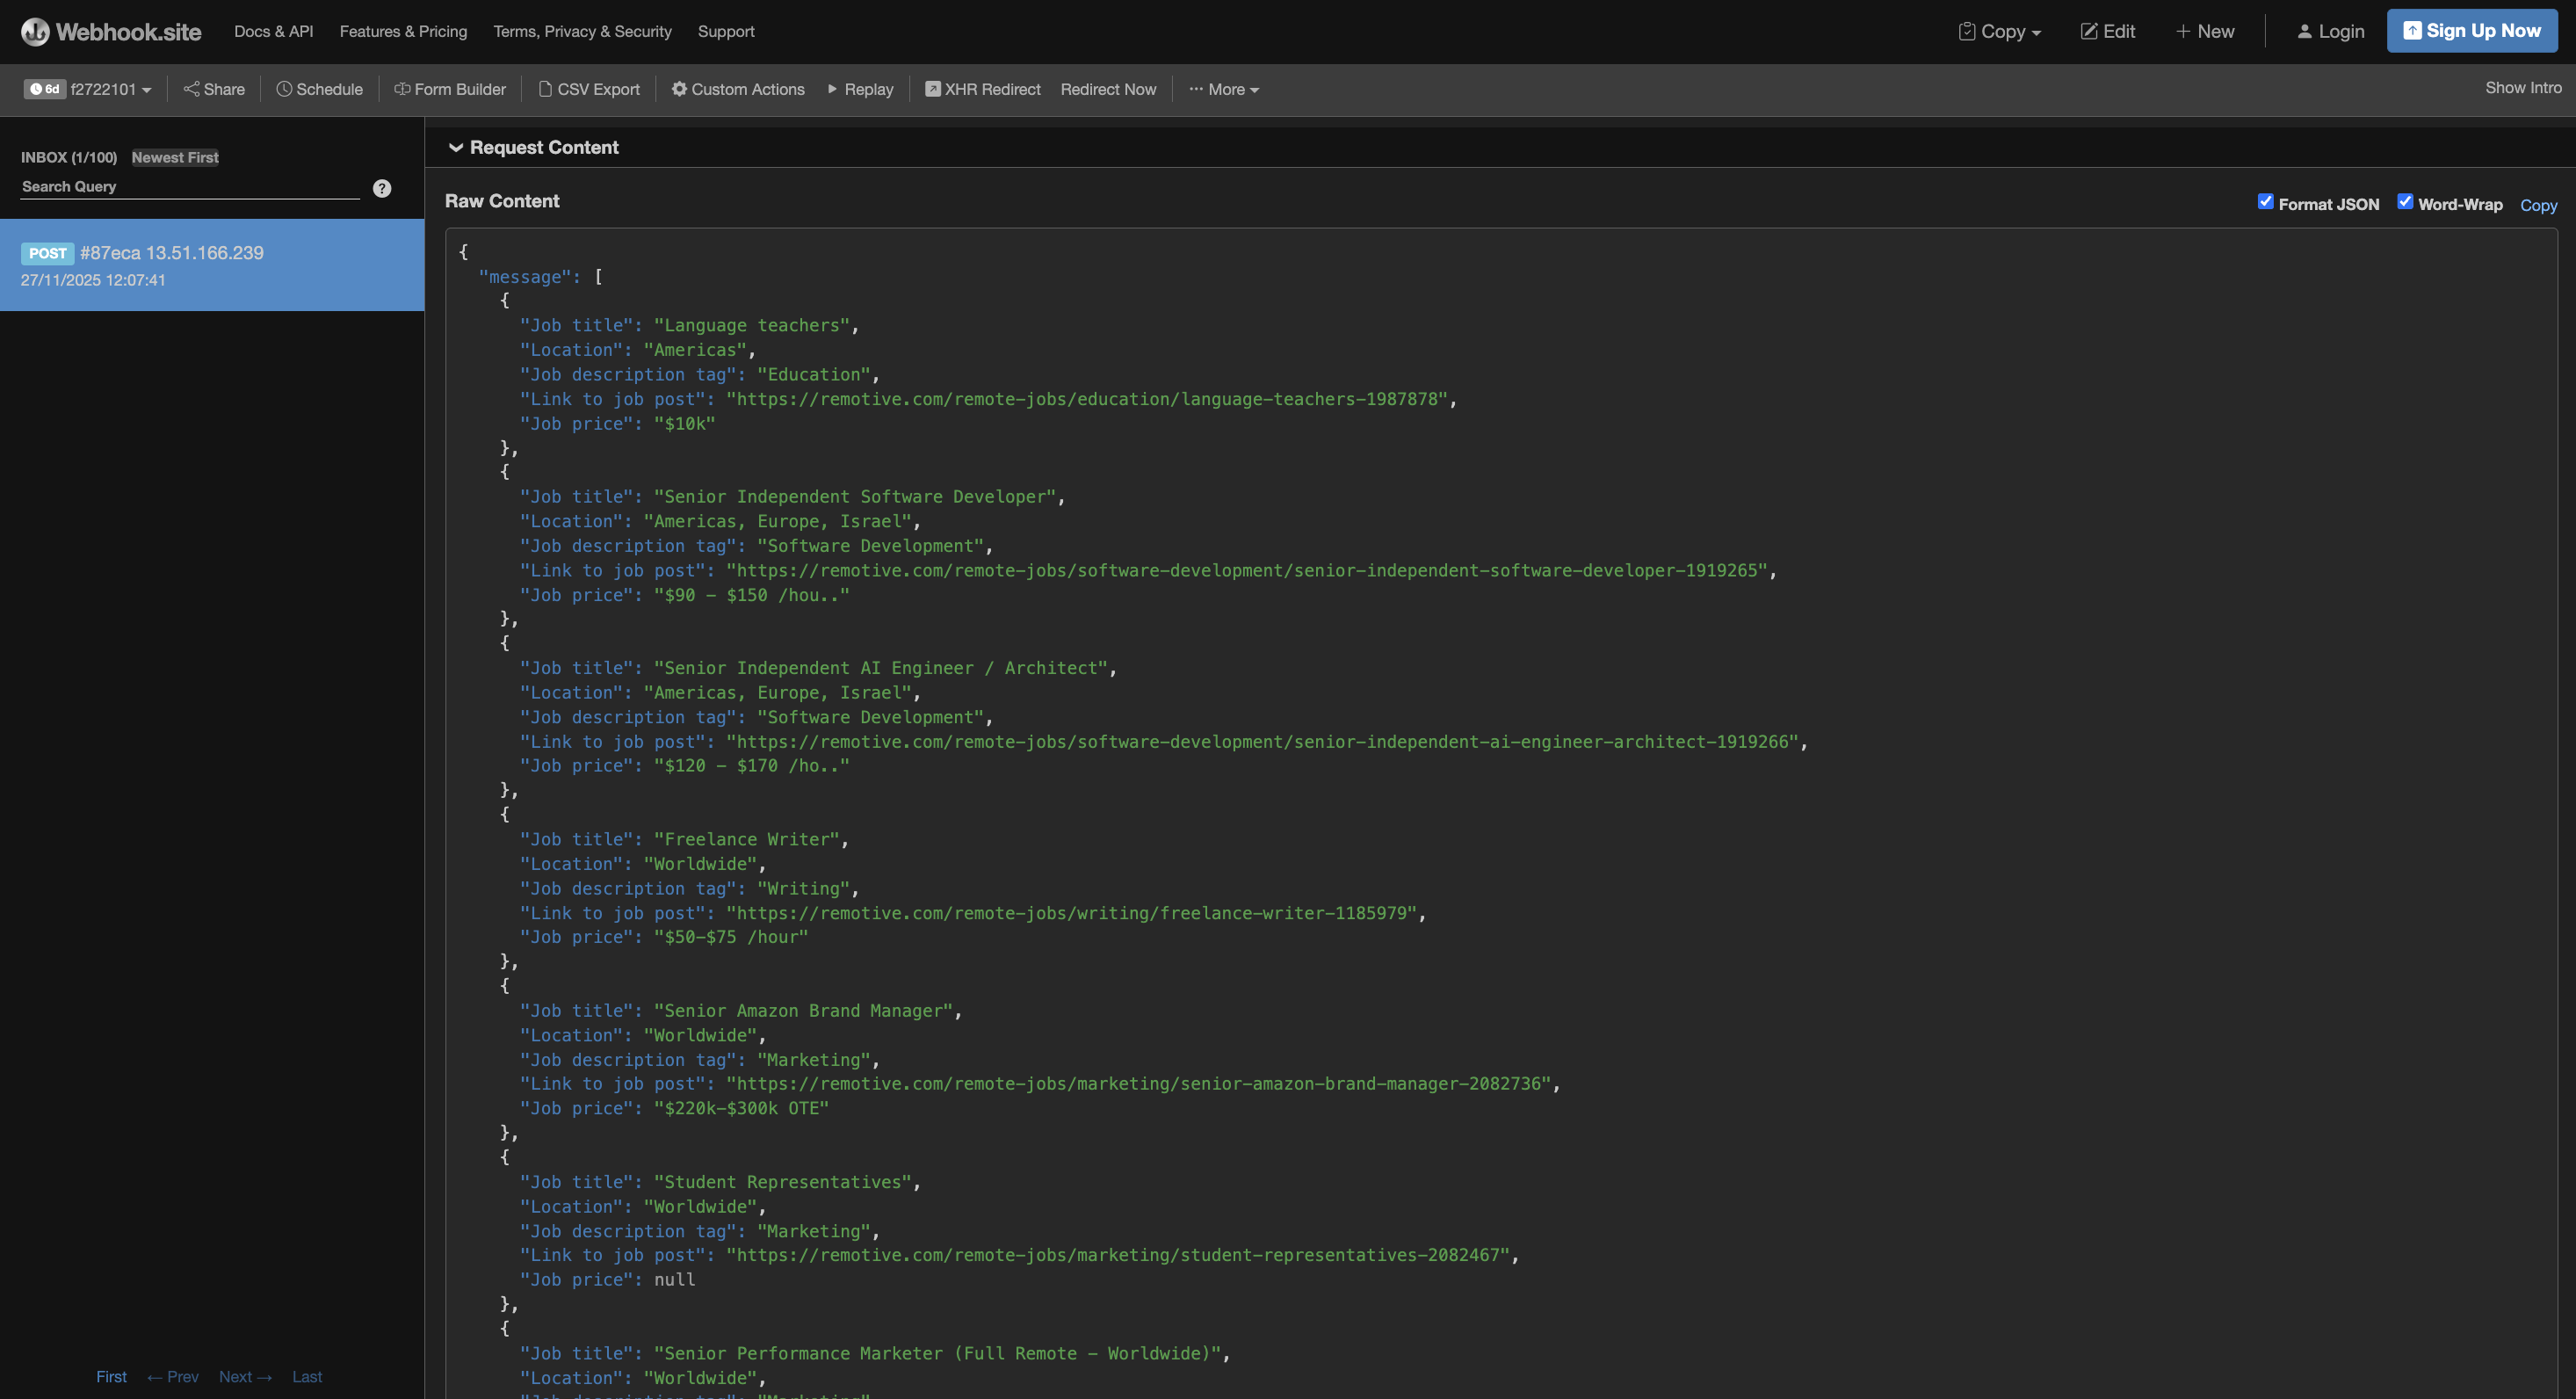
Step 6: View Incoming Payload on Webhook.site
Once your scheduled time arrives, navigate to Webhook.site. You’ll see the incoming request appear on the page with the full payload. This confirms your automation is working!