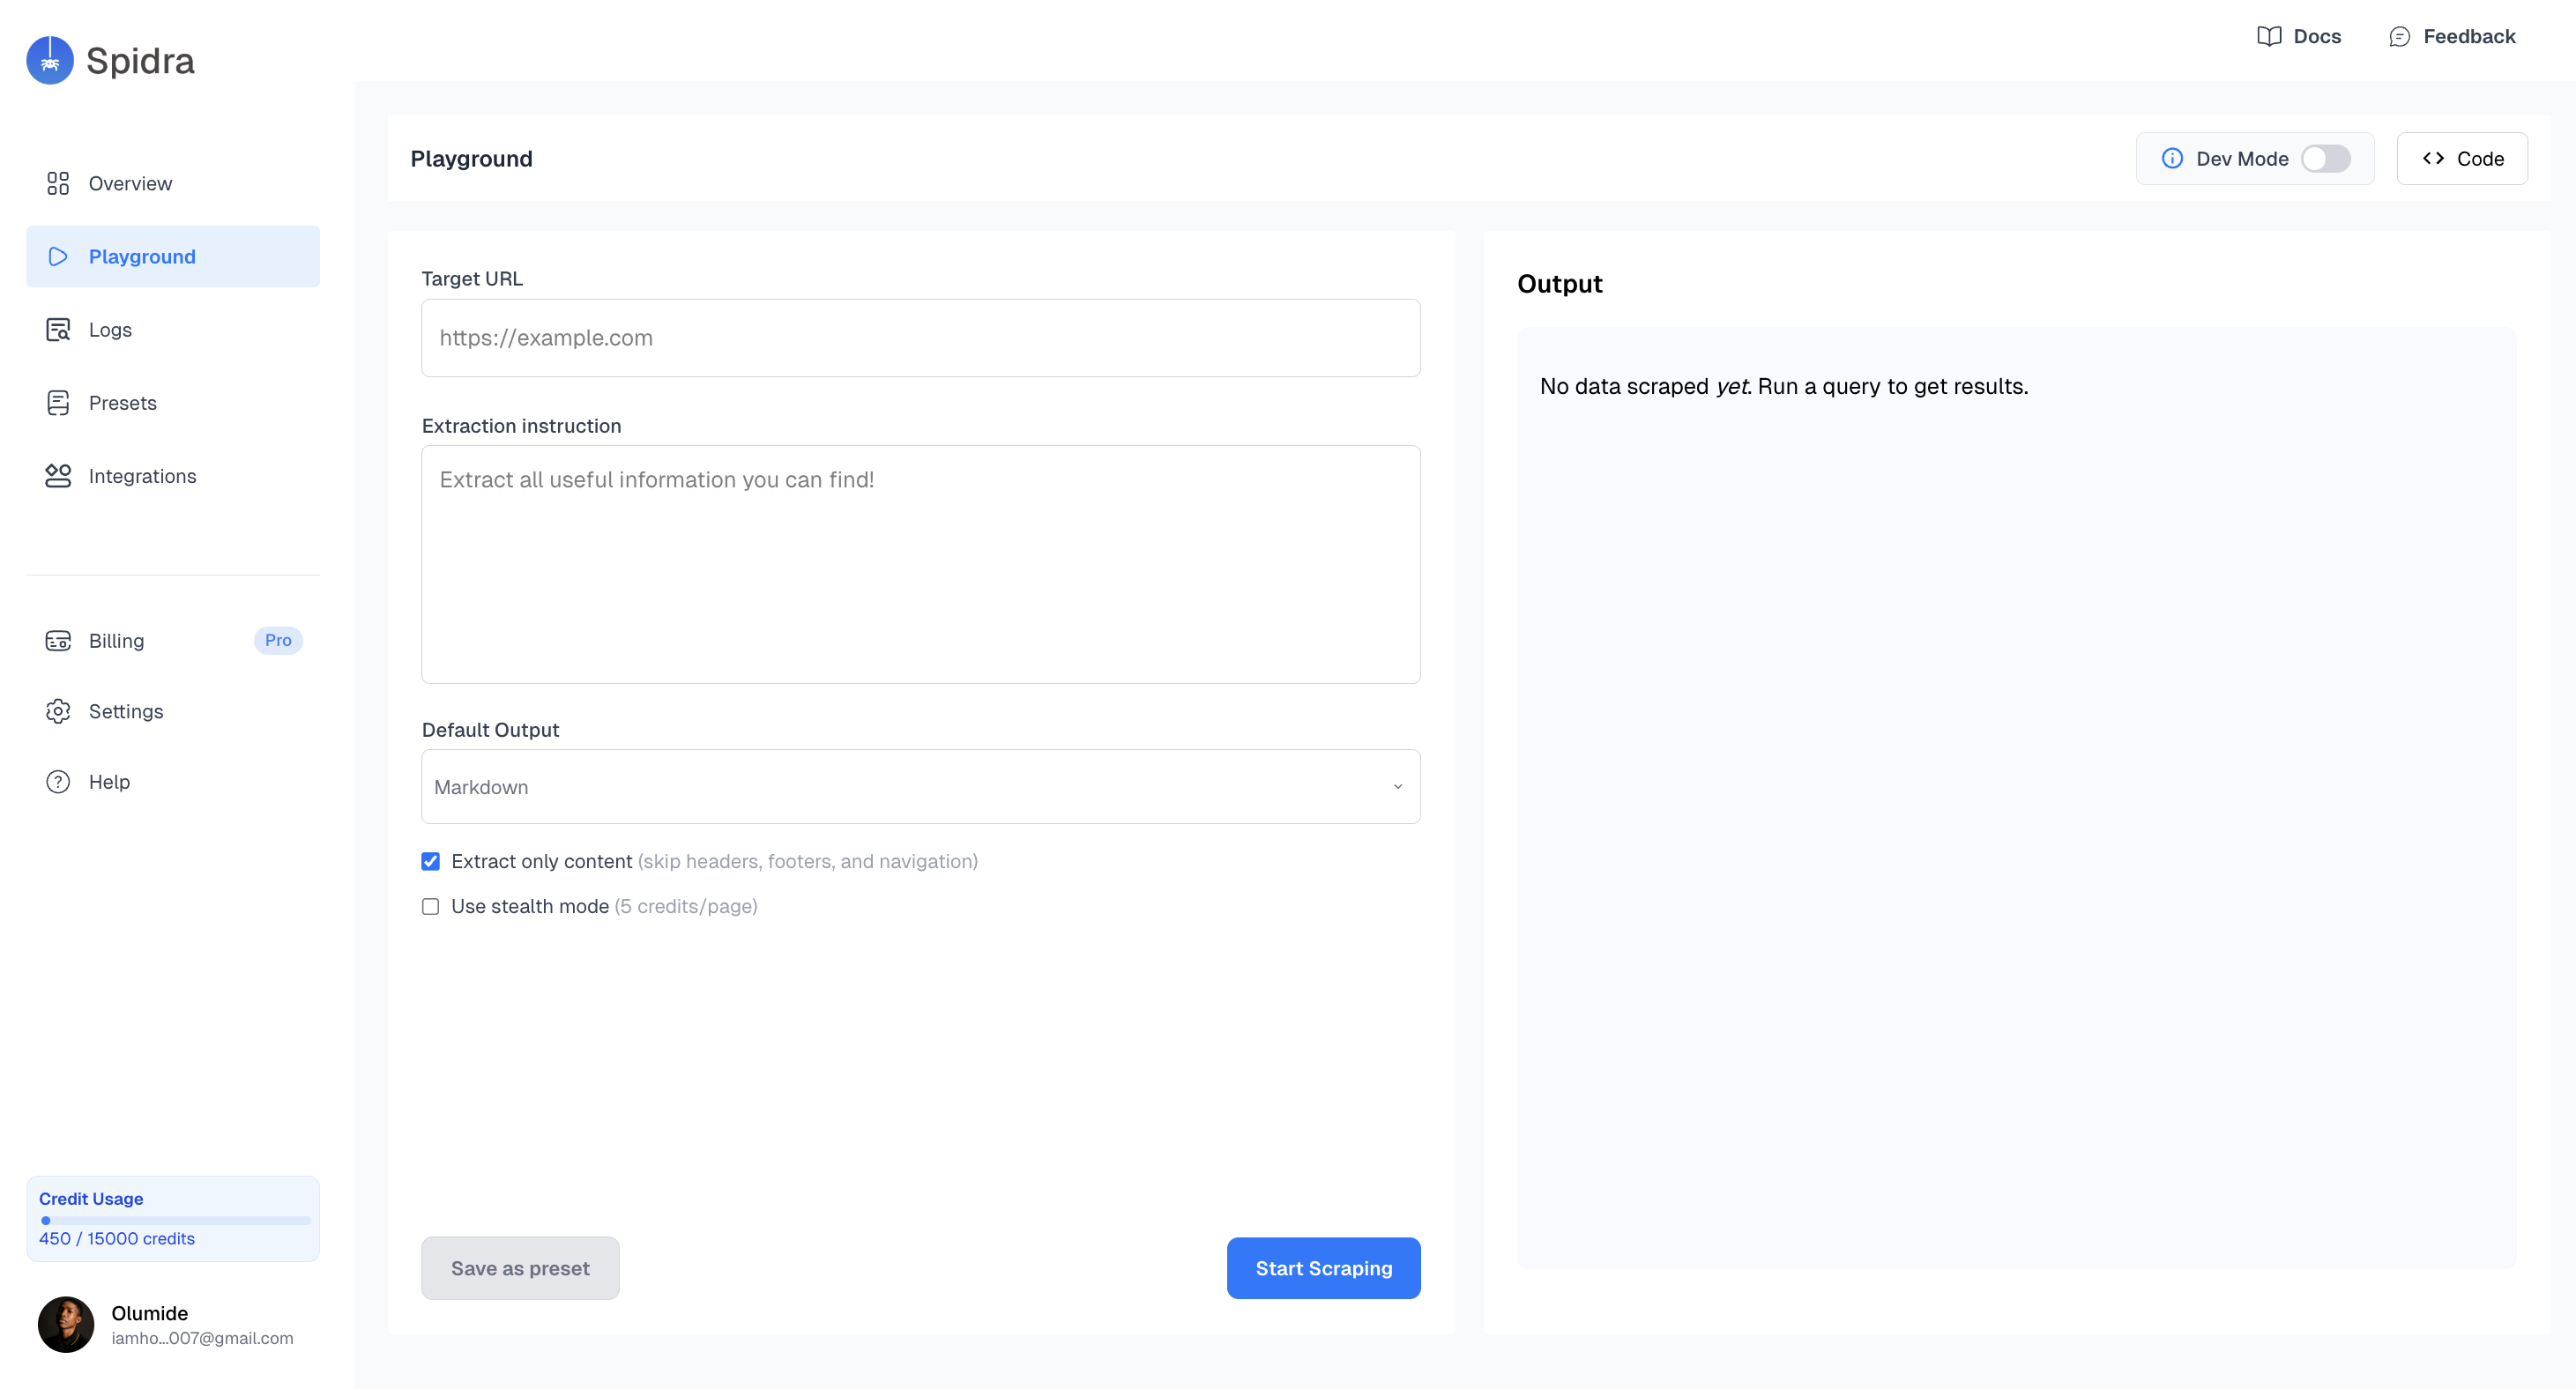
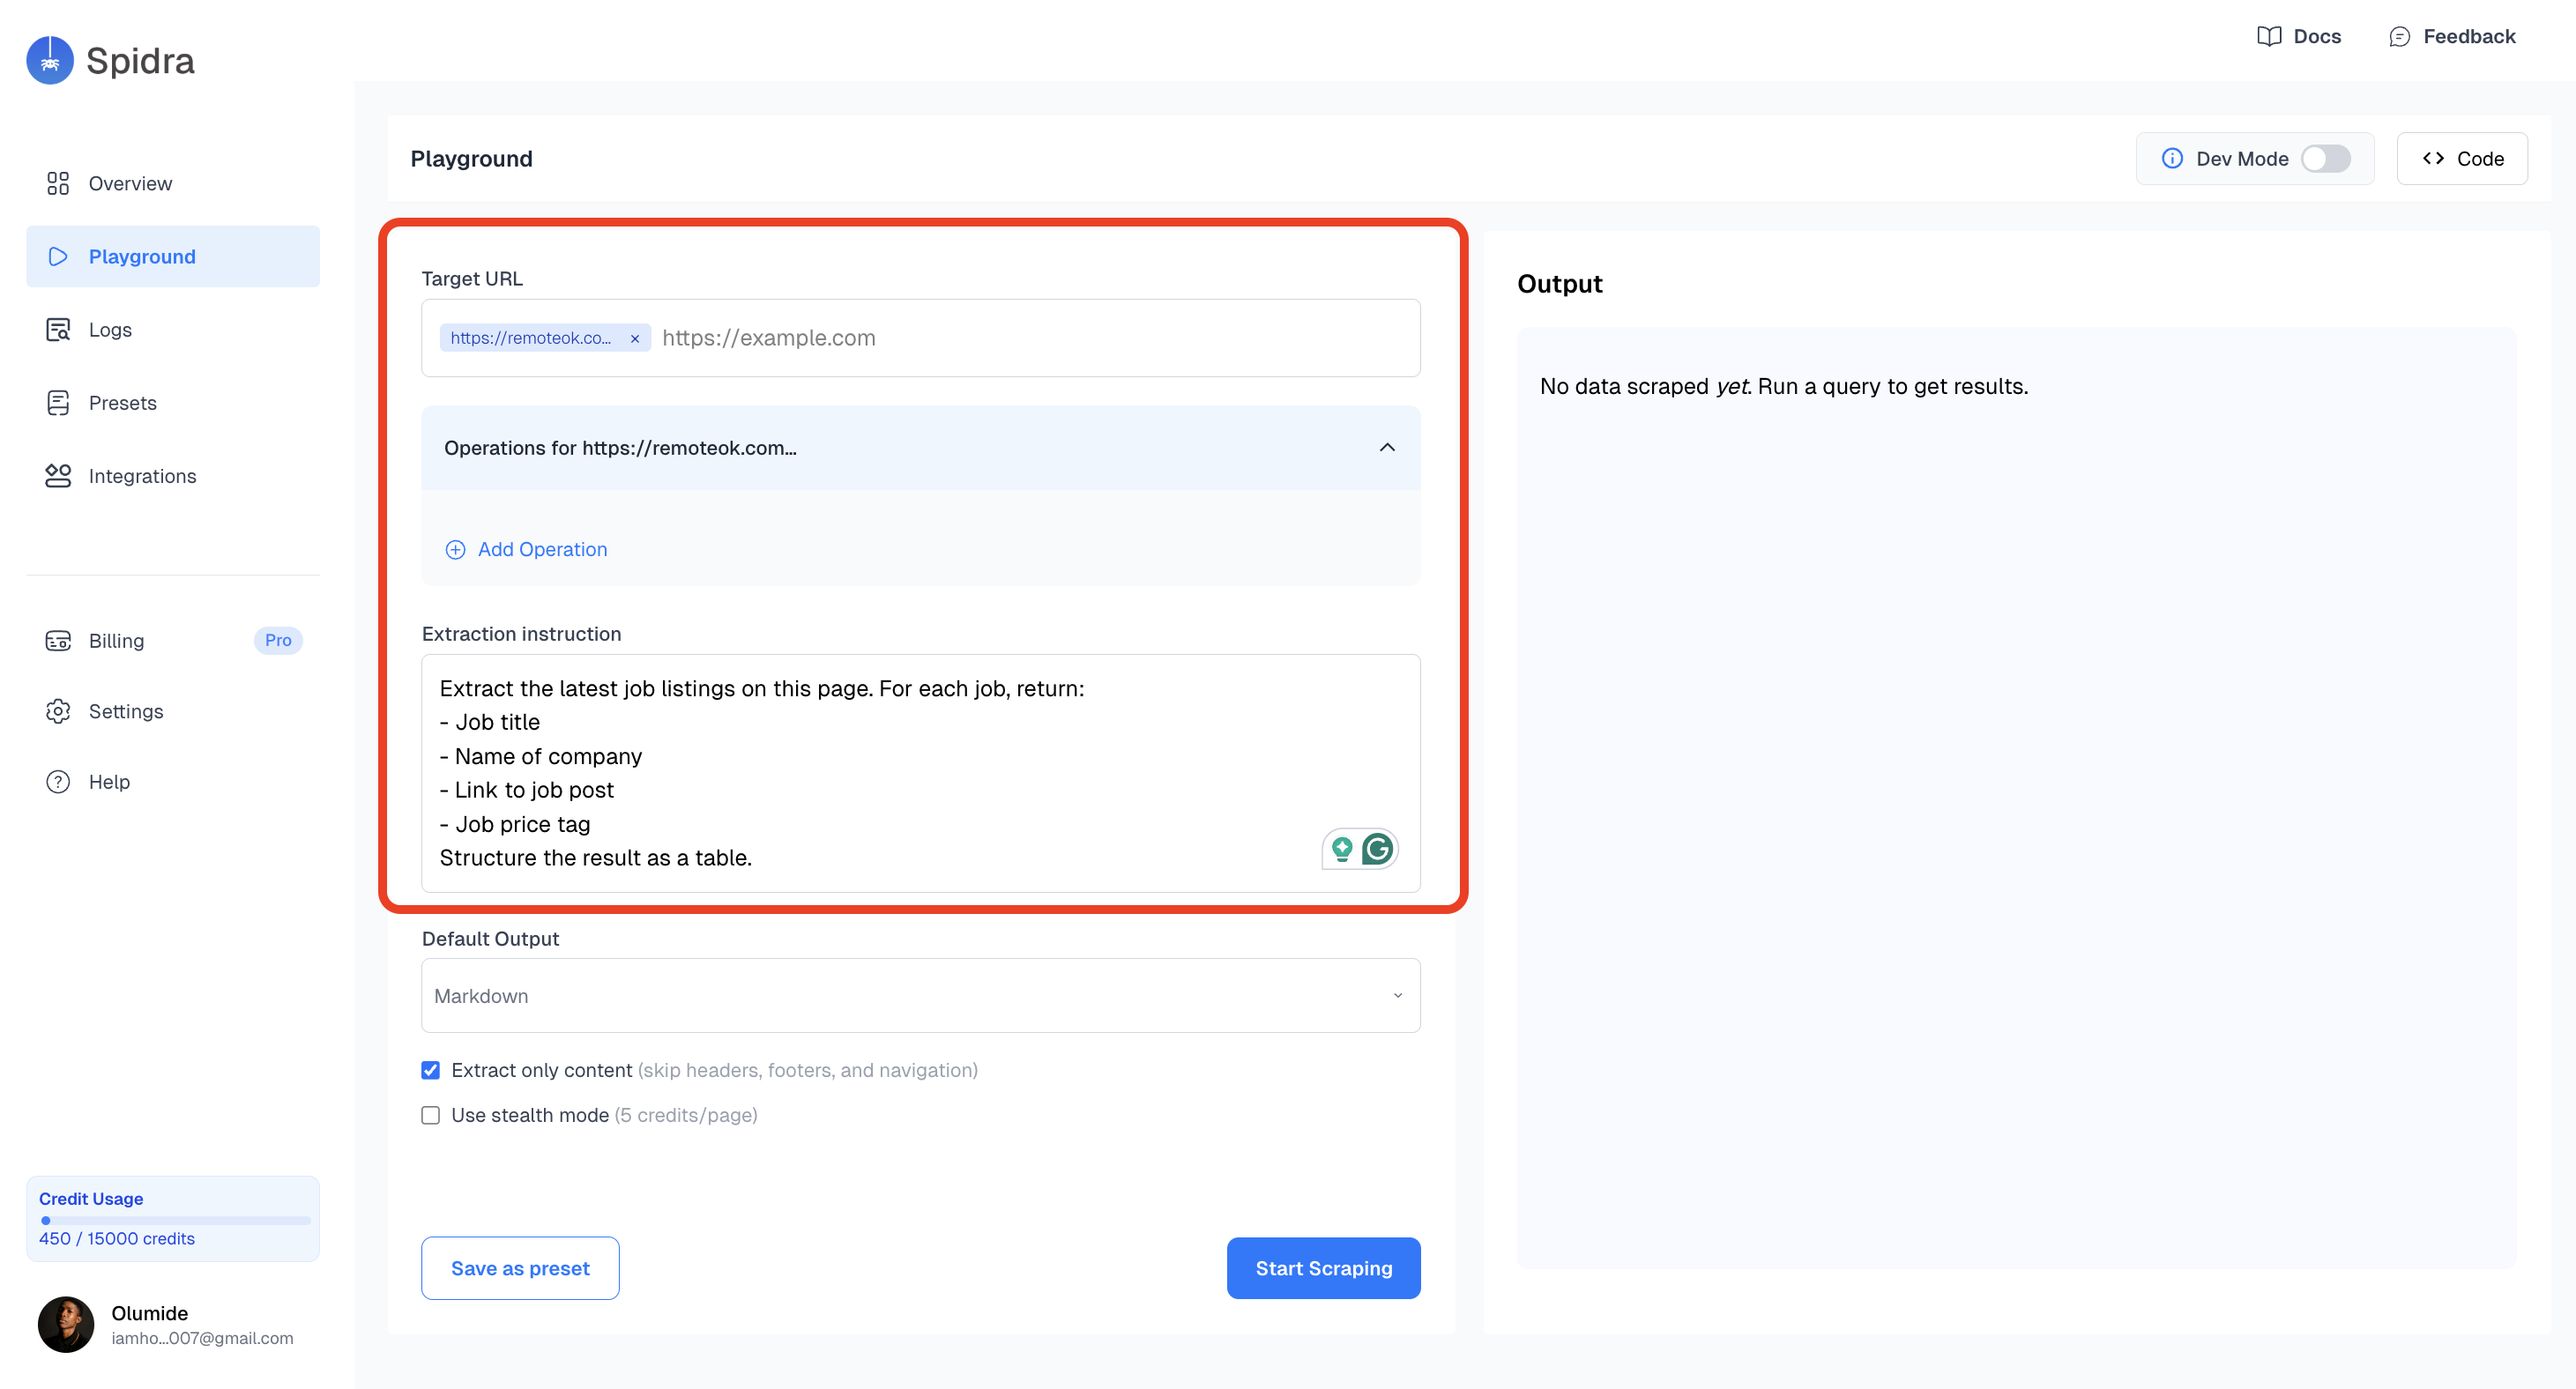
Click Playground in the sidebar. Paste a URL into the Target URL field, then write what you want to extract in plain English.Try this to start:
URL: https://remoteok.com/remote-react-jobsPrompt: Extract all job listings on this page. For each job return the title,company name, link to the post, and salary if shown. Return as JSON.
Choose JSON as your output format. Then toggle any options you need:
Extract only content removes navbars, footers, and boilerplate so the AI focuses on what matters.
Stealth mode routes the request through a residential proxy, useful on sites that block scrapers.
Screenshot captures the page at scrape time, handy for debugging.
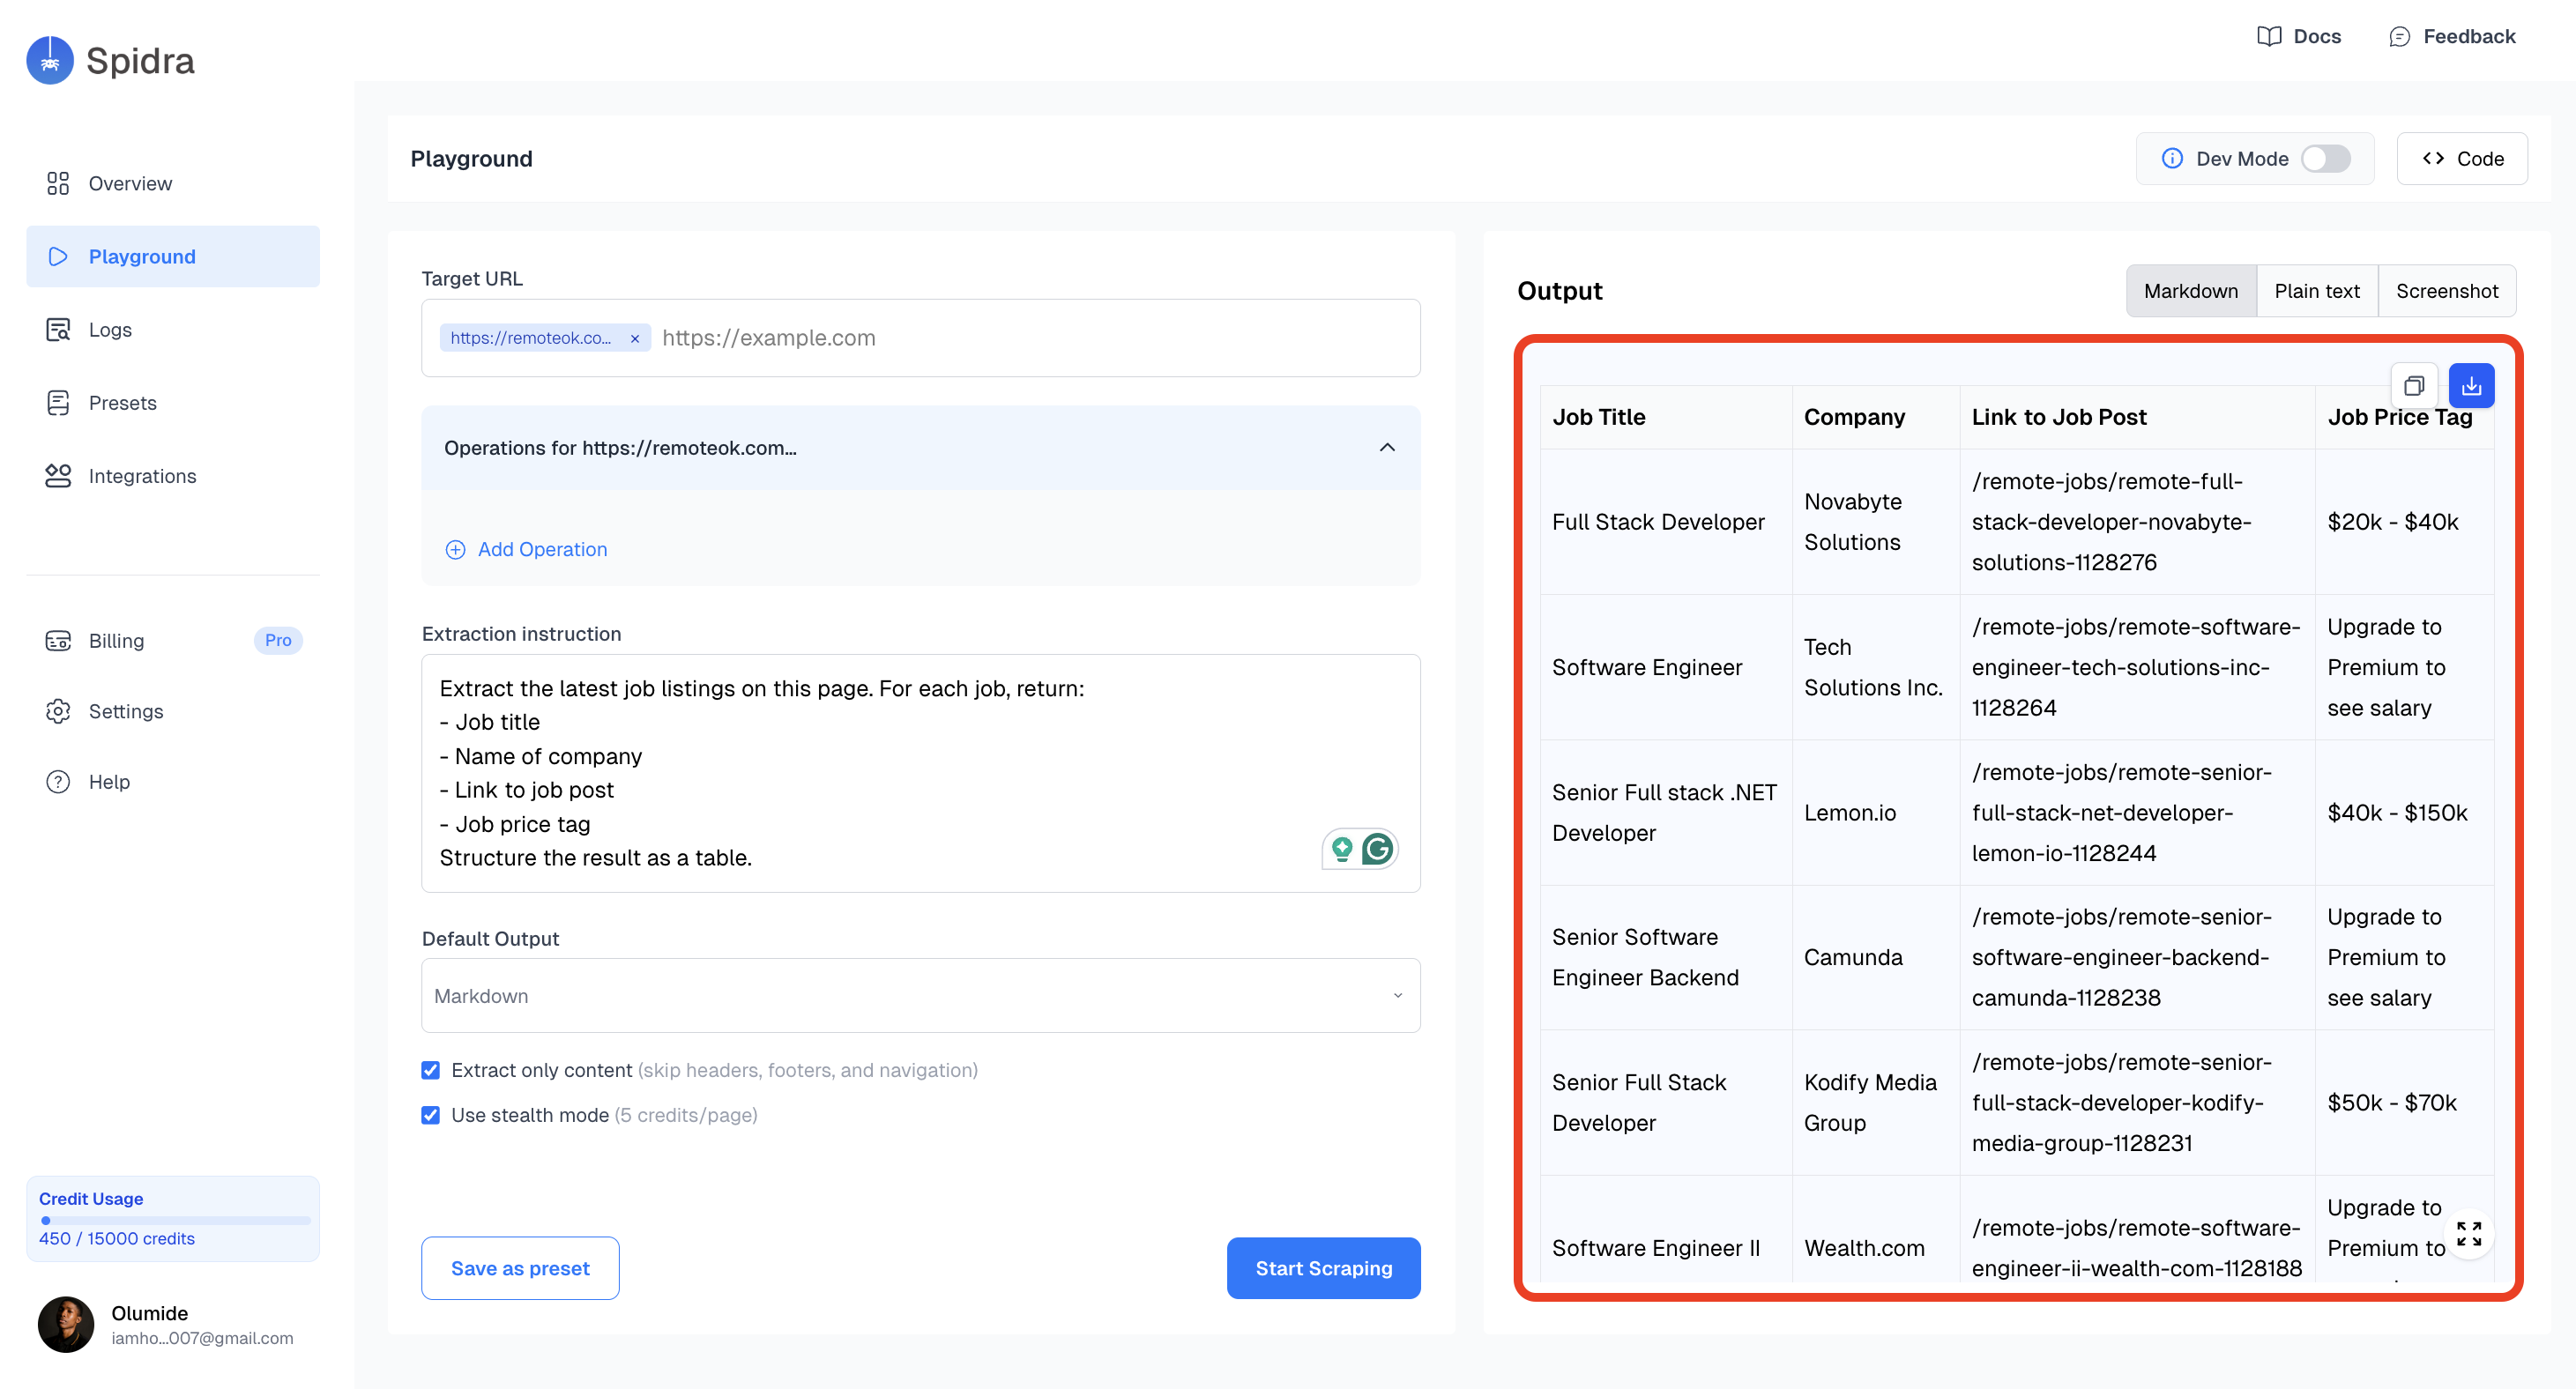
Hit Start Scraping. Spidra opens the page in a real browser, runs your prompt through the AI, and returns the extracted results on the right side of the screen.
Click Save as Preset and give it a name. A preset stores your URL, prompt, and all settings so you can rerun it with one click, put it on a schedule, or connect it to Slack, Discord, or a webhook.This is how recurring workflows are built in Spidra: preset, then integration, then schedule. Set it up once and the data flows automatically.
Browser actions
Click, scroll, and type before extracting. Works on any dynamic page.
Structured output
Guarantee exact field names and types with a JSON schema.
Integrations
Deliver data to Slack, Airtable, or webhooks automatically.
Pick the language your project uses. They all wrap the same API. If you’d rather go direct with curl or HTTP, skip this step — there’s nothing to install.
Spidra jobs are async. The run() method handles polling for you and returns when the job completes. If you need more control, use submit() to queue the job and get() to check status yourself.
# 1. Submit the jobcurl -X POST https://api.spidra.io/api/scrape \ -H "Authorization: Bearer $SPIDRA_API_KEY" \ -H "Content-Type: application/json" \ -d '{ "urls": [{"url": "https://remoteok.com/remote-react-jobs"}], "prompt": "Extract all job listings. For each one return the title, company, and salary if shown.", "output": "json" }'# Response: {"jobId": "abc123", "status": "queued"}# 2. Poll until completedcurl https://api.spidra.io/api/scrape/abc123 \ -H "Authorization: Bearer $SPIDRA_API_KEY"
The basic scrape reads a single page. forEach is what you use when you need to click into each item and pull detail from the destination page. This is where most scrapers fall short — Spidra handles it natively.
curl -X POST https://api.spidra.io/api/scrape \
  -H "Authorization: Bearer $SPIDRA_API_KEY" \
  -H "Content-Type: application/json" \
  -d '{
    "urls": [
      {
        "url": "https://remoteok.com/remote-react-jobs",
        "actions": [
          {
            "type": "forEach",
            "observe": "Find all job listing rows on the page",
            "mode": "navigate",
            "maxItems": 10,
            "waitAfterClick": 1000,
            "itemPrompt": "Extract the full job description, required skills, and salary range. Return as JSON."
          }
        ]
      }
    ],
    "prompt": "Return a clean JSON array of all jobs with their full details.",
    "output": "json"
  }'
Each matched element gets its own AI extraction pass. The results come back as a structured array. Read the full browser actions guide to see what else is possible.
Browser actions
The full forEach reference, plus click, scroll, type, and pagination.
Structured output
Use a JSON schema to enforce exact field names and types on every response.
Batch scraping
Submit up to 50 URLs in one request and process them all in parallel.
API reference
Every endpoint with request and response examples if you’re going direct.