- Webhook – Ideal for sending simple, plain text messages and it is quick to set up.
- Bot Token – Suitable for advanced workflows and sending file attachments.
Let’s explore the setup for both methods.
Step 1: Access the Integrations Page
Navigate to the Integrations tab on your dashboard and click on the Add Integration button.
Step 2: Select Slack as Integration Type
From the preset dropdown, select the saved preset you’d like to connect to Slack. Choose Slack as your integration type. Click Next to proceed.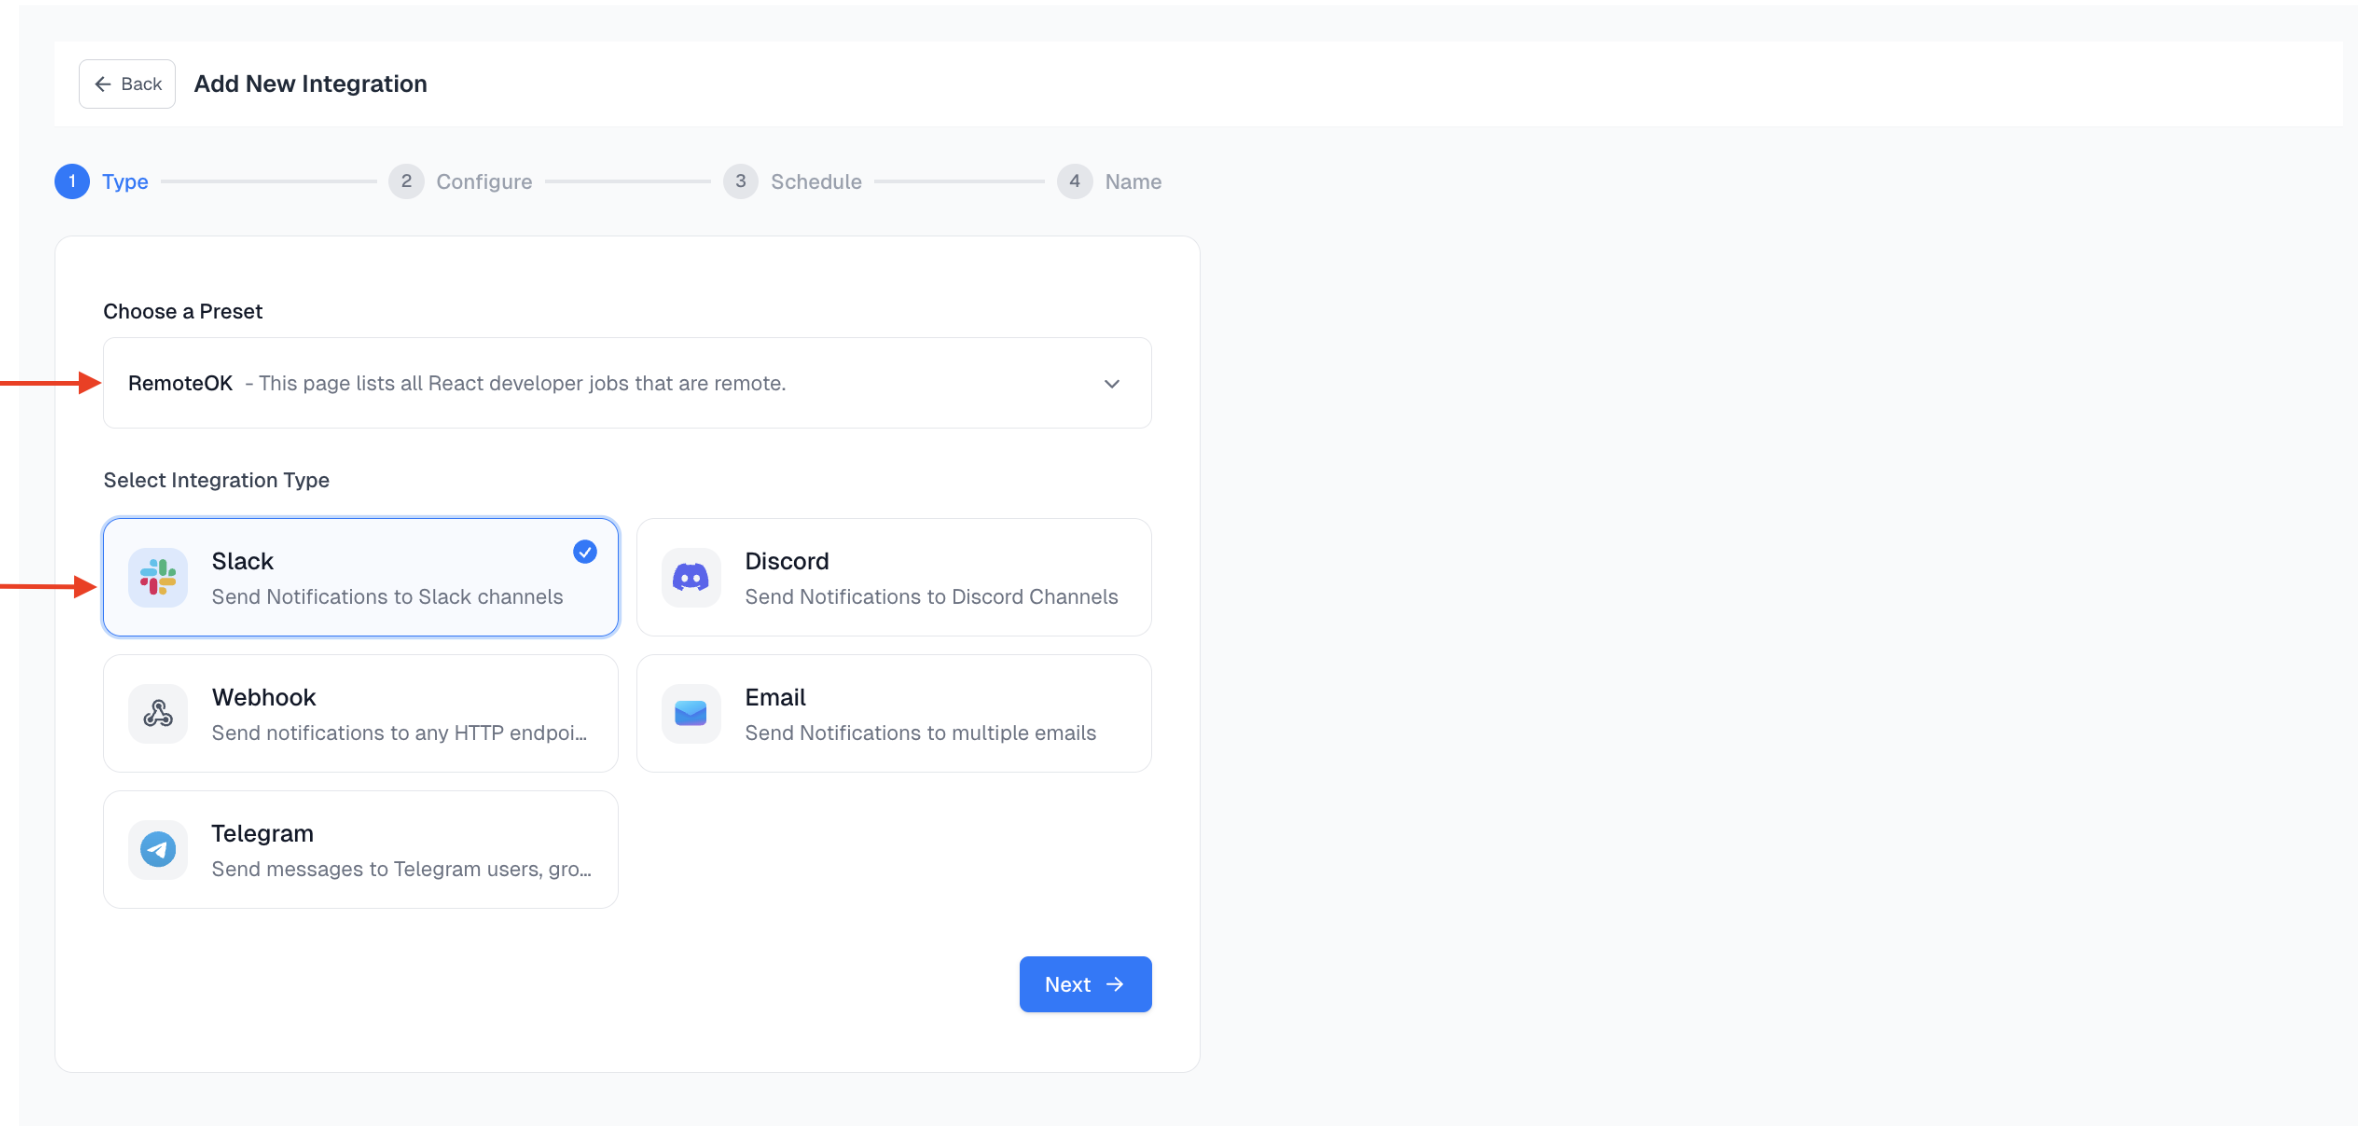
Step 3: Configure Your Slack Integration
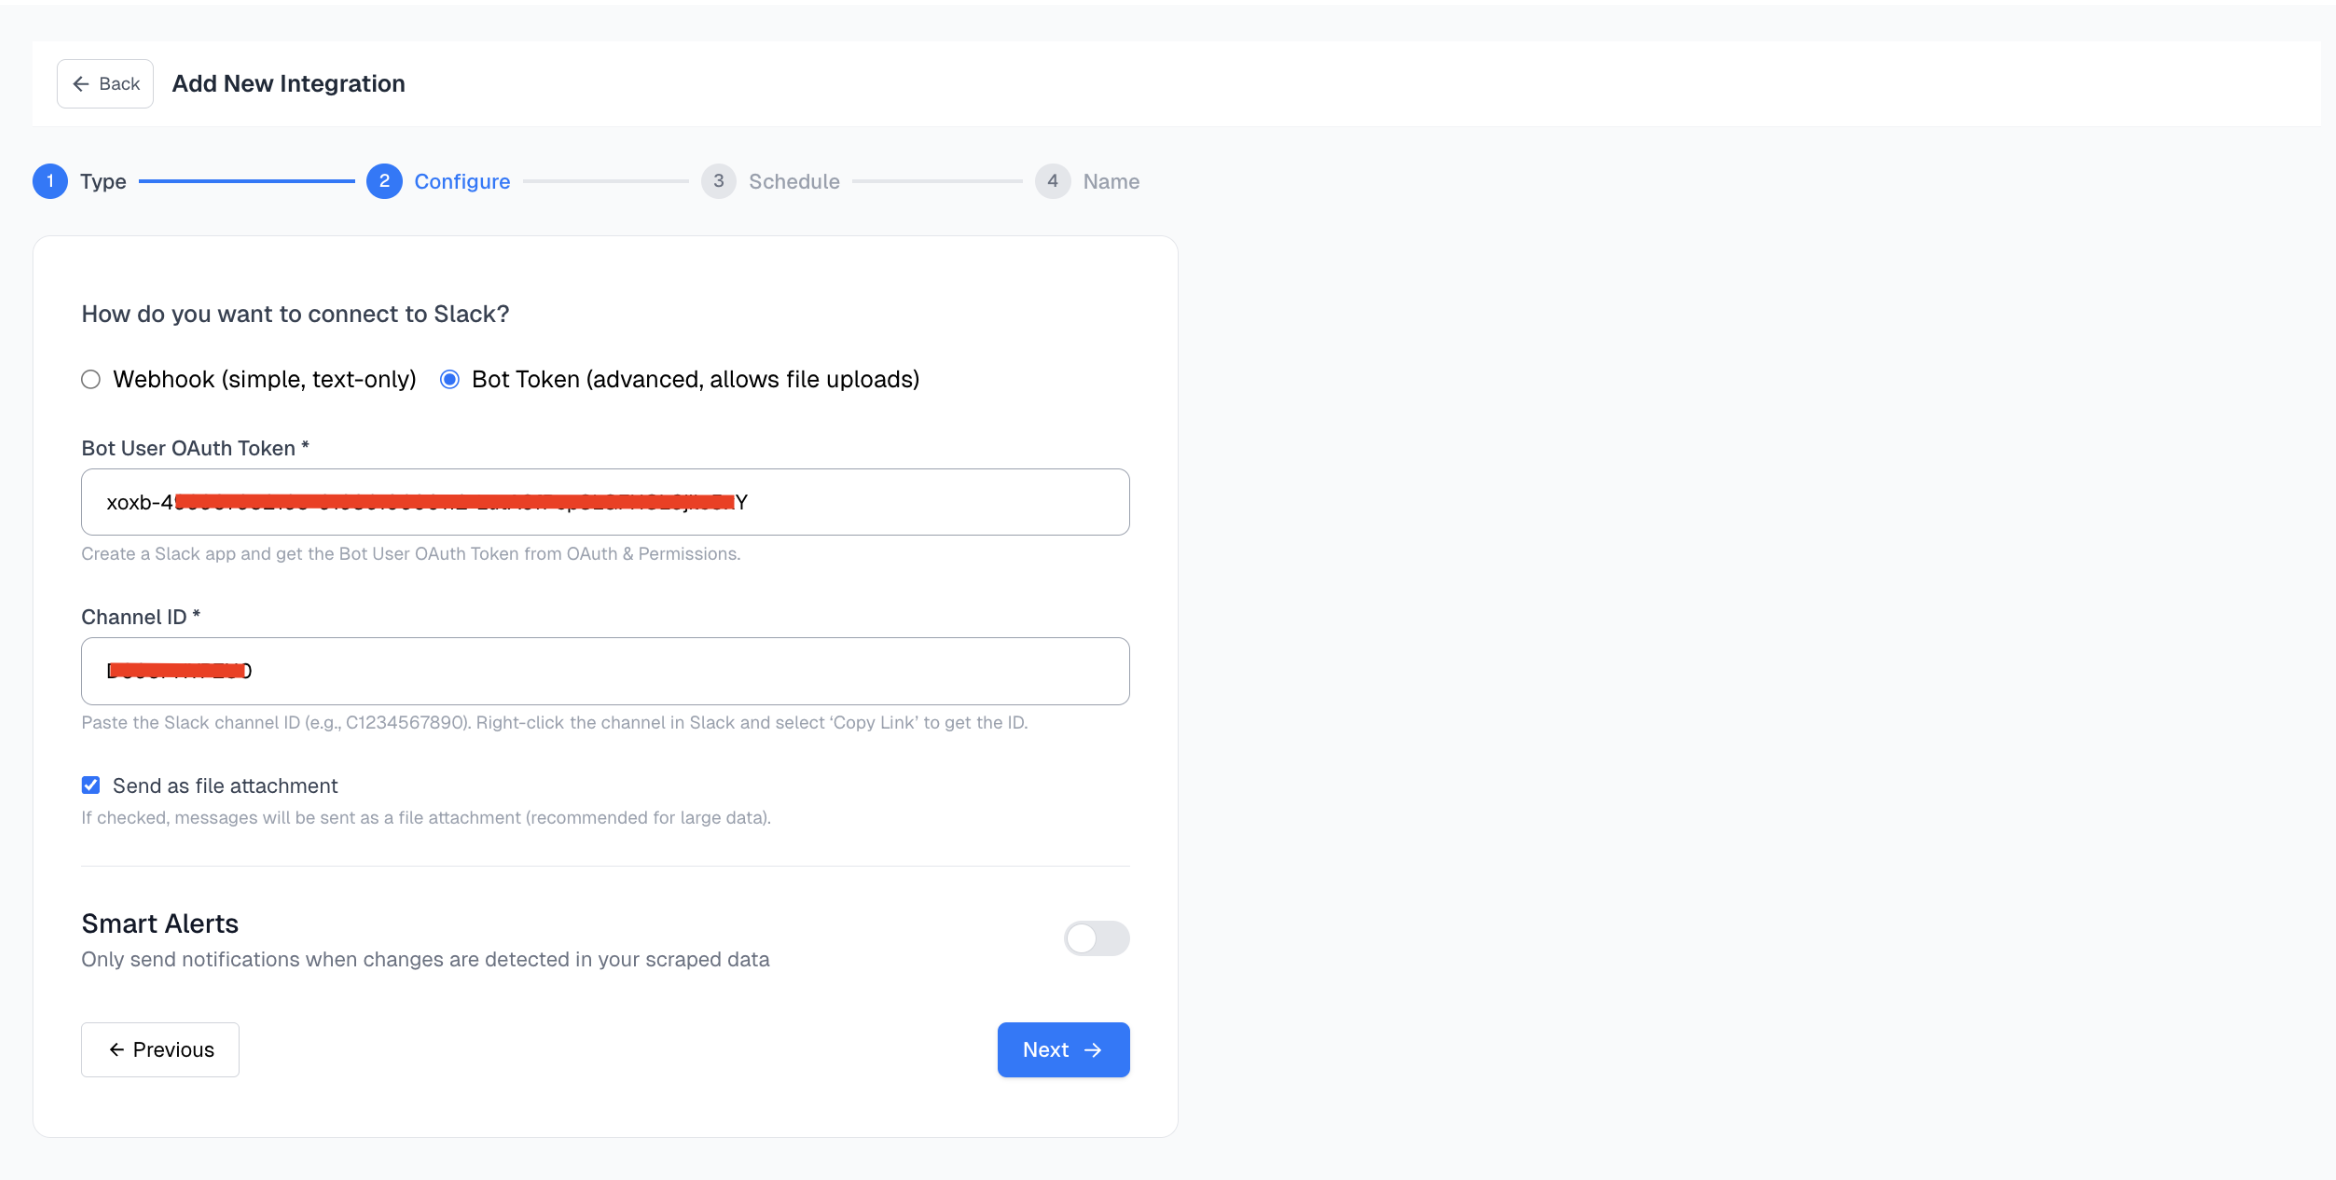
Spidra supports two ways to connect with Slack. We’ll start with the Slack Wehbook:Method 1: Using a Slack Webhook (Simple, Text-Only)
This method is perfect for quickly getting text-based scrape results delivered to a specific channel, it dooesn’t support file attachment.Steps to Get Your Slack Webhook URL
- Go to the Slack Incoming Webhooks page.
- Click “Create your Slack app” (if you don’t already have one).

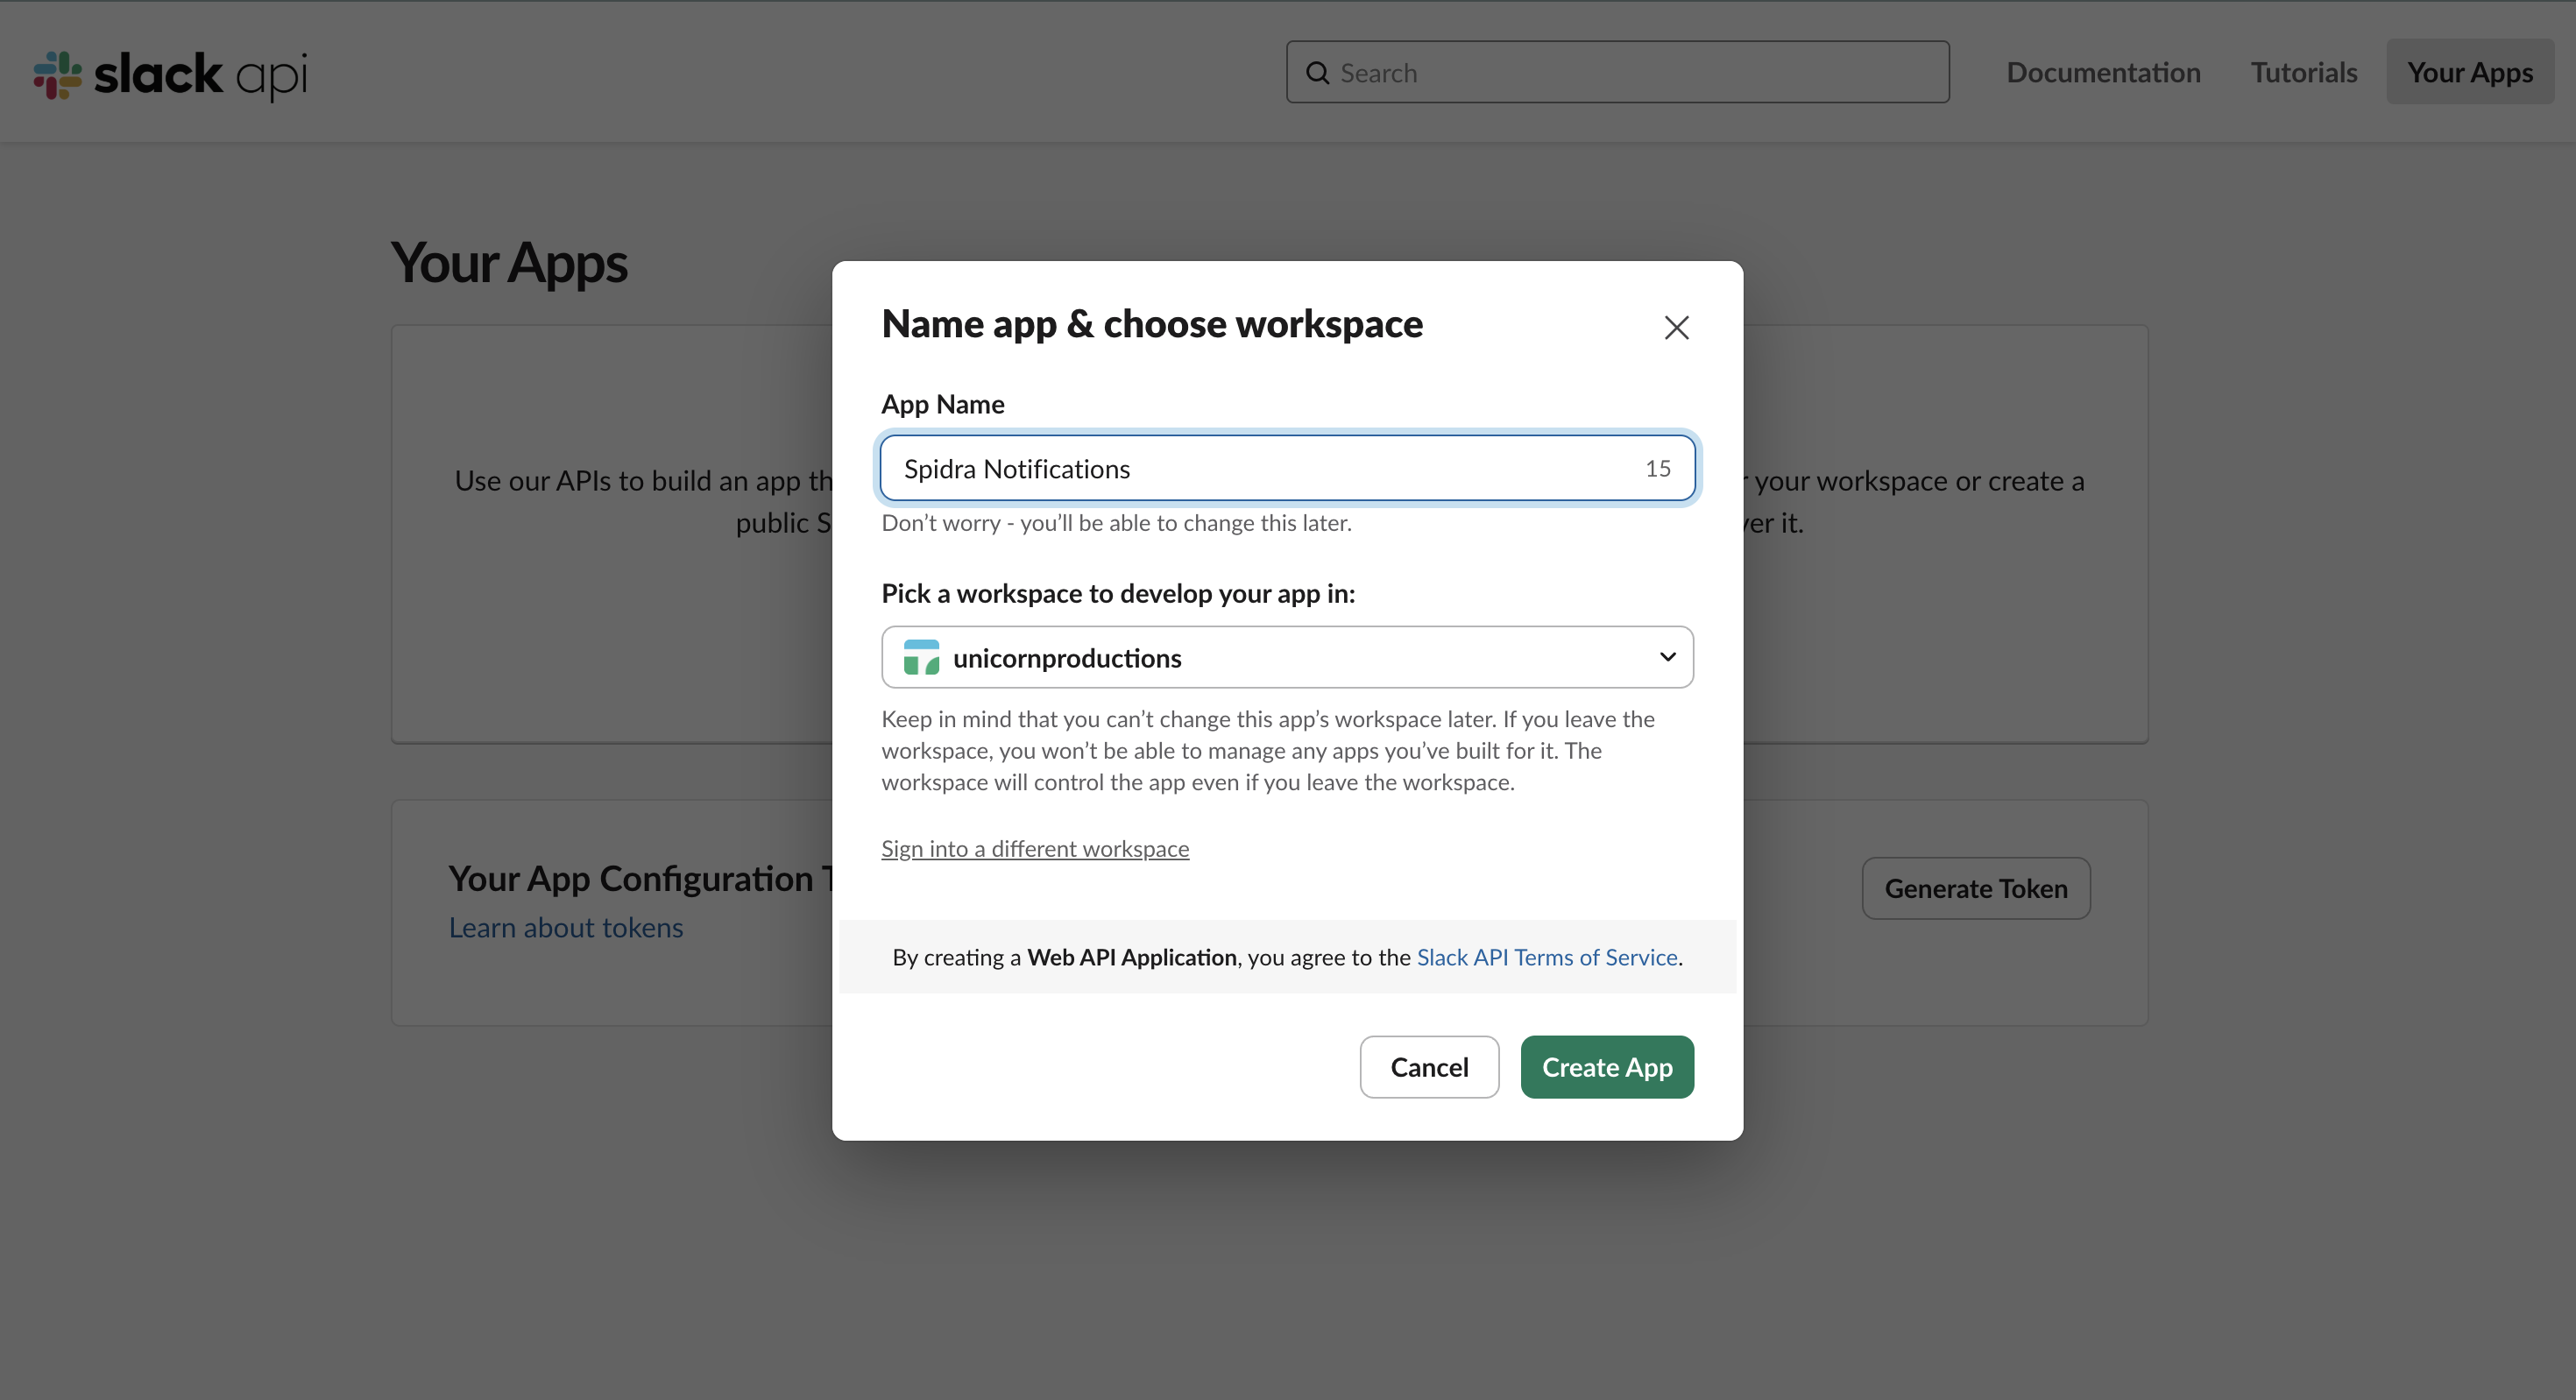
- Create your Slack App:
- Name it something like
"Spidra Notifications". - Choose the Slack workspace where you want to install it.
- Click Create App.
- Name it something like
- Enable Incoming Webhooks:
- In the app dashboard, navigate to Features → Incoming Webhooks.
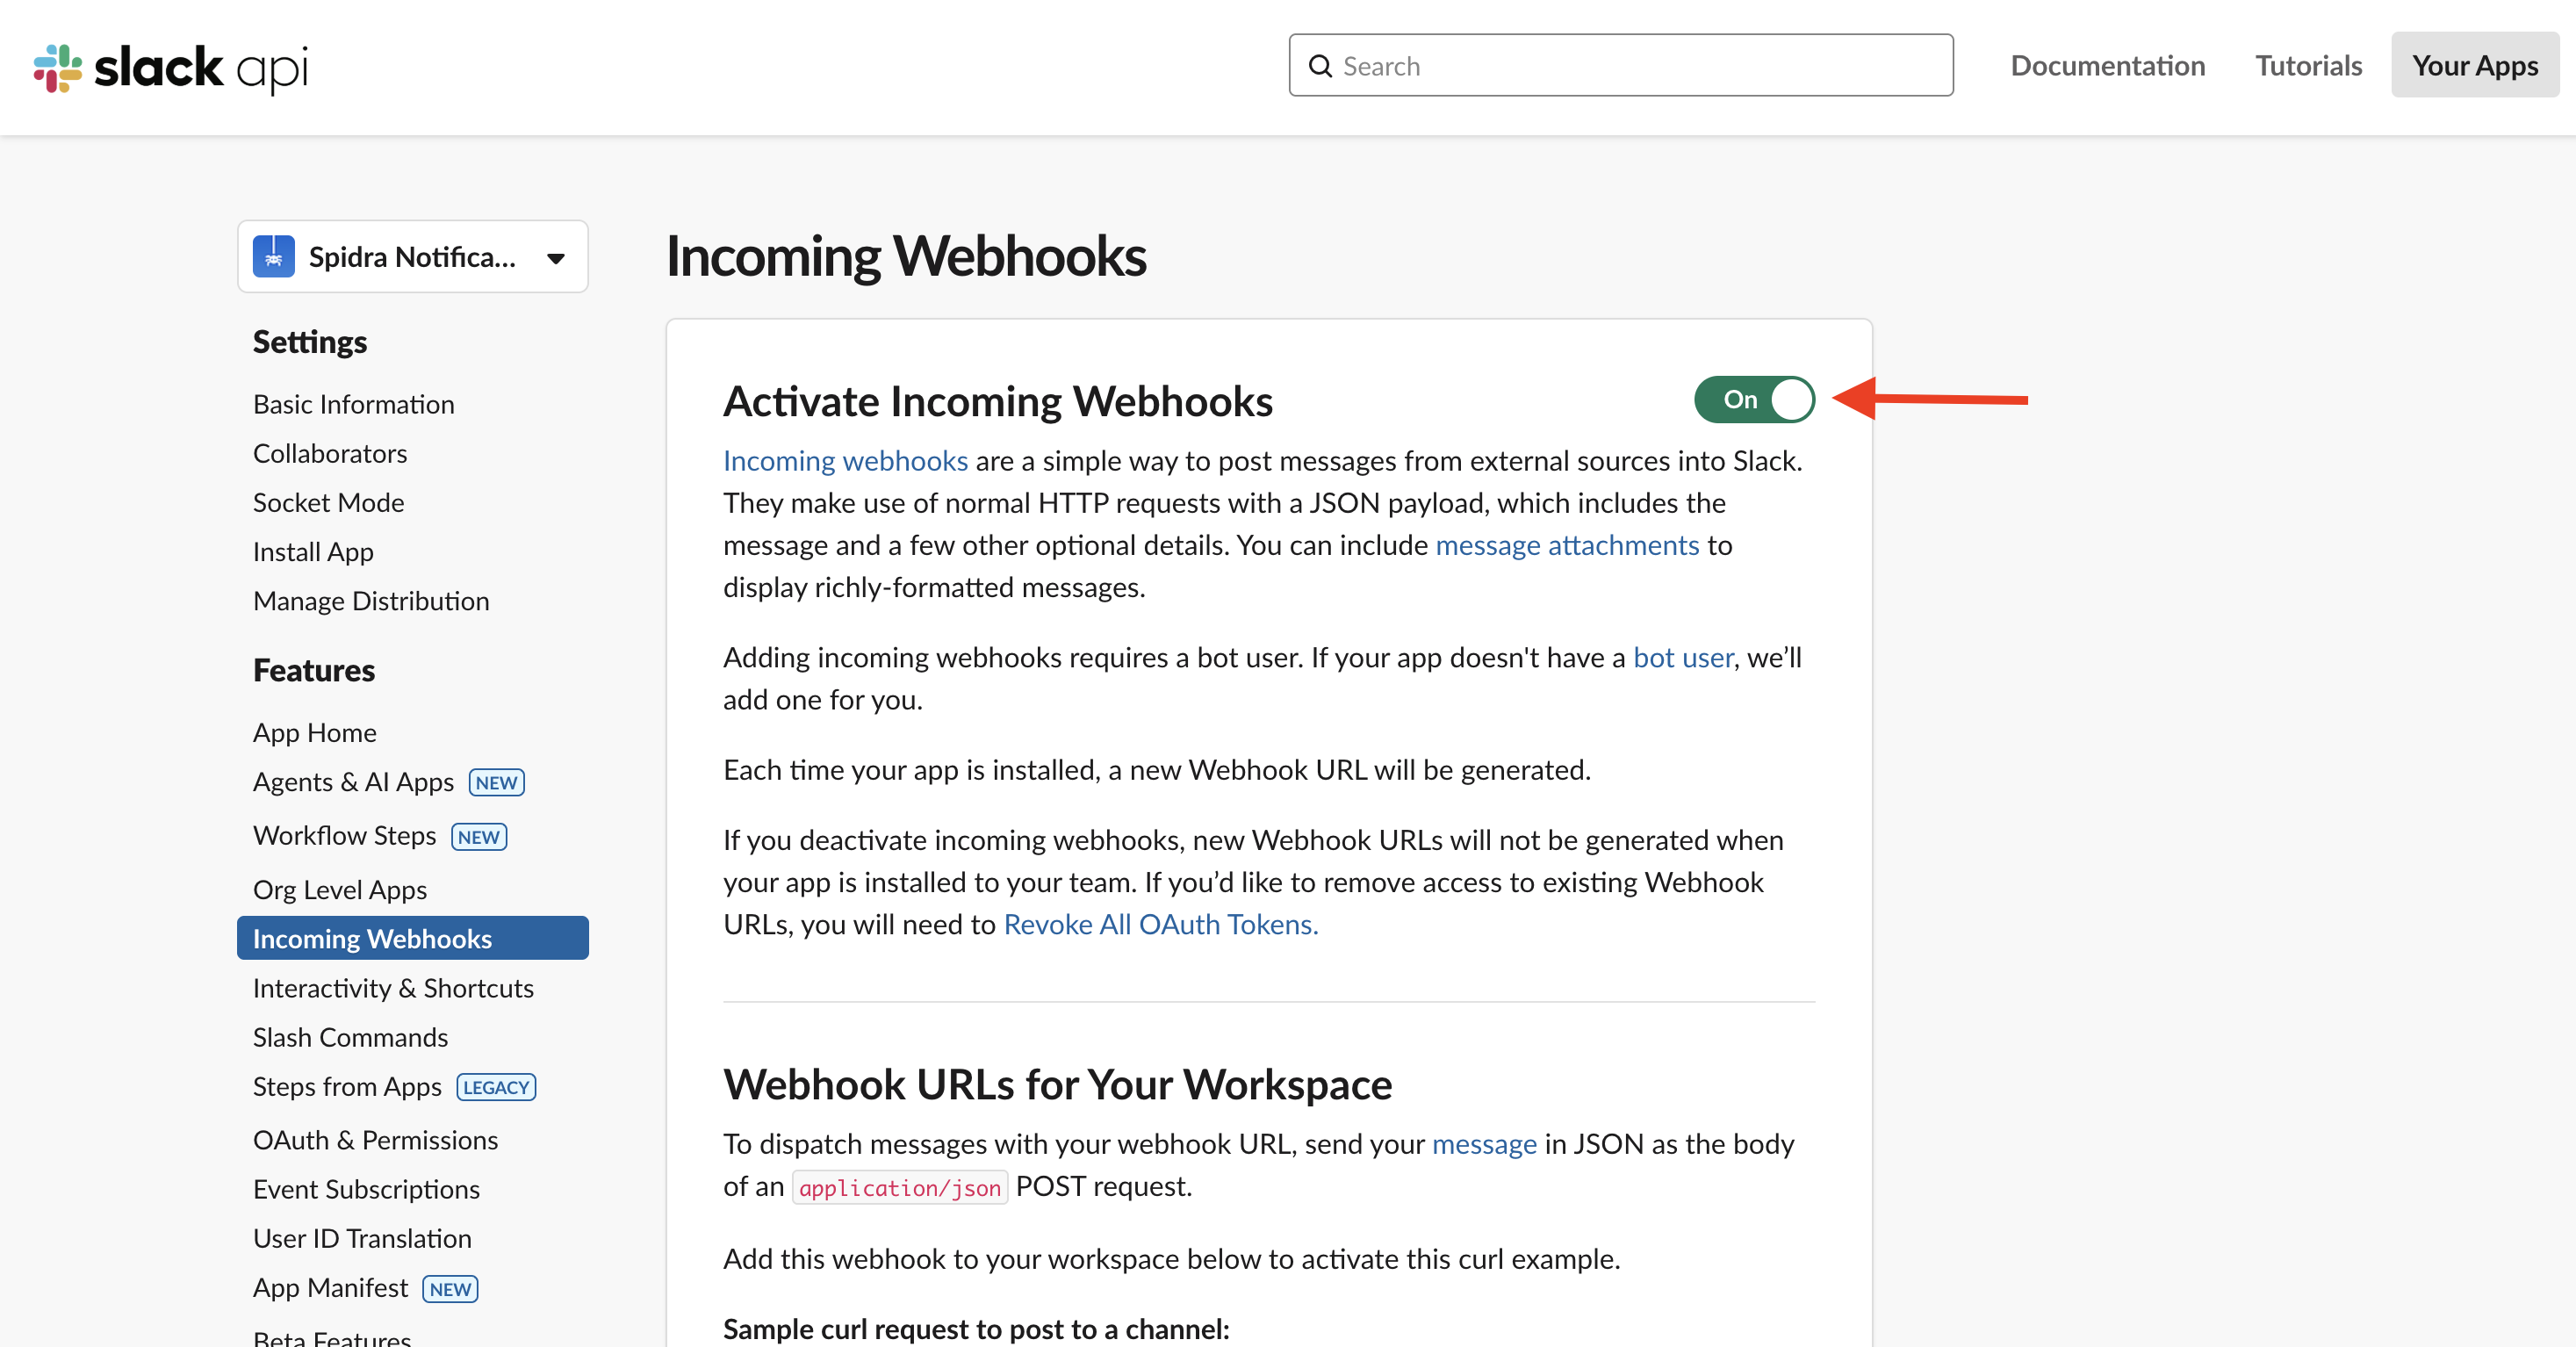
- Toggle the switch to activate webhooks.
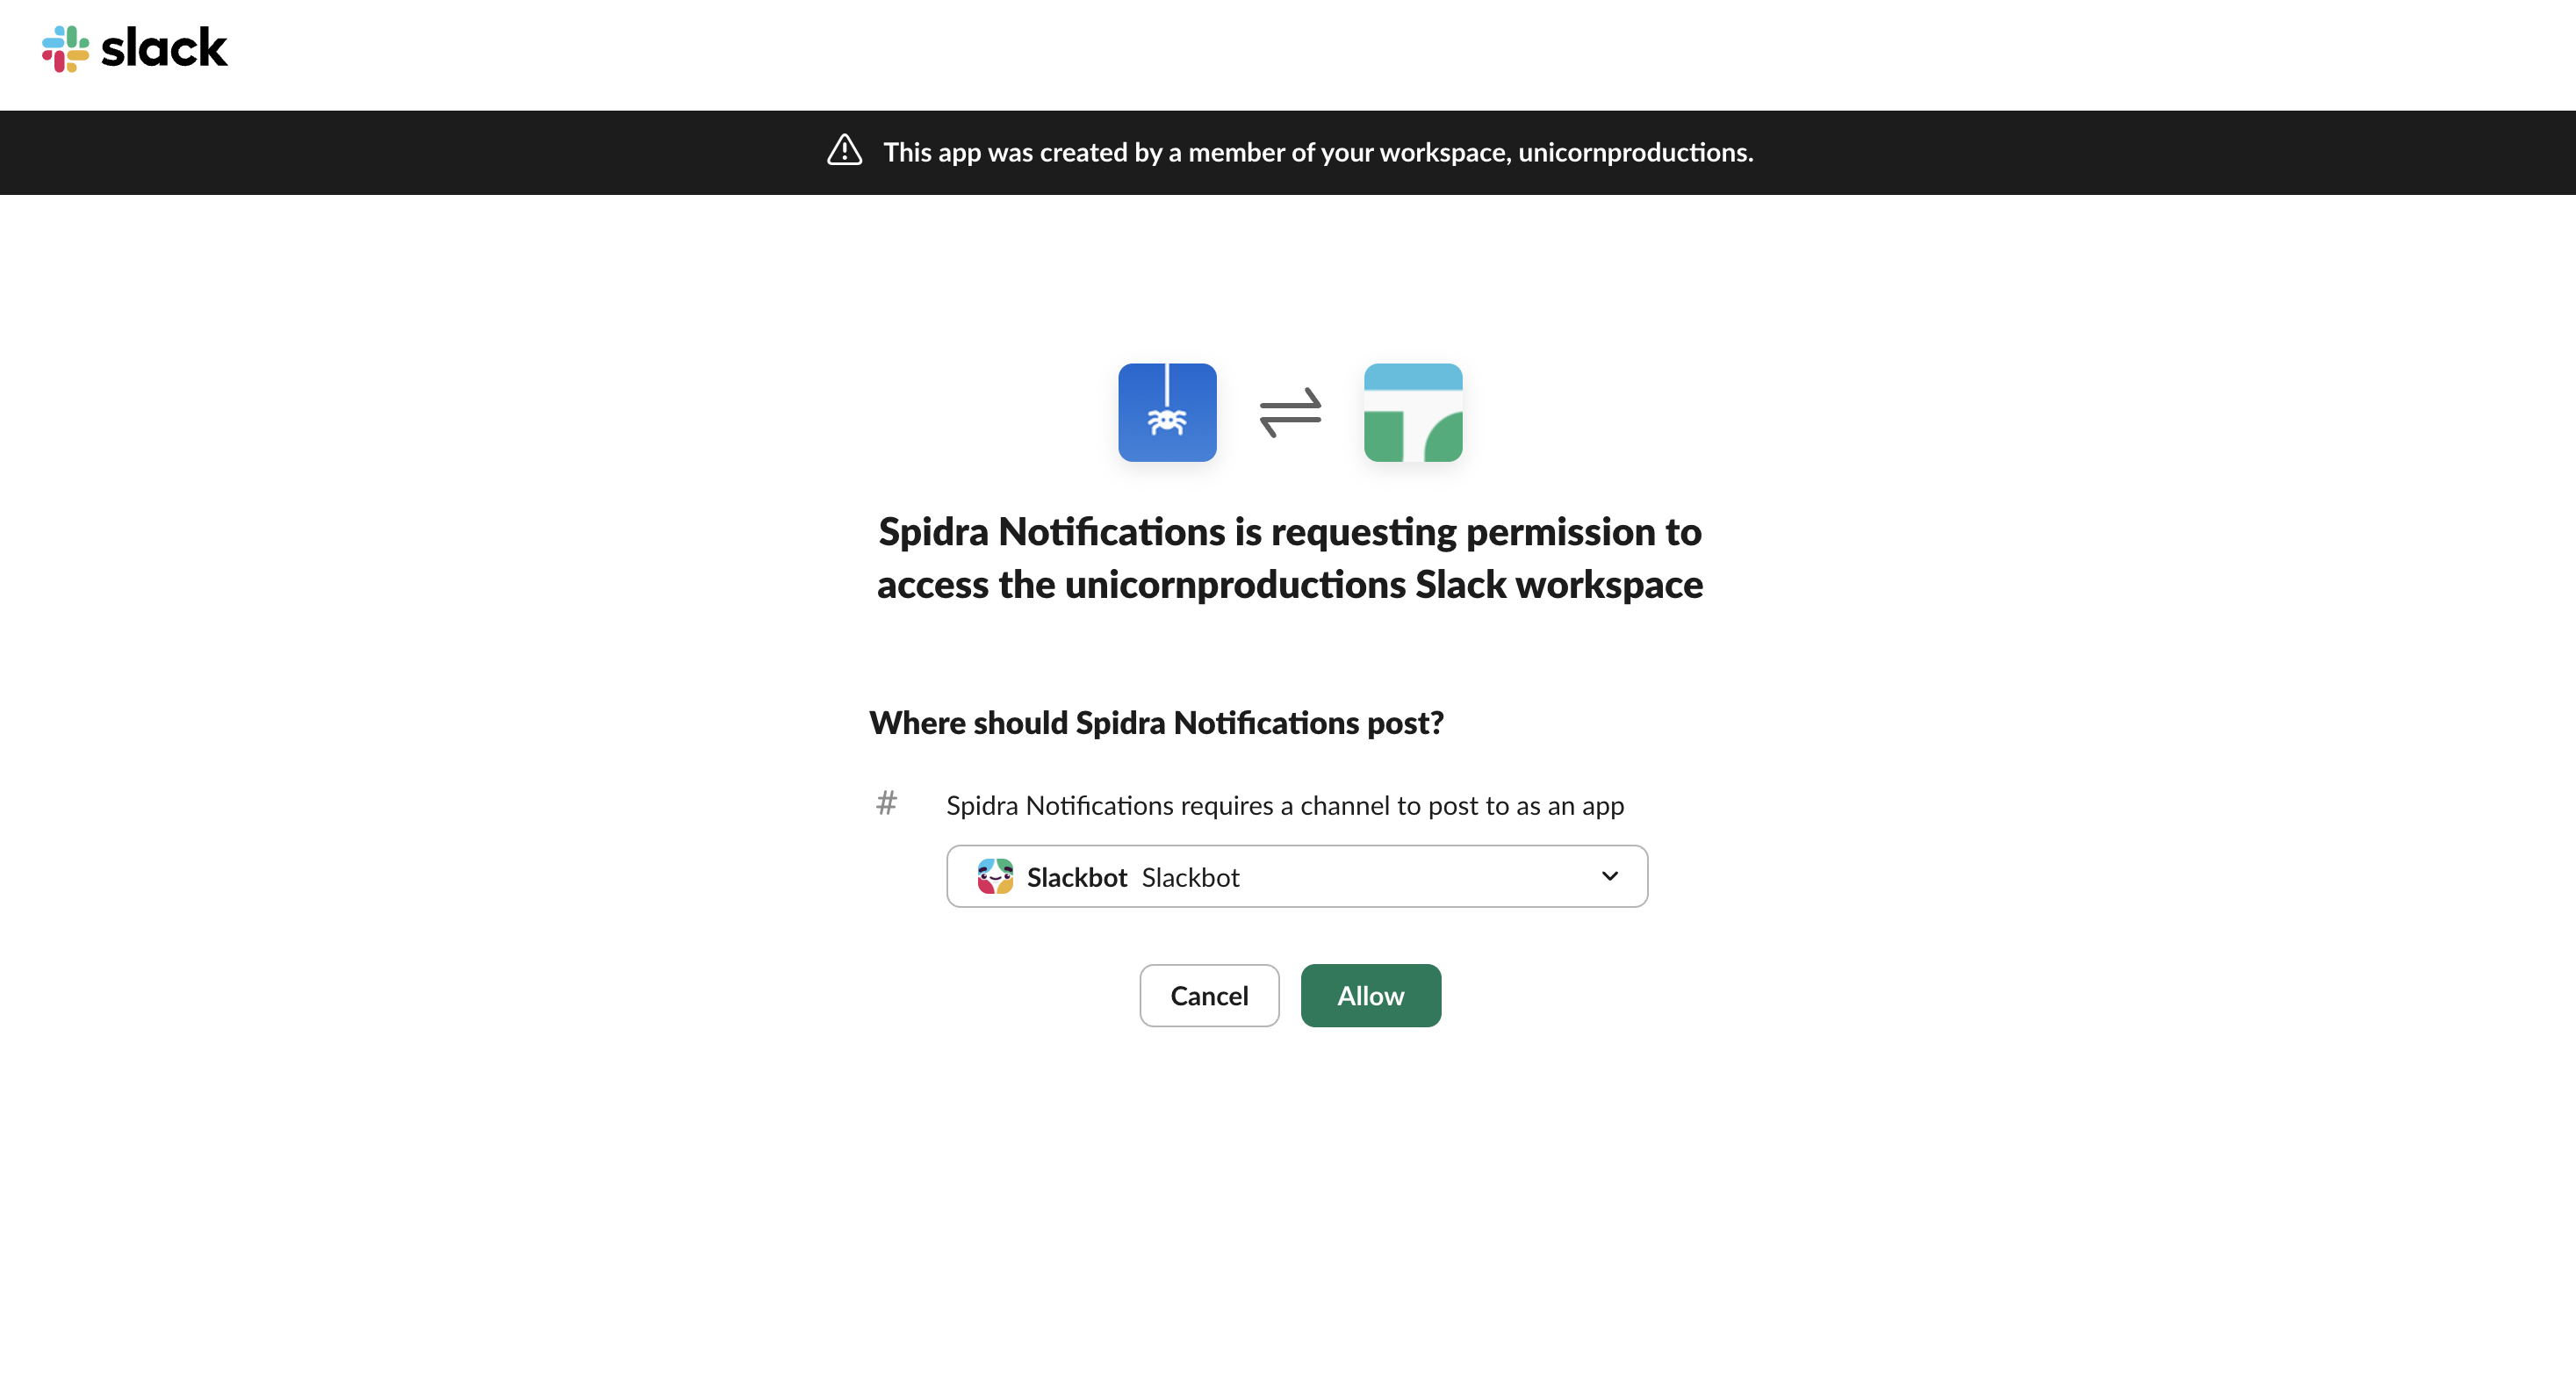
- Add the Webhook to a Channel:
- Scroll down and click “Add New Webhook.”
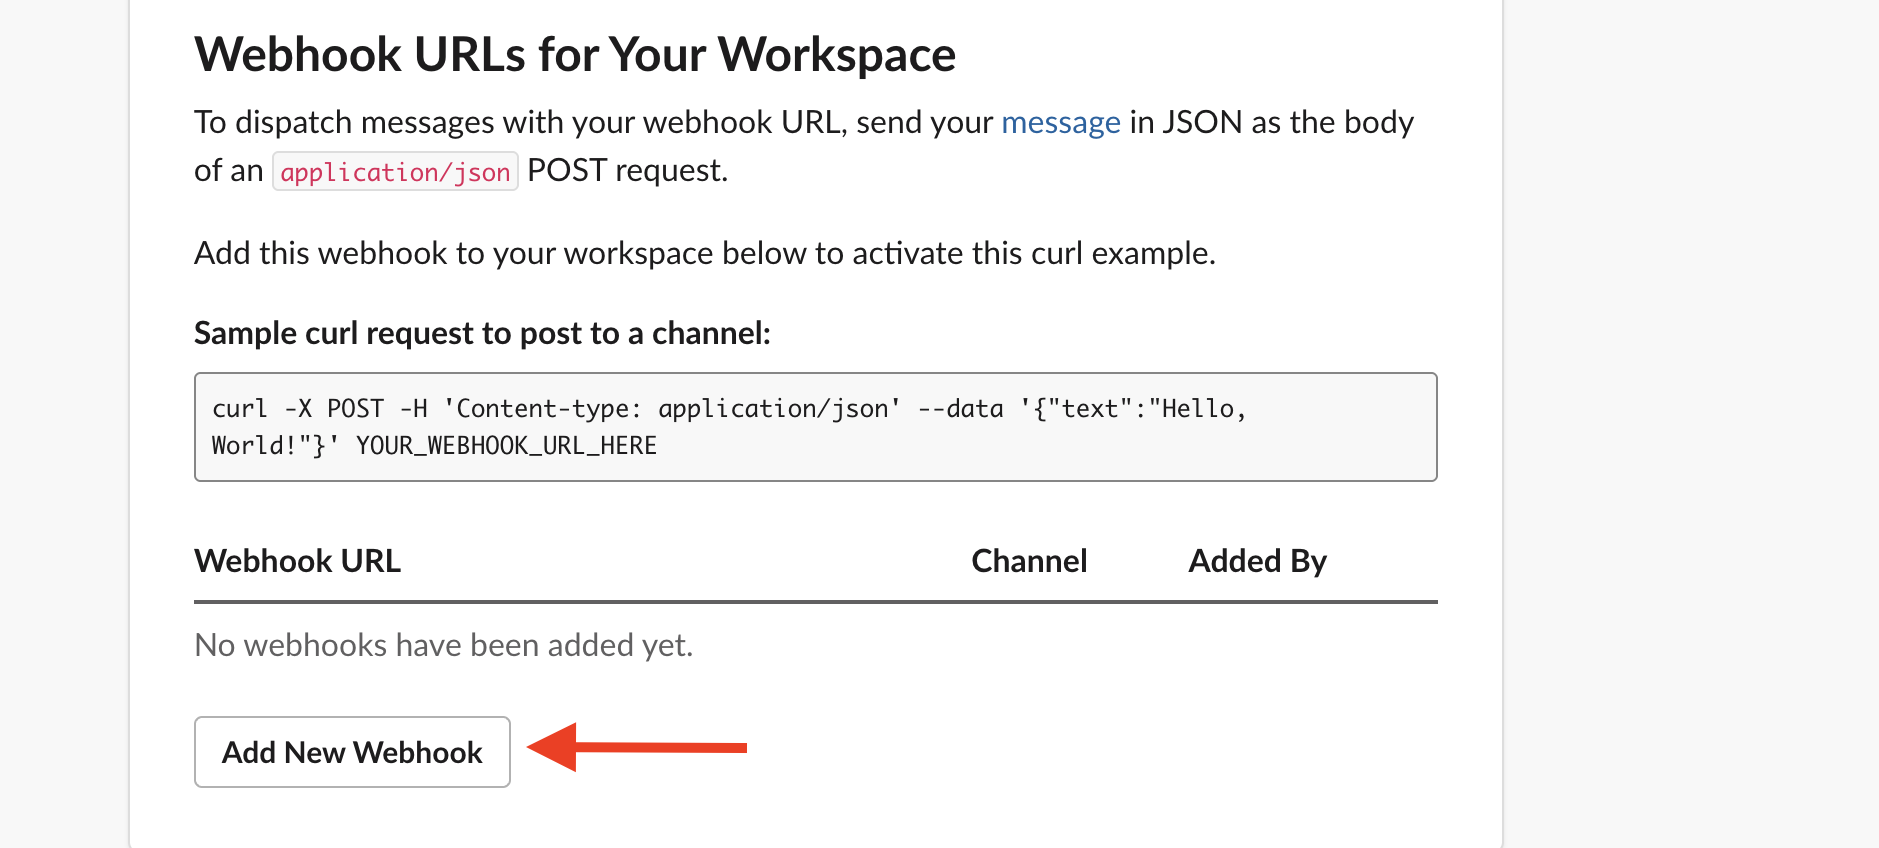
- Select the channel you want messages sent to.
- Click Allow to grant access.
- Copy Your Webhook URL:
-
You’ll be provided a URL like:
- Paste this URL into the Webhook URL field in Spidra’s Slack integration form.
-
You’ll be provided a URL like:
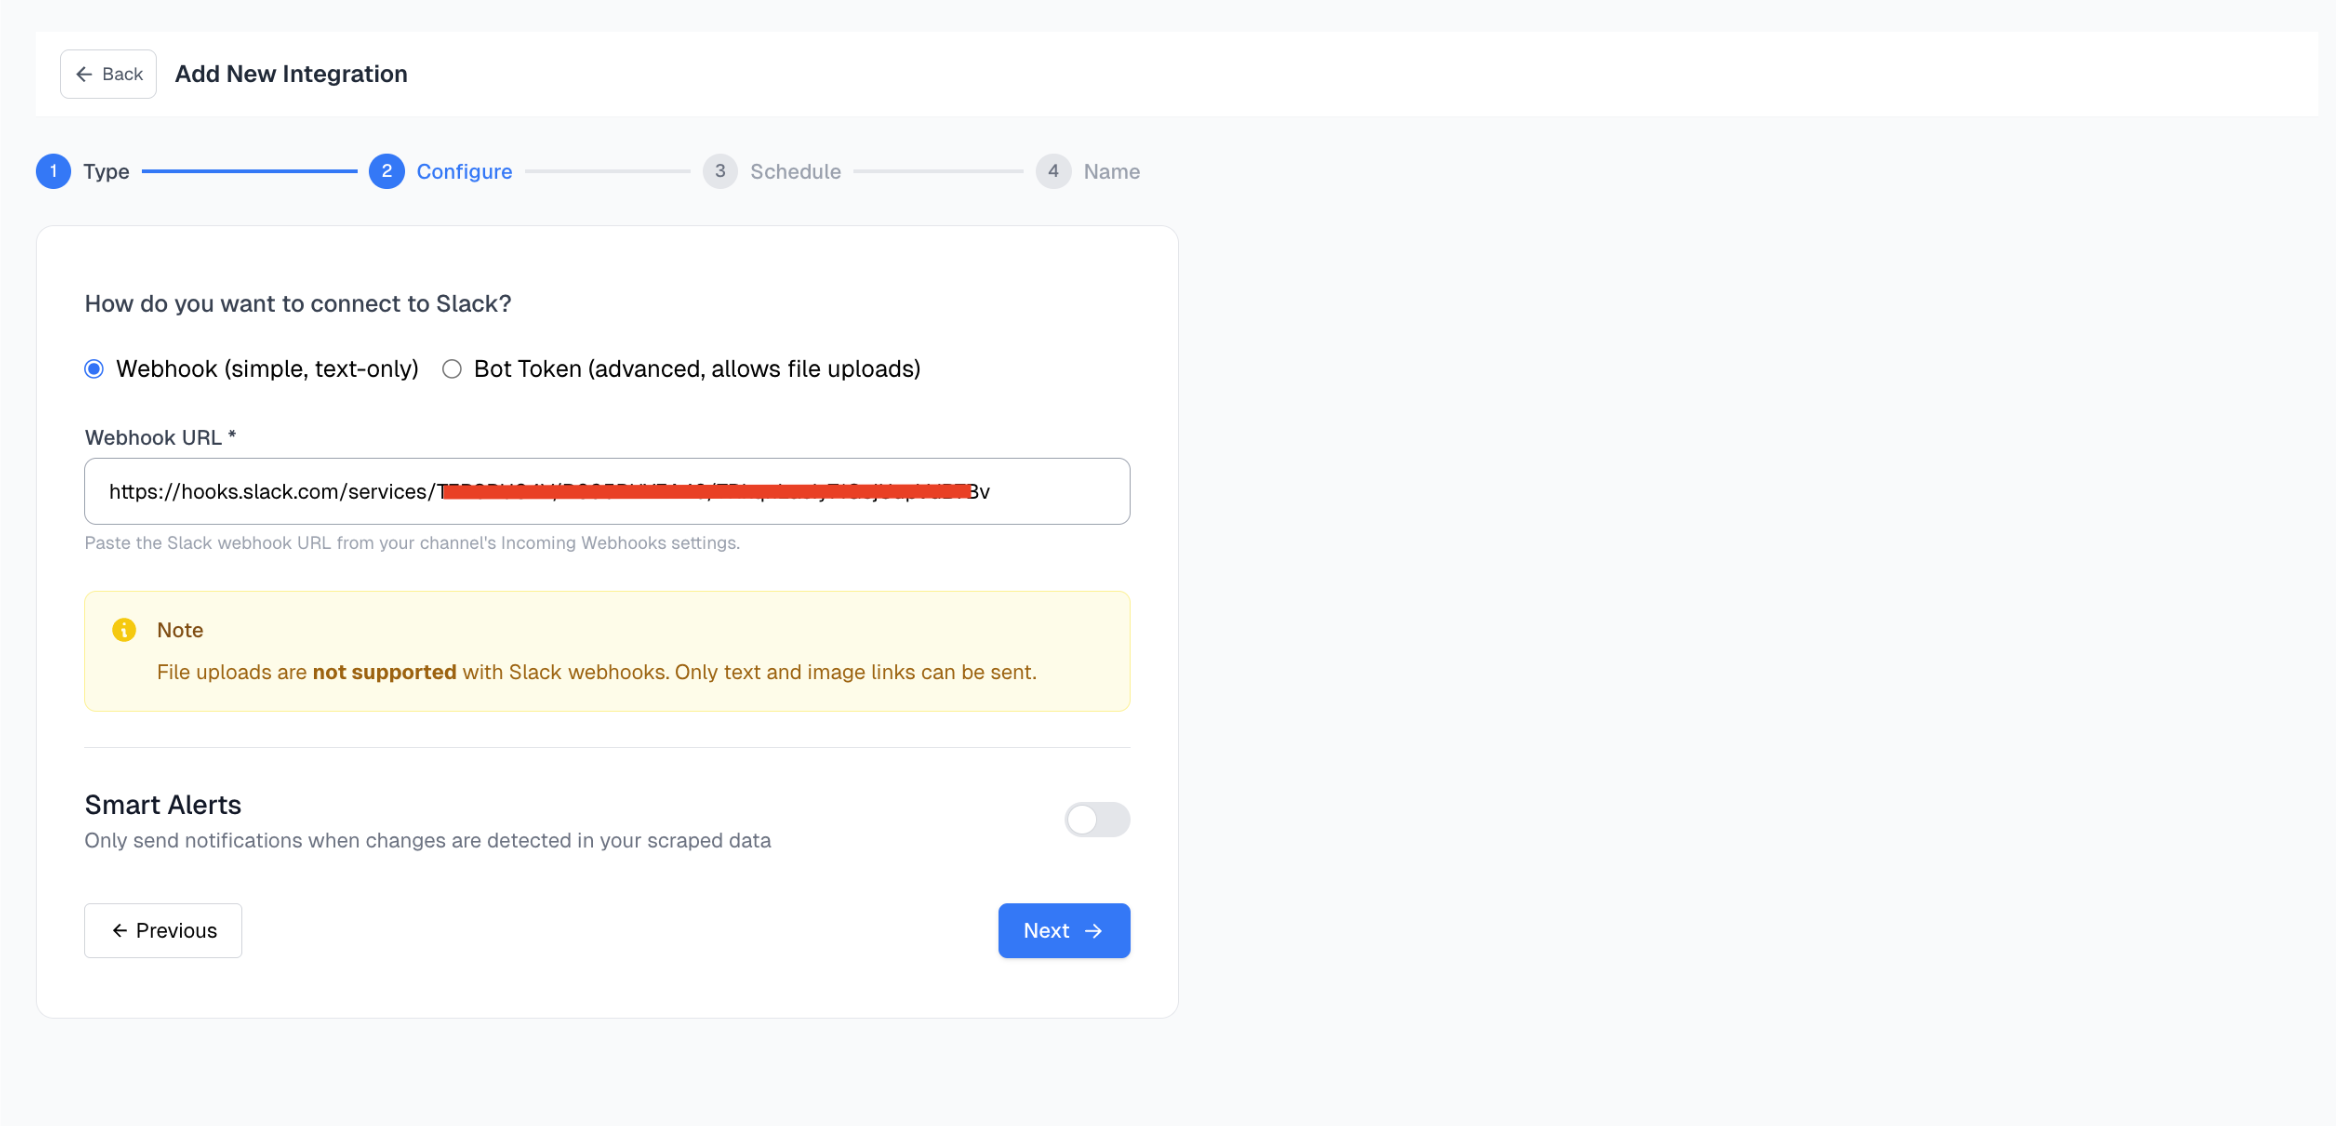
Note: This method supports only plain text — for file attachments, use the Bot Token method.
Method 2: Using a Slack Bot Token (Advanced, File Uploads)
If you need to send rich messages or file attachments (e.g., large data exports), we recommend using a Slack Bot Token integration. Since you’ve already created the Spidra Notifications Slack app, follow these steps to enable bot functionality.Steps to Enable Bot Token in Your Existing Slack App
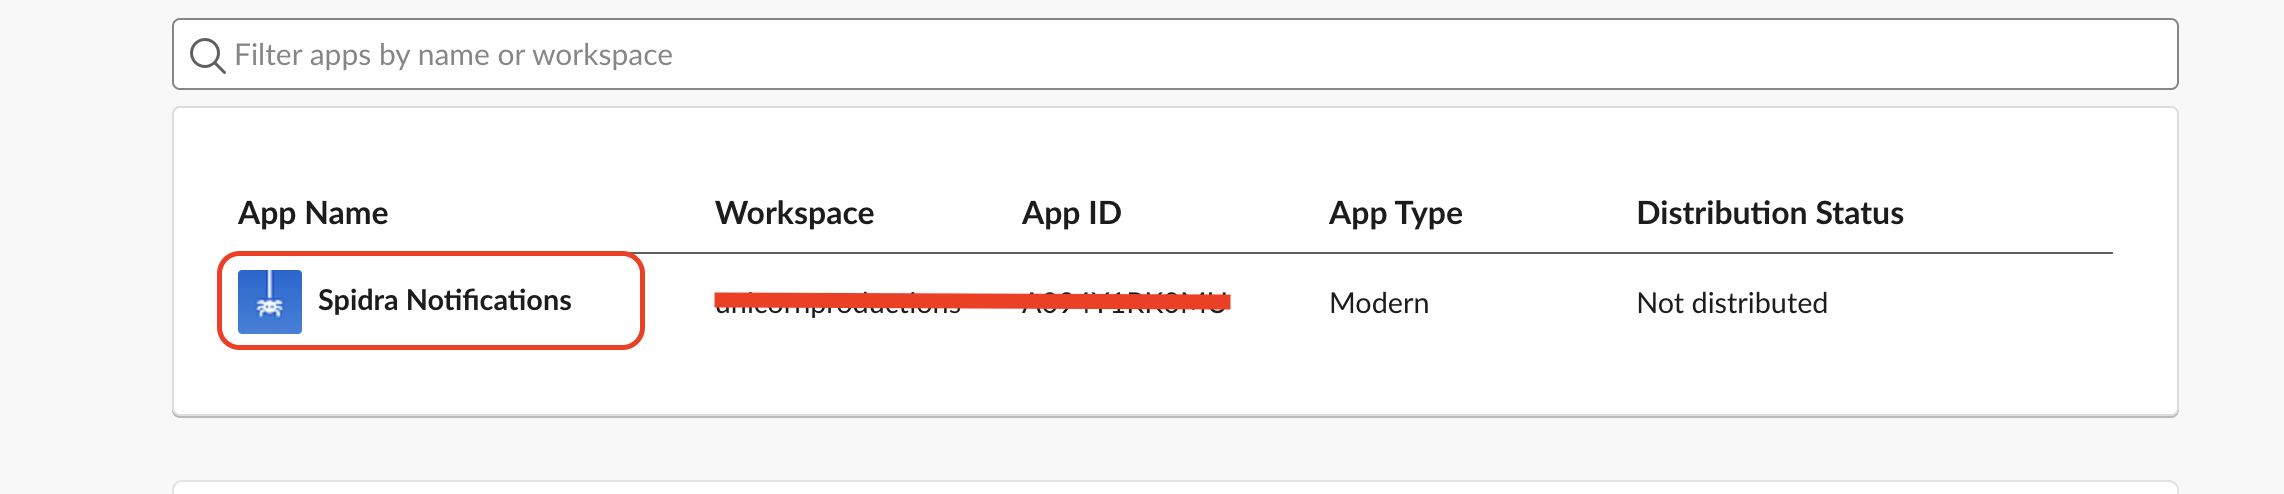
- Go to Your App Settings: Visit api.slack.com/apps and click on your app: Spidra Notifications.
- Navigate to OAuth & Permissions: In the left sidebar, click OAuth & Permissions.
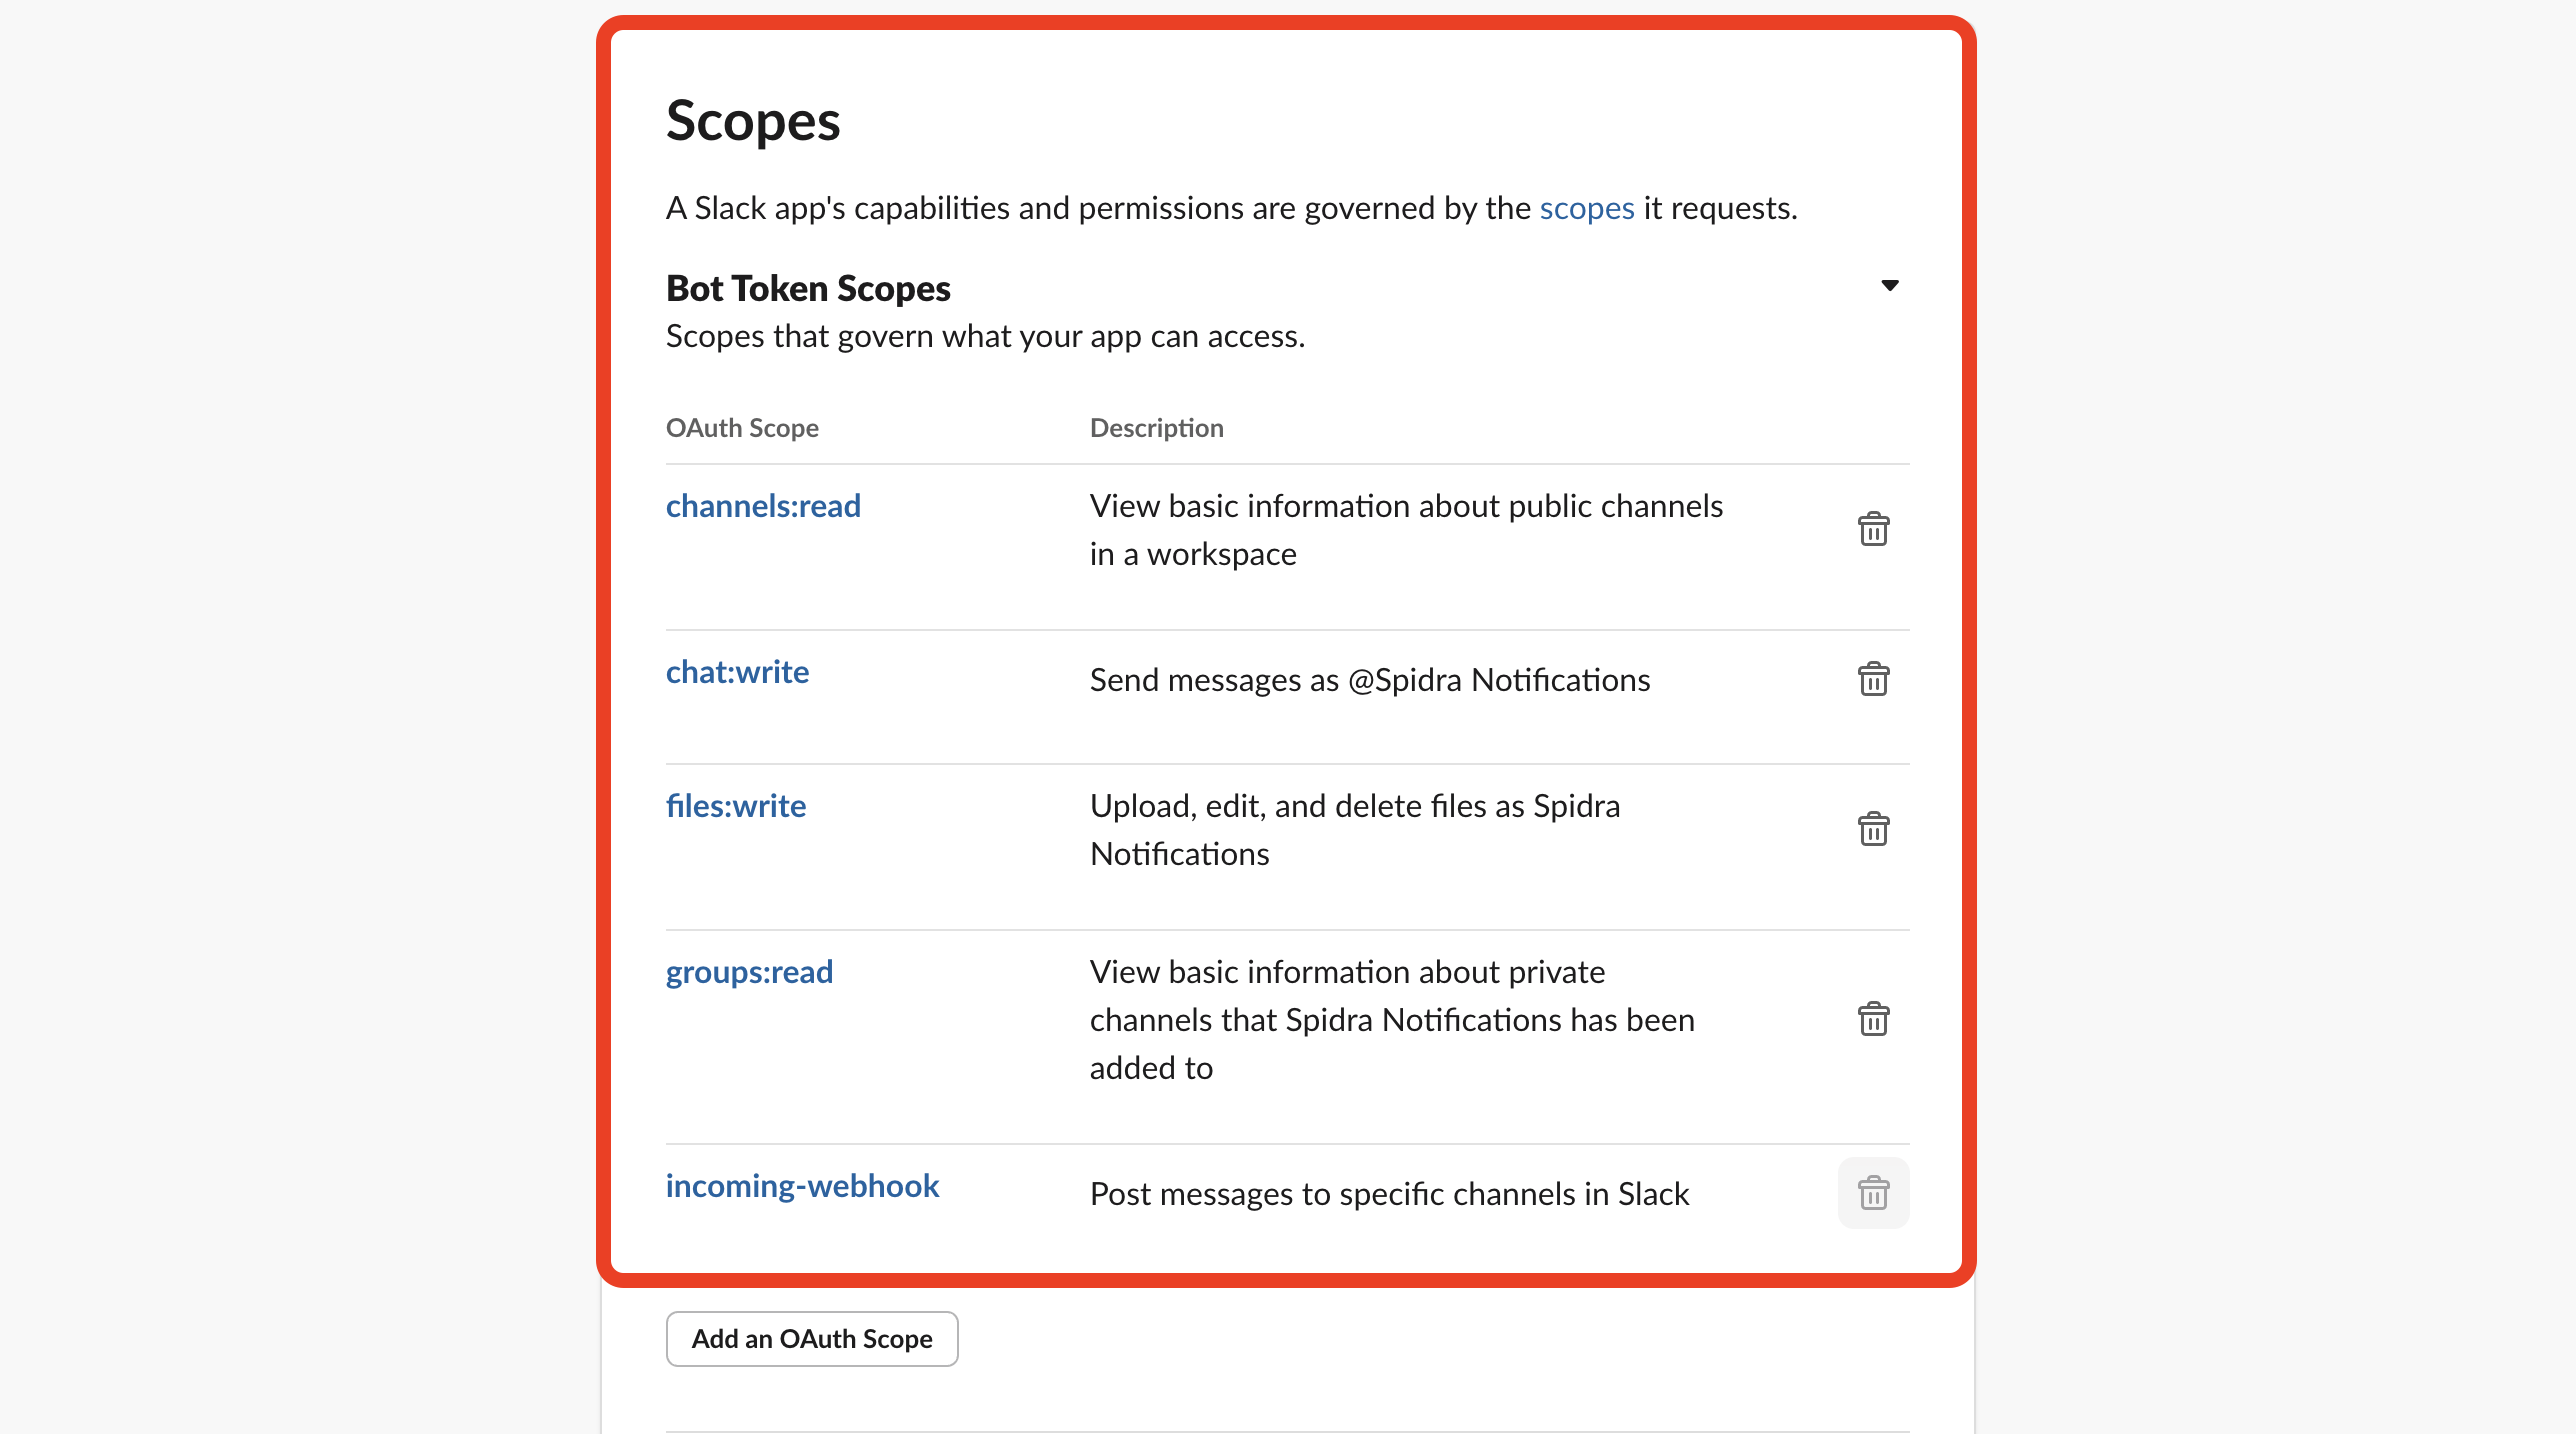
- Set Scopes for Your Bot Token: Scroll to Bot Token Scopes and click Add an OAuth Scope. Add the following permissions:
-
chat:write→ to send messages as the bot. -
files:write→ to upload and send files. -
channels:read→ to access public channels. -
groups:read→ to access private channels (if needed).
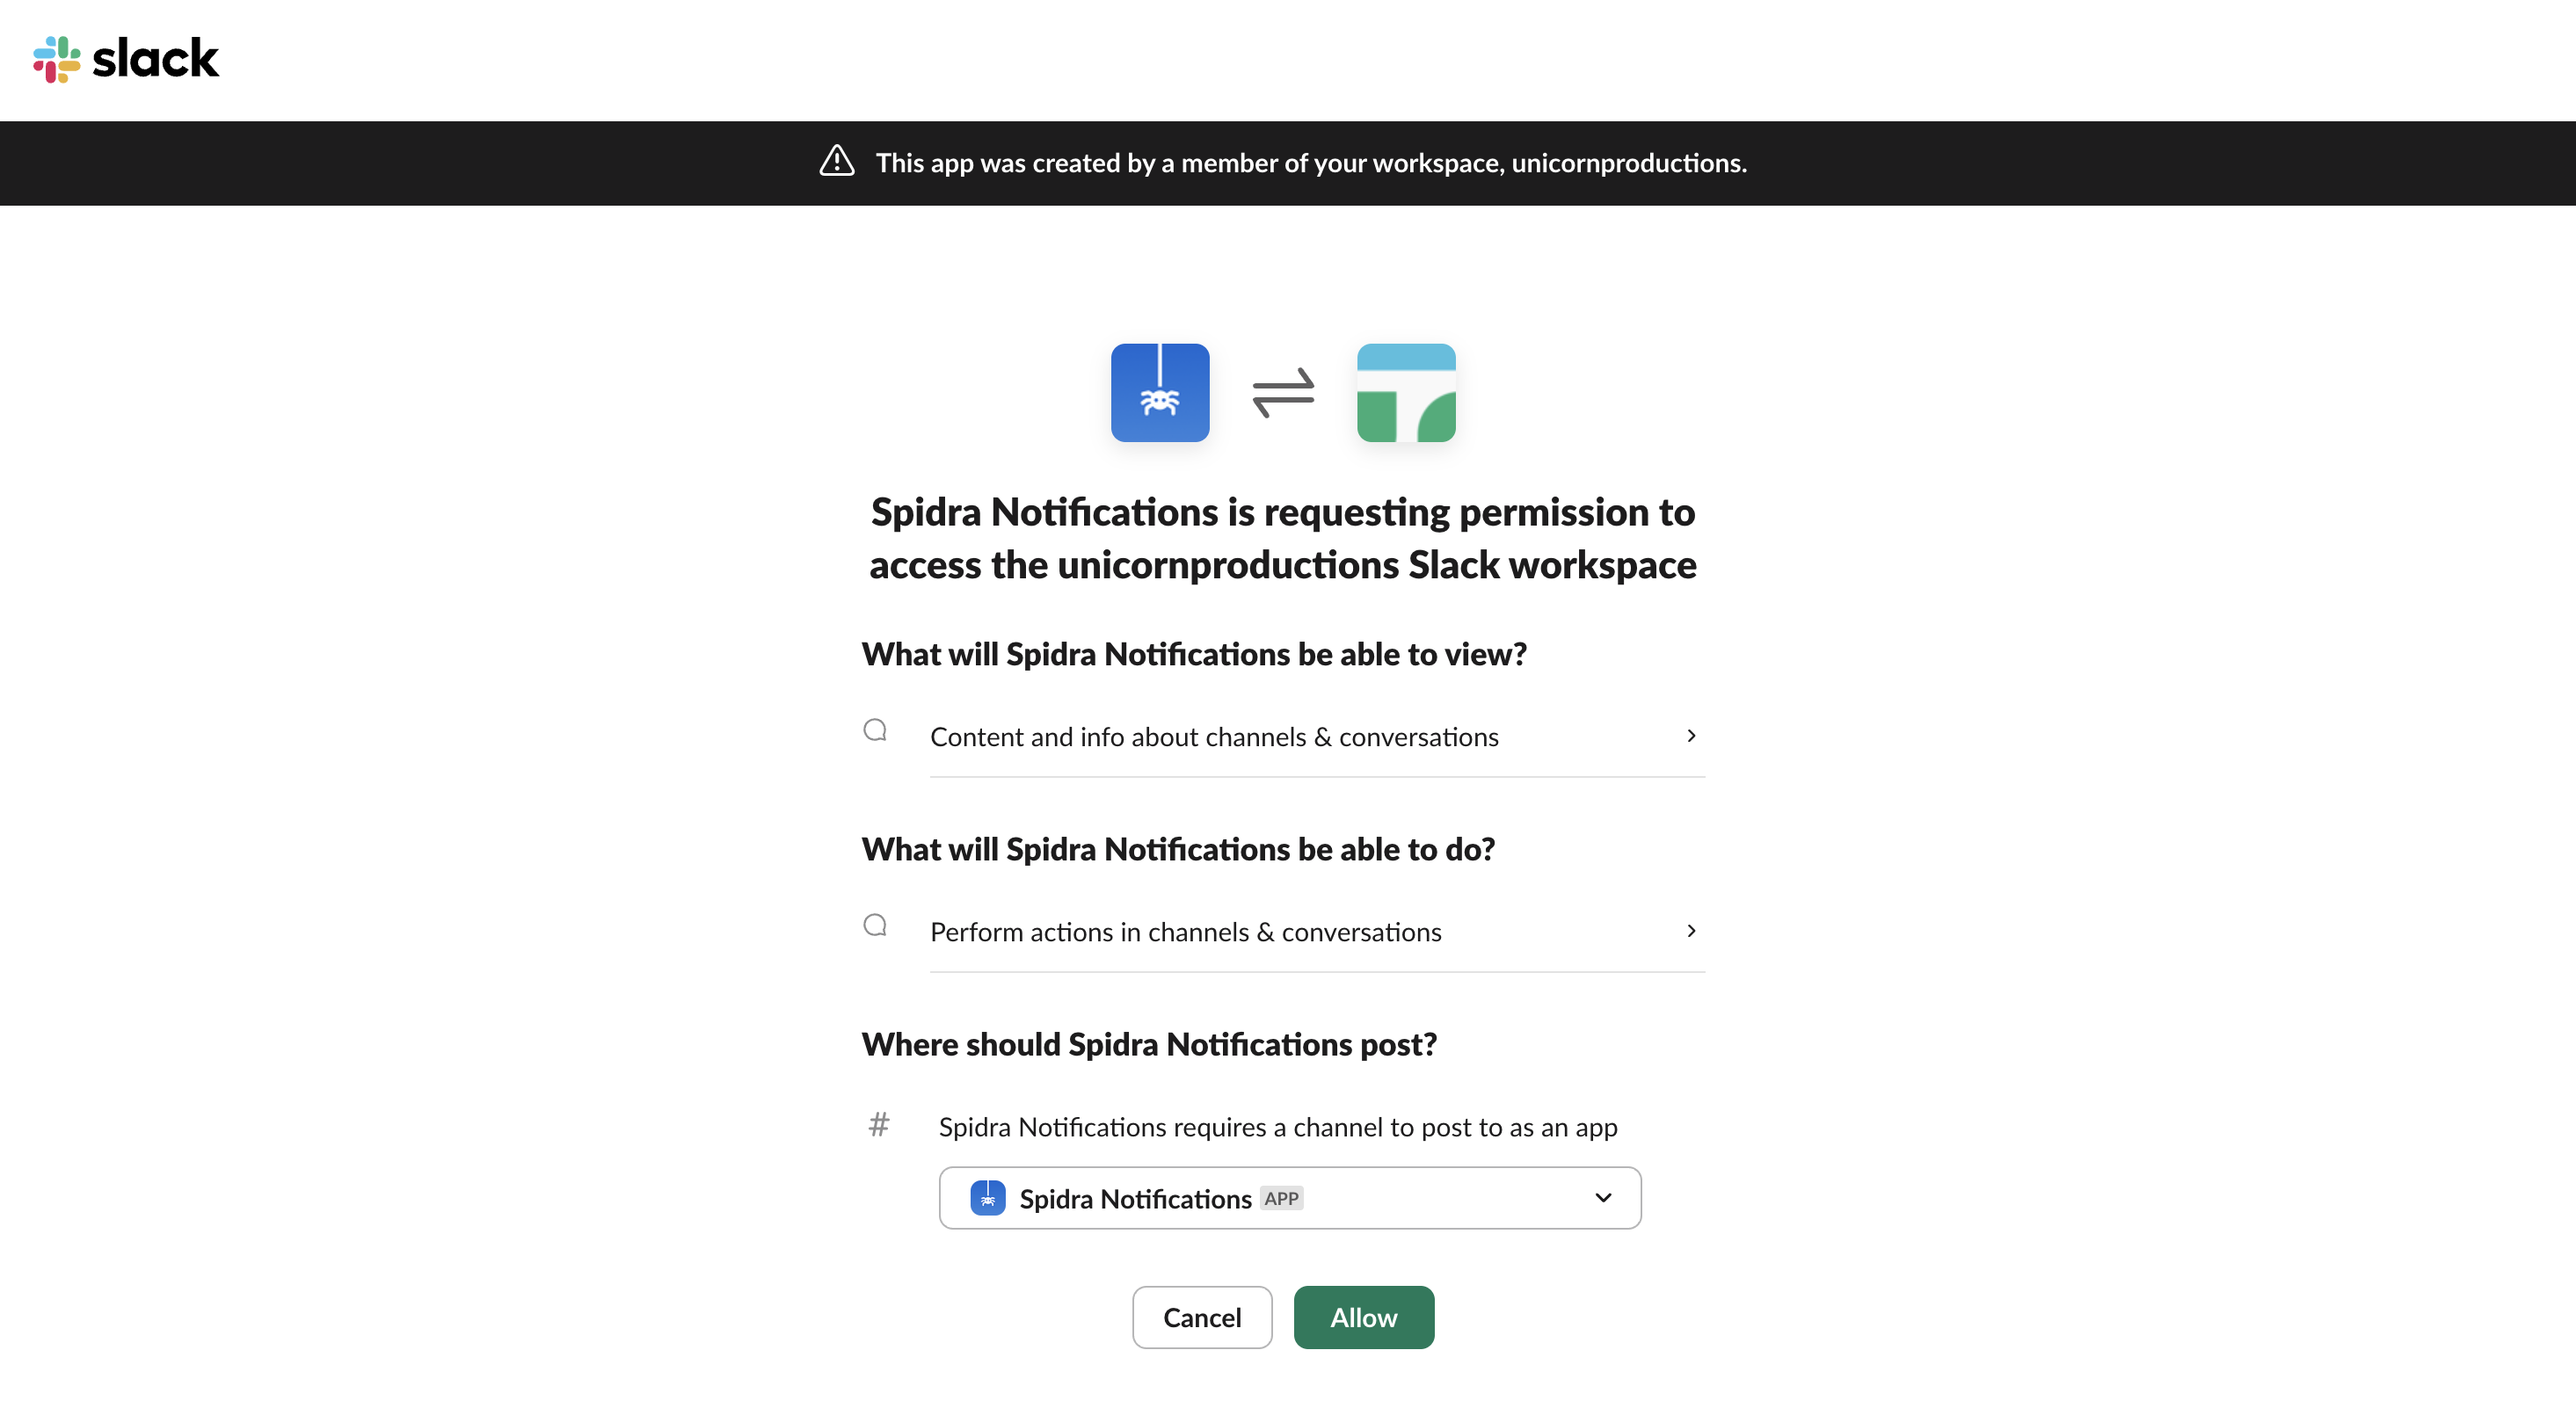
- Install or Reinstall the App: At the top of the page, click Install App to Workspace or Reinstall if already installed. Proceed to authorize the permissions for your workspace.
- Copy Your Bot User OAuth Token: After installing, scroll up to the OAuth Tokens for Your Workspace section. Copy the token that starts with:

- Get Your Slack Channel ID: Spidra also requires your Slack Channel ID to know where to send the data. Here’s how to get it:
- Open Slack and go to the desired channel.
- Right-click the channel name → Copy Link.
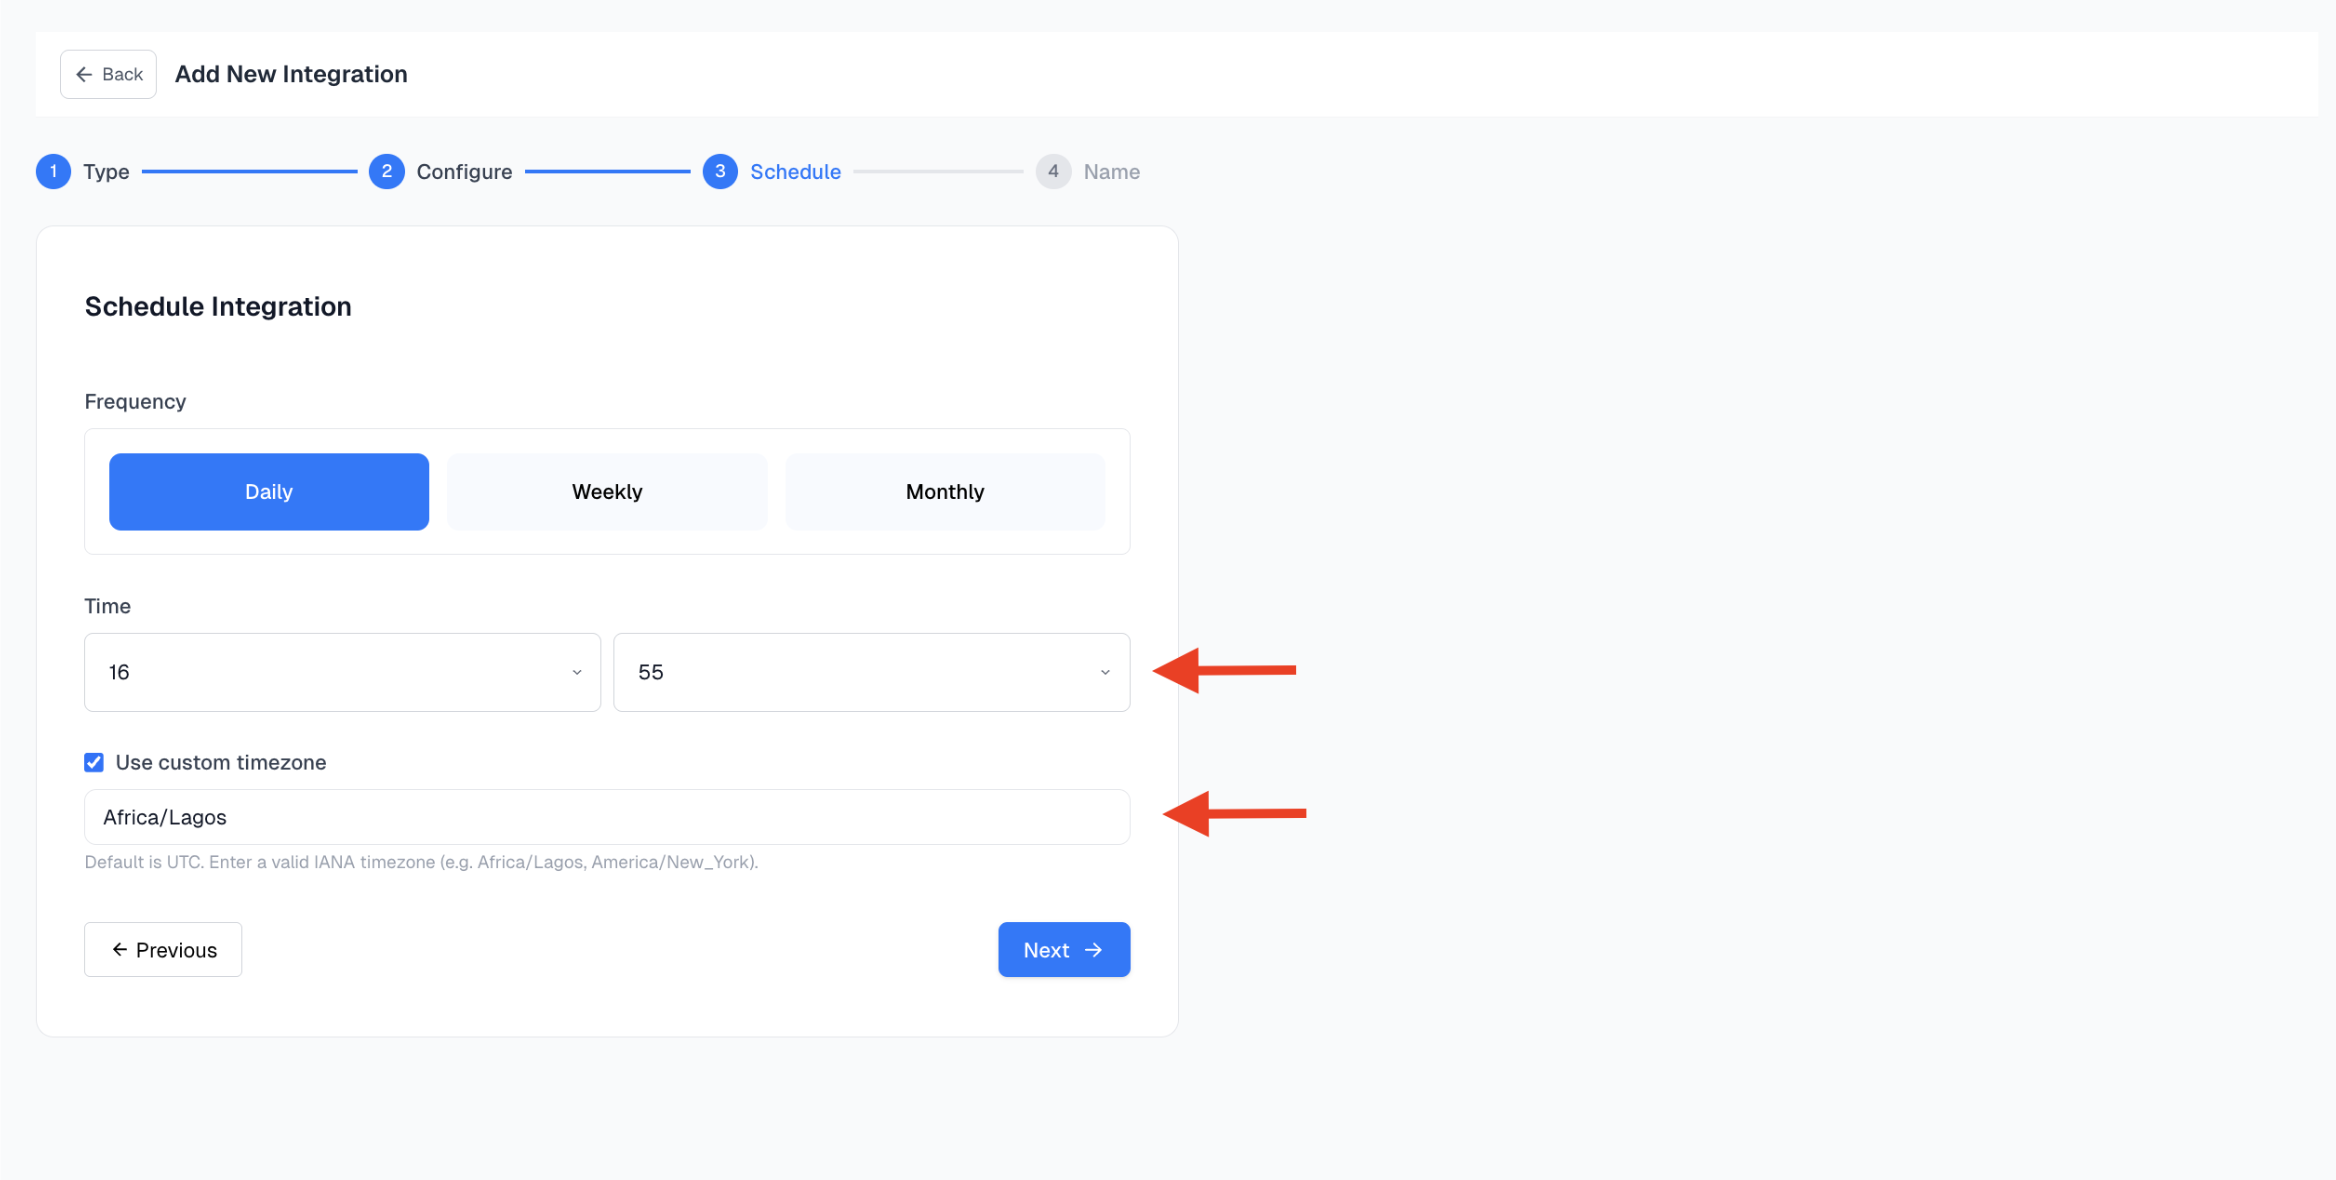
Step 4: Set Up Your Schedule
Define how often and when you want the integration to trigger:- Frequency: Daily, Weekly, and Monthly.
- Time: Select the exact time for the scrape job to run.
-
Timezone (default is
UTC): Use a valid IANA timezone (e.g.,Africa/Lagos,America/New_York).
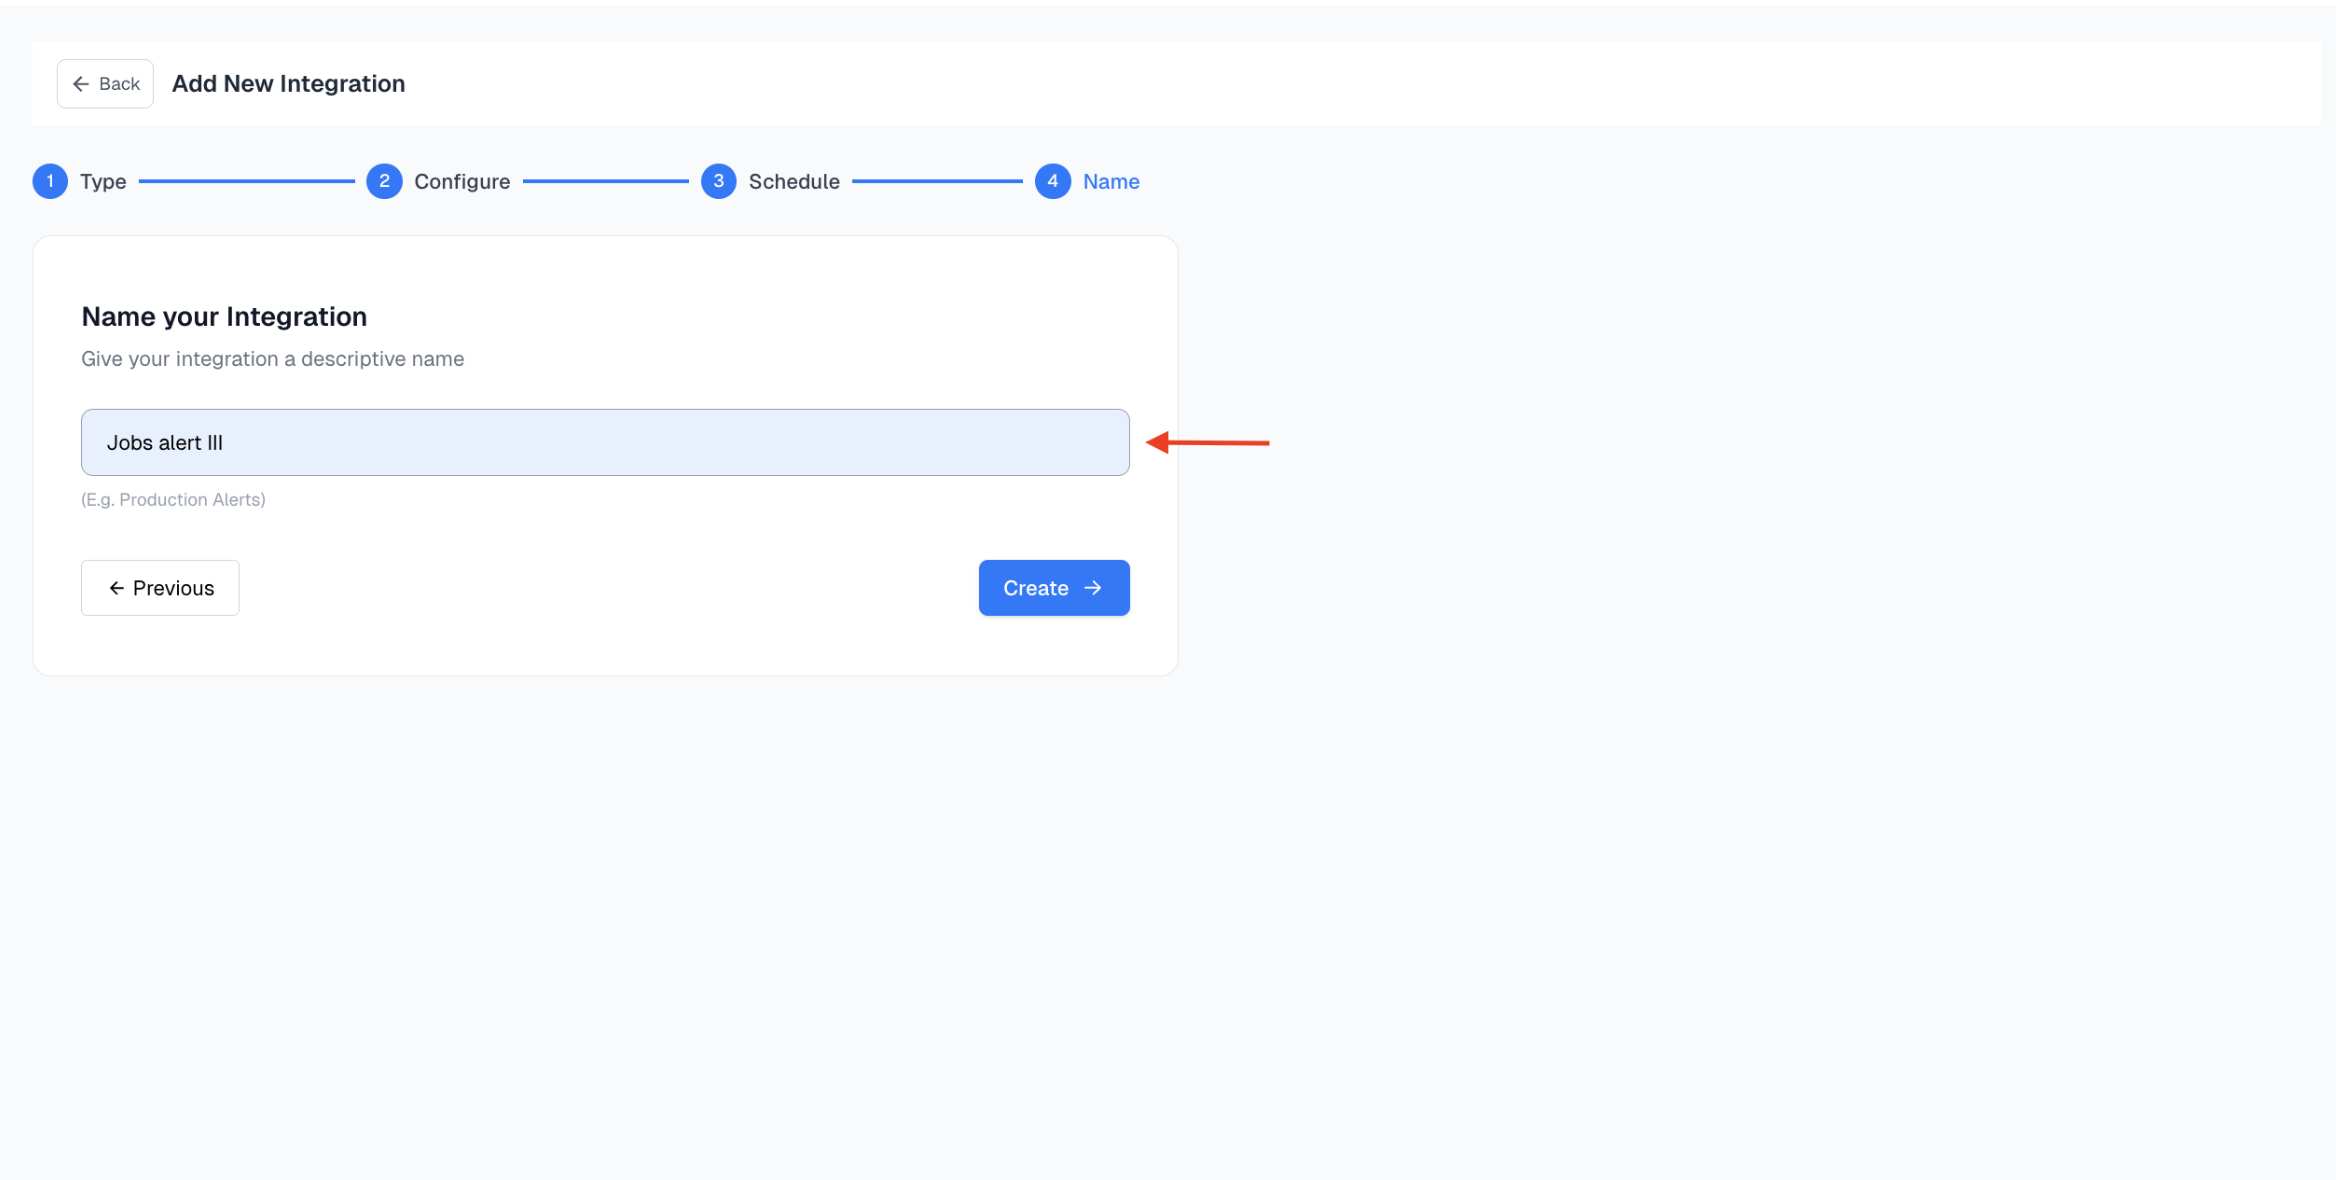
Step 5: Name Your Integration
Give your integration a name that reflects its purpose, this helps with managing multiple integrations. Example:Jobs Alert III, etc.
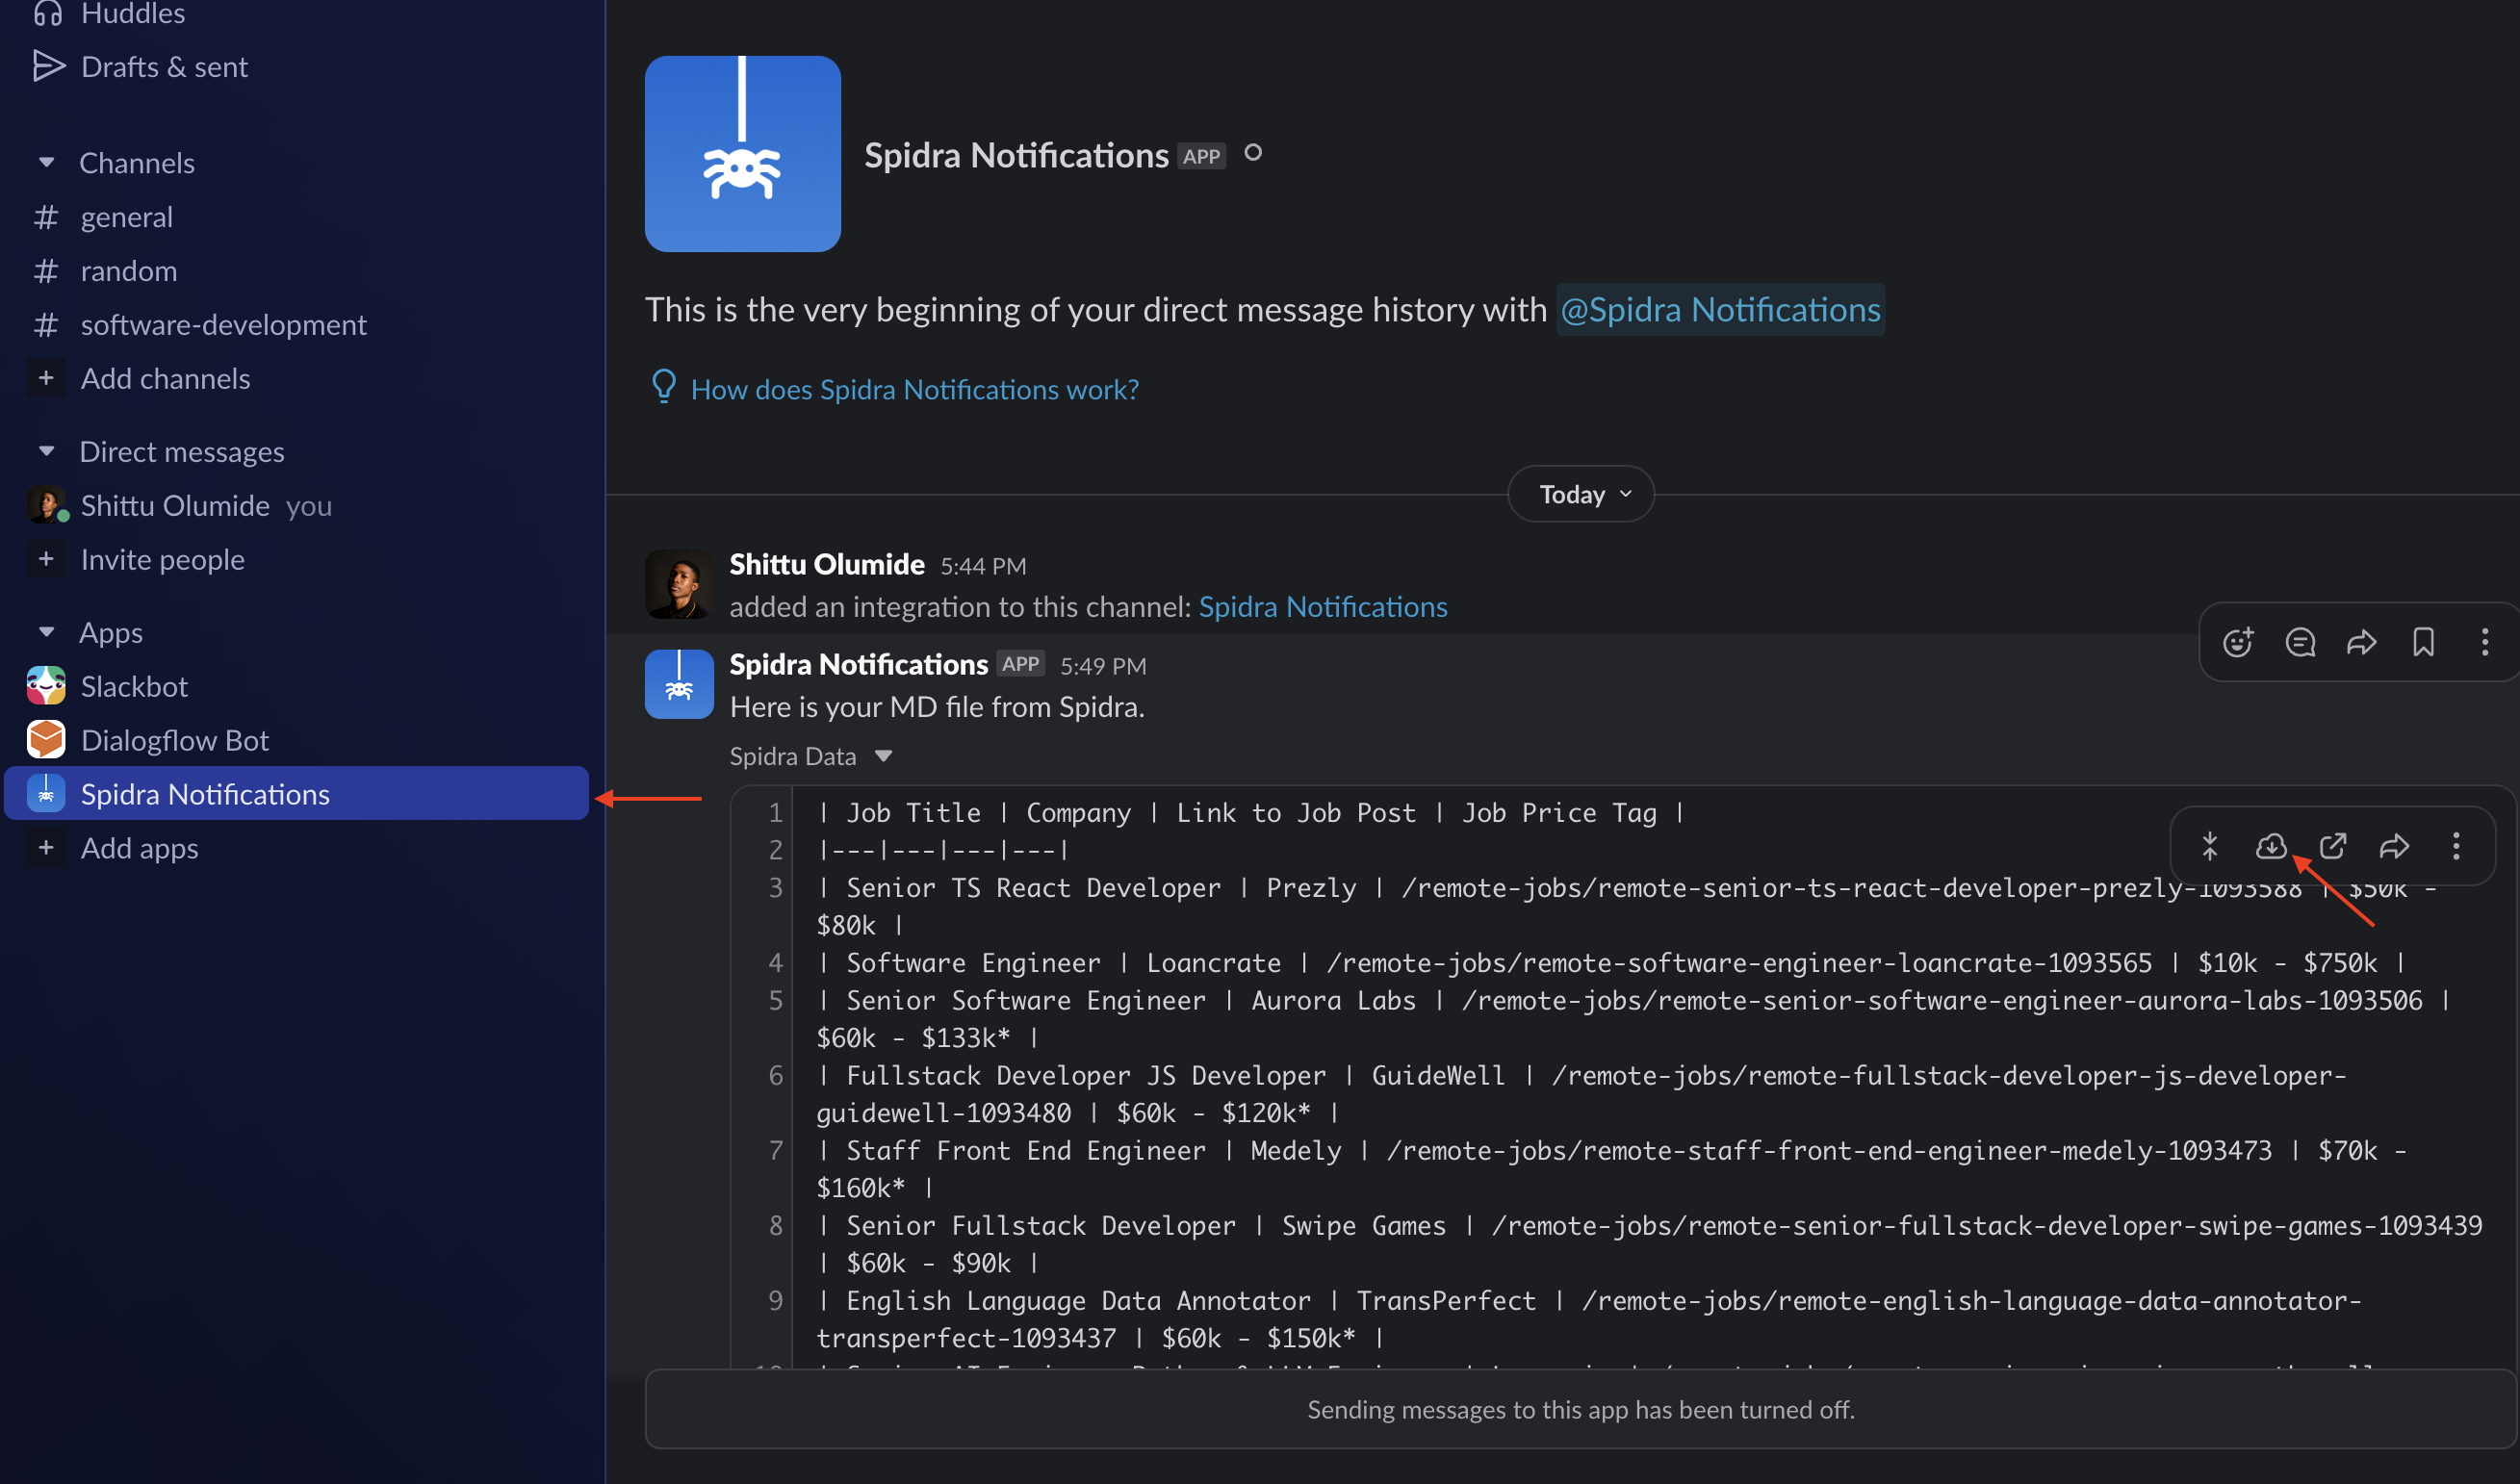
Step 6: Receive Data in Slack
Once your scheduled time hits, Spidra will automatically send the scrape results to your selected Slack channel. If you used the Slack Bot Token, you will be able to see the results and also download it. You’ll find the data posted directly in your workspace, exactly how you configured it.