Step 1: Open the Integrations Tab
First, navigate to the Integrations tab in your Spidra dashboard. Click the Add Integration button to begin.
Step 2: Select Preset and Choose Discord
In the Type modal that appears, use the dropdown to select the preset you want to connect. Choose Discord as your destination. Click Next to proceed.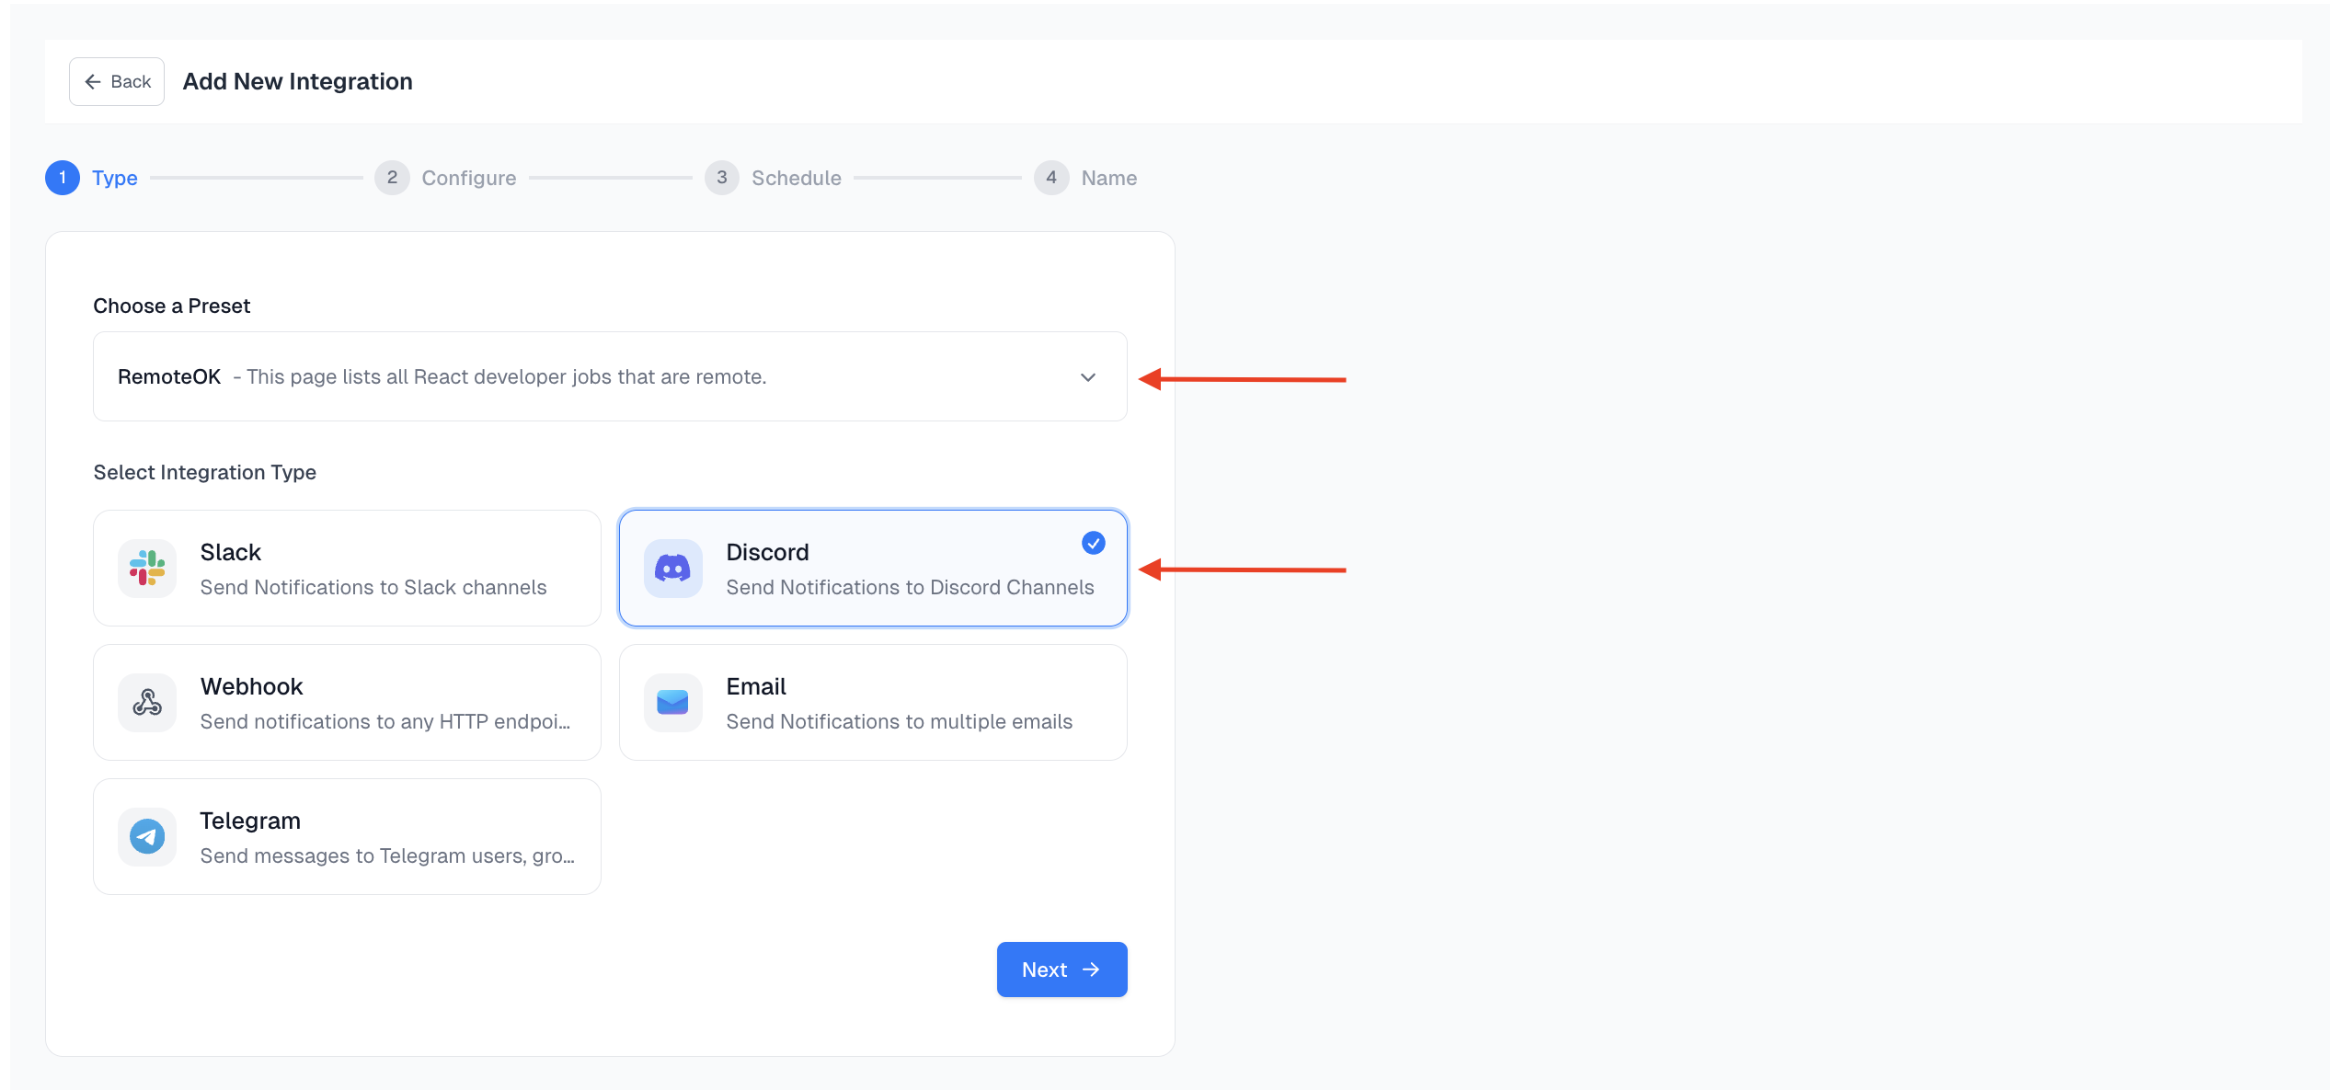
Step 3: Configure Discord
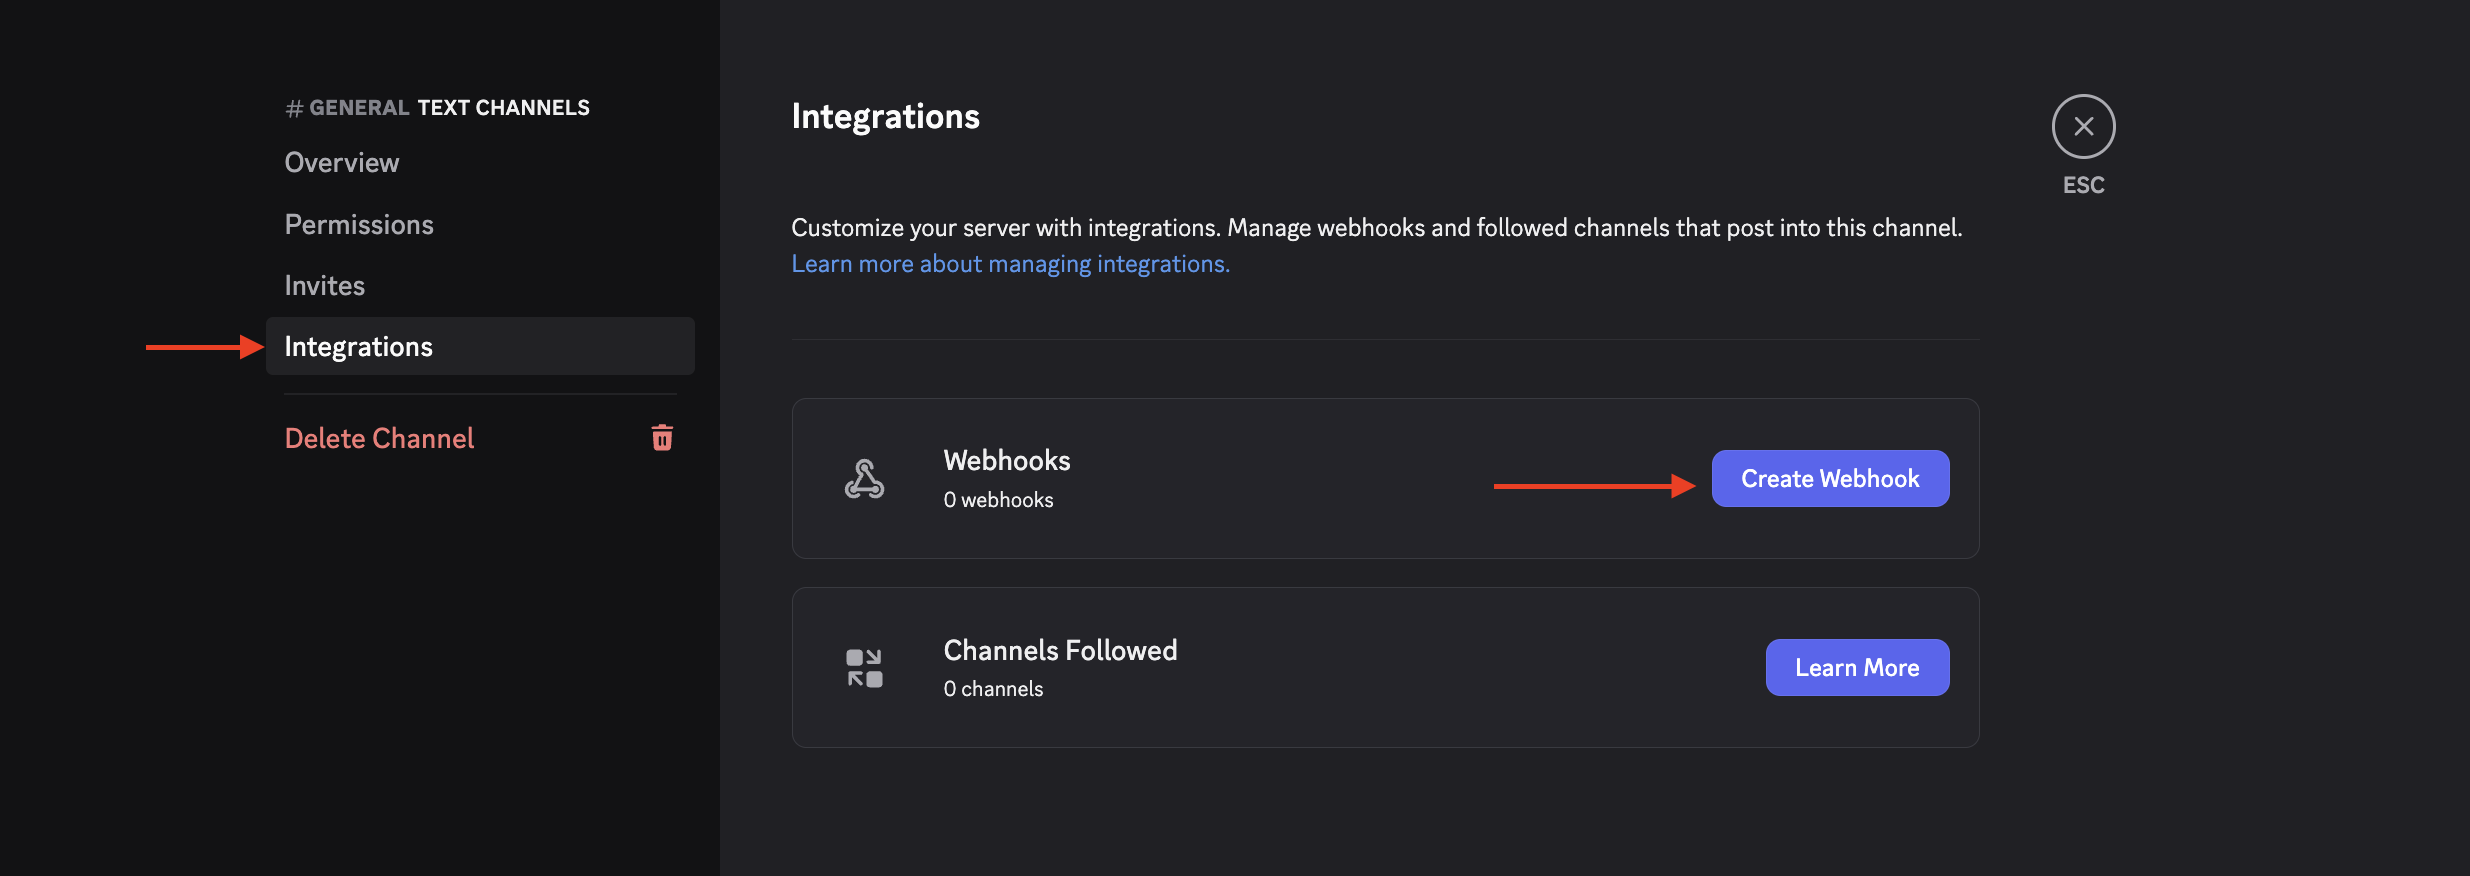
To configure the integration, you’ll need a Discord Webhook URL. To get your Webhook URL follow these instructions :- Open your Discord server.
- Go to the channel where you want messages to be posted.
- Click the gear icon (⚙️) next to the channel name.
- In the sidebar, go to Integrations → Webhooks.
- Click Create Webhook.
- Give the webhook a name (e.g., “Spidra Alerts”).

- Click Copy Webhook URL.
- Click Save Changes.
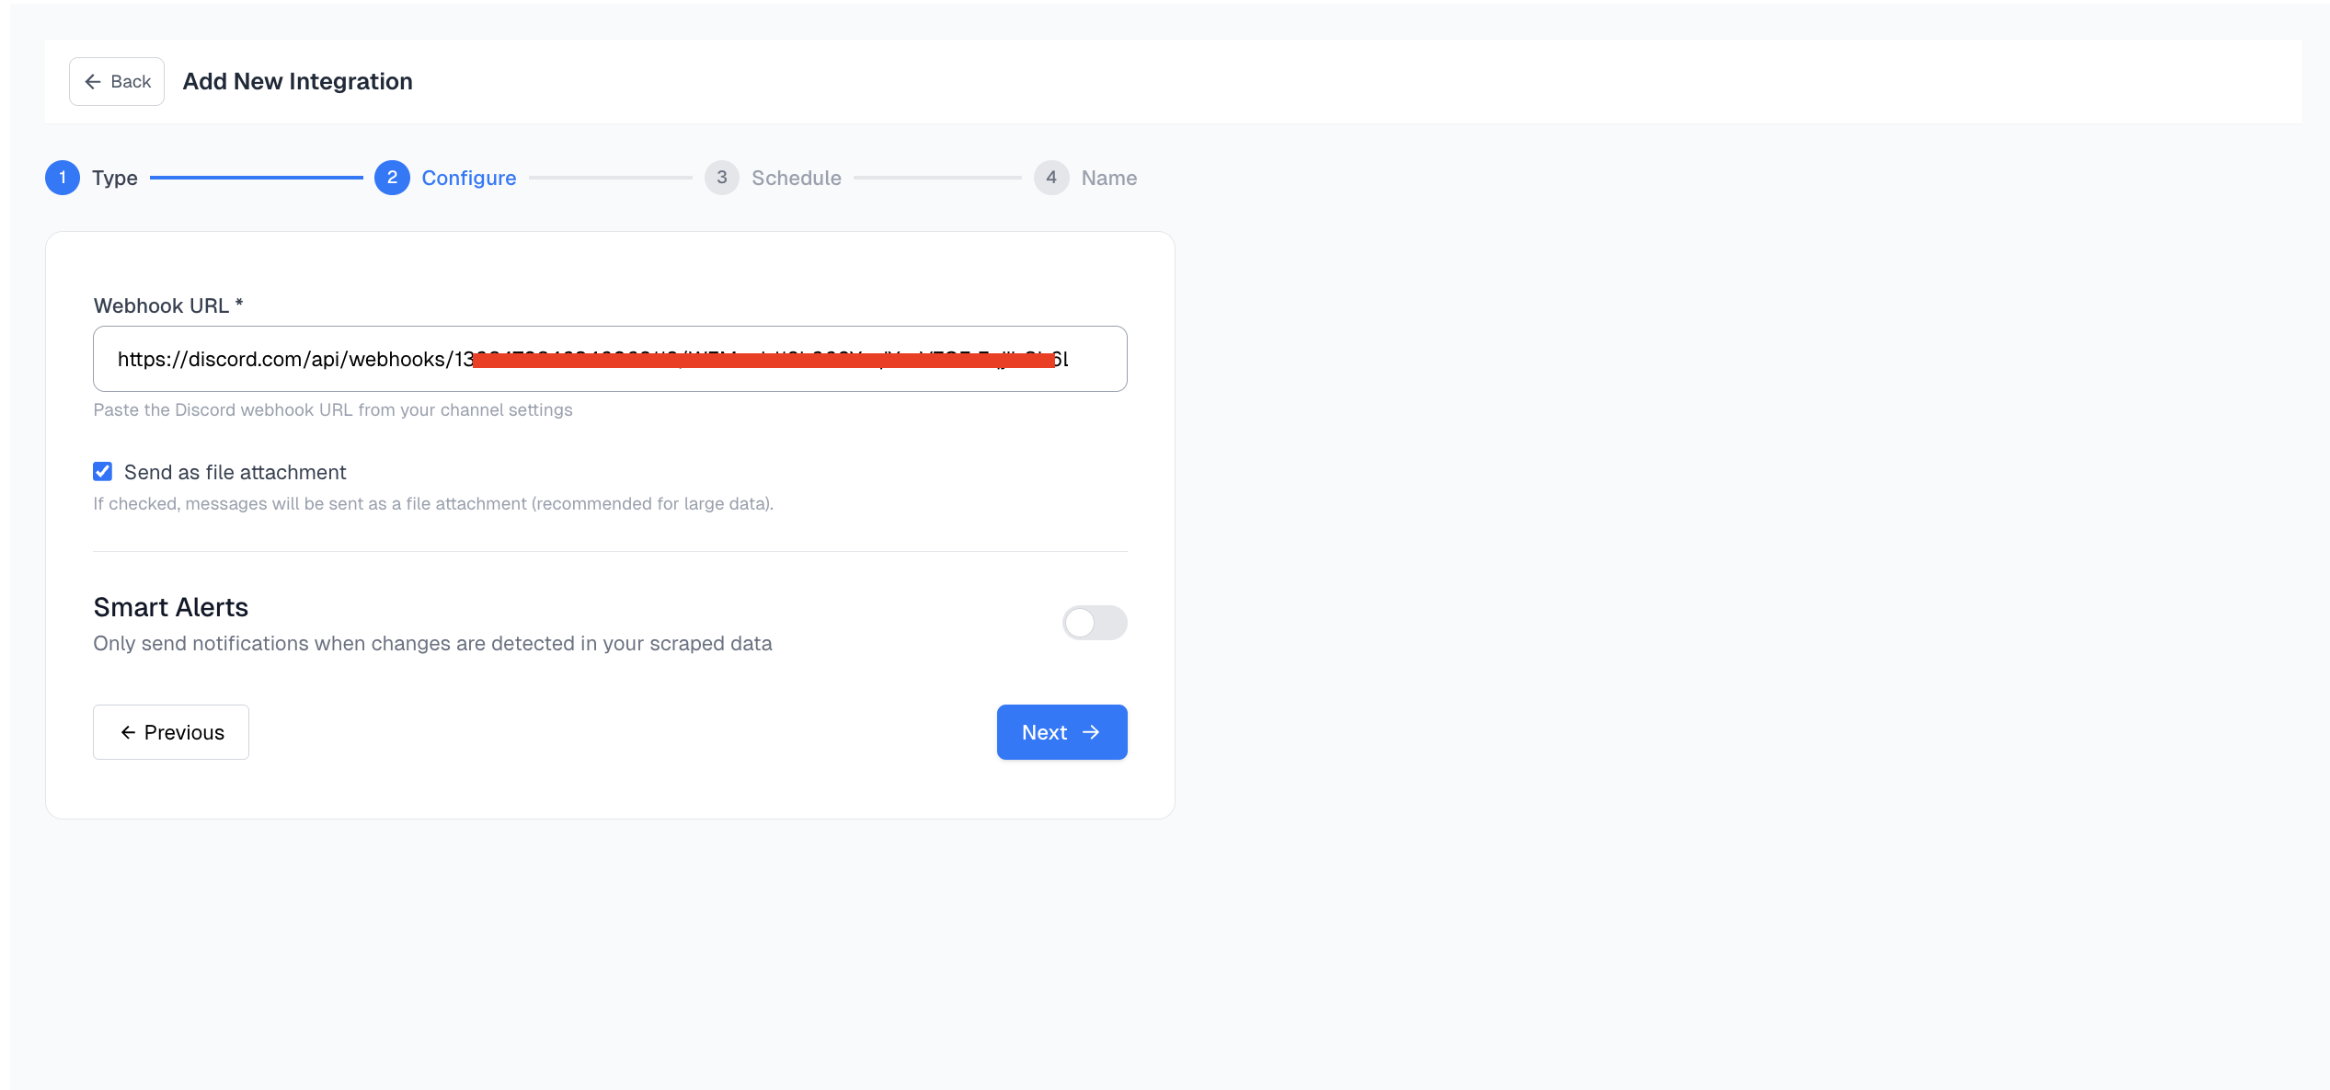
Optional: Send as File Attachment
You can choose to send your scrape result as a file attachment instead of plain text. This is especially useful for:- Large datasets
- Preserving formatting (e.g., CSV/Markdown)
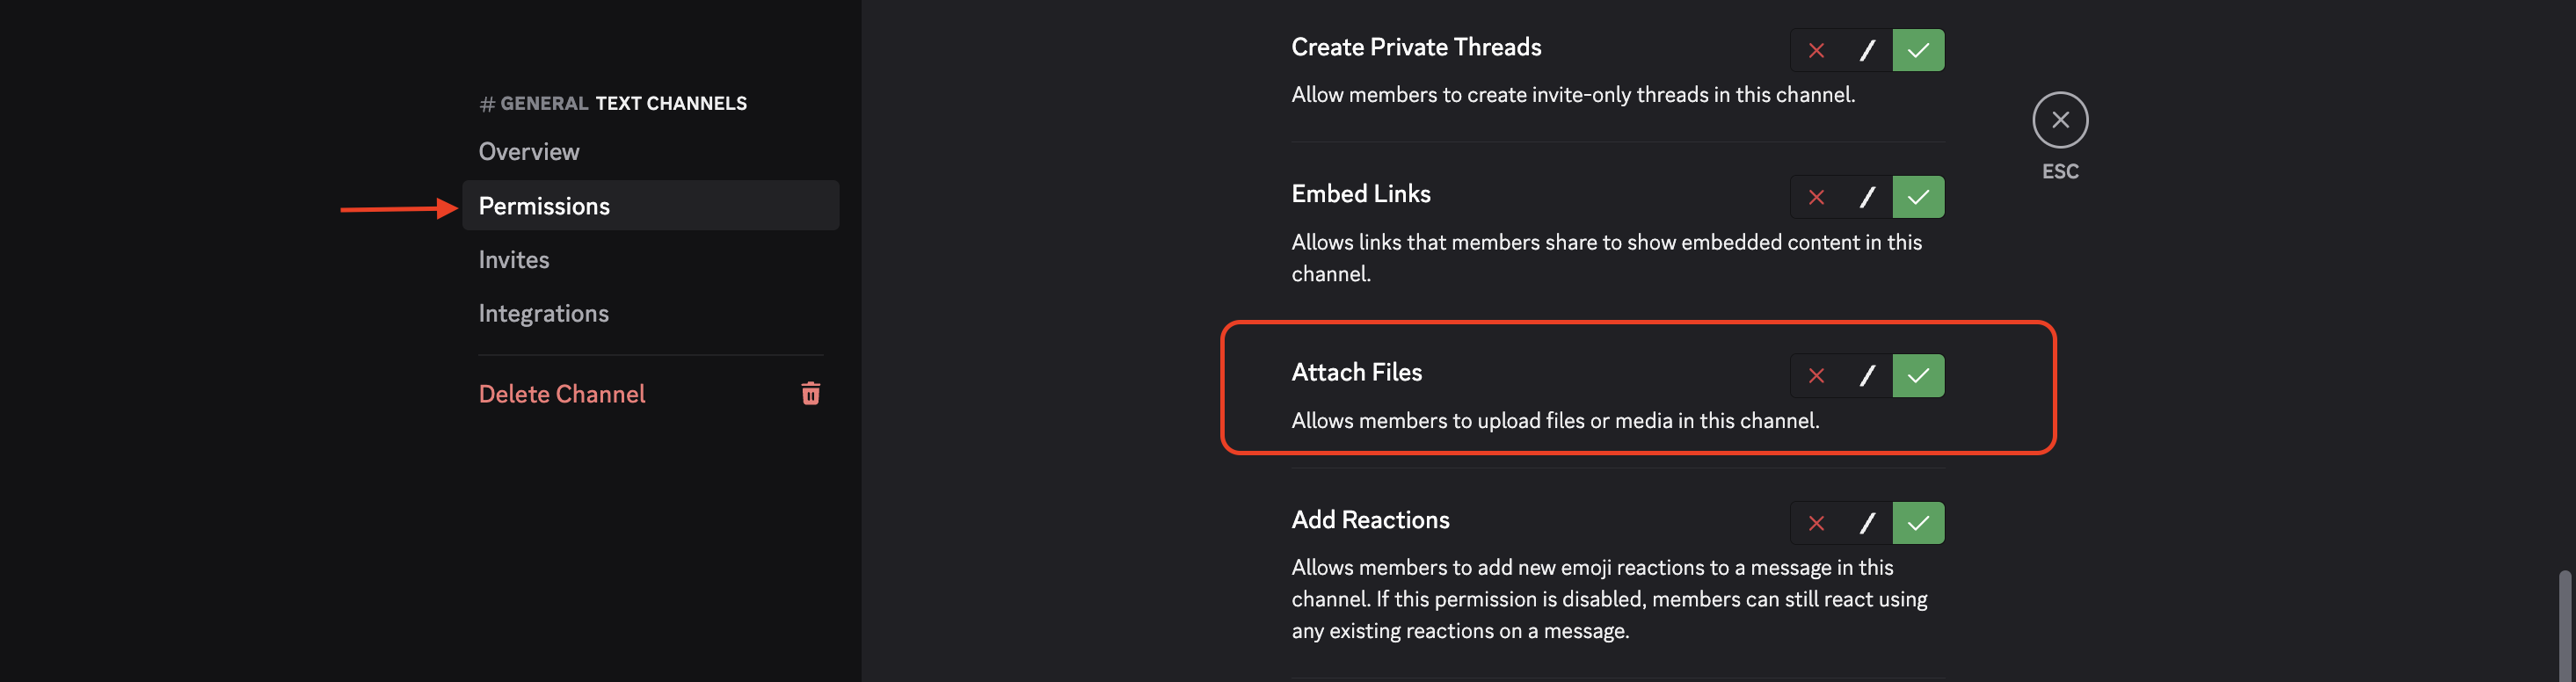
- You check the “Attach files” option to allow your Discord channel permission to upload files.
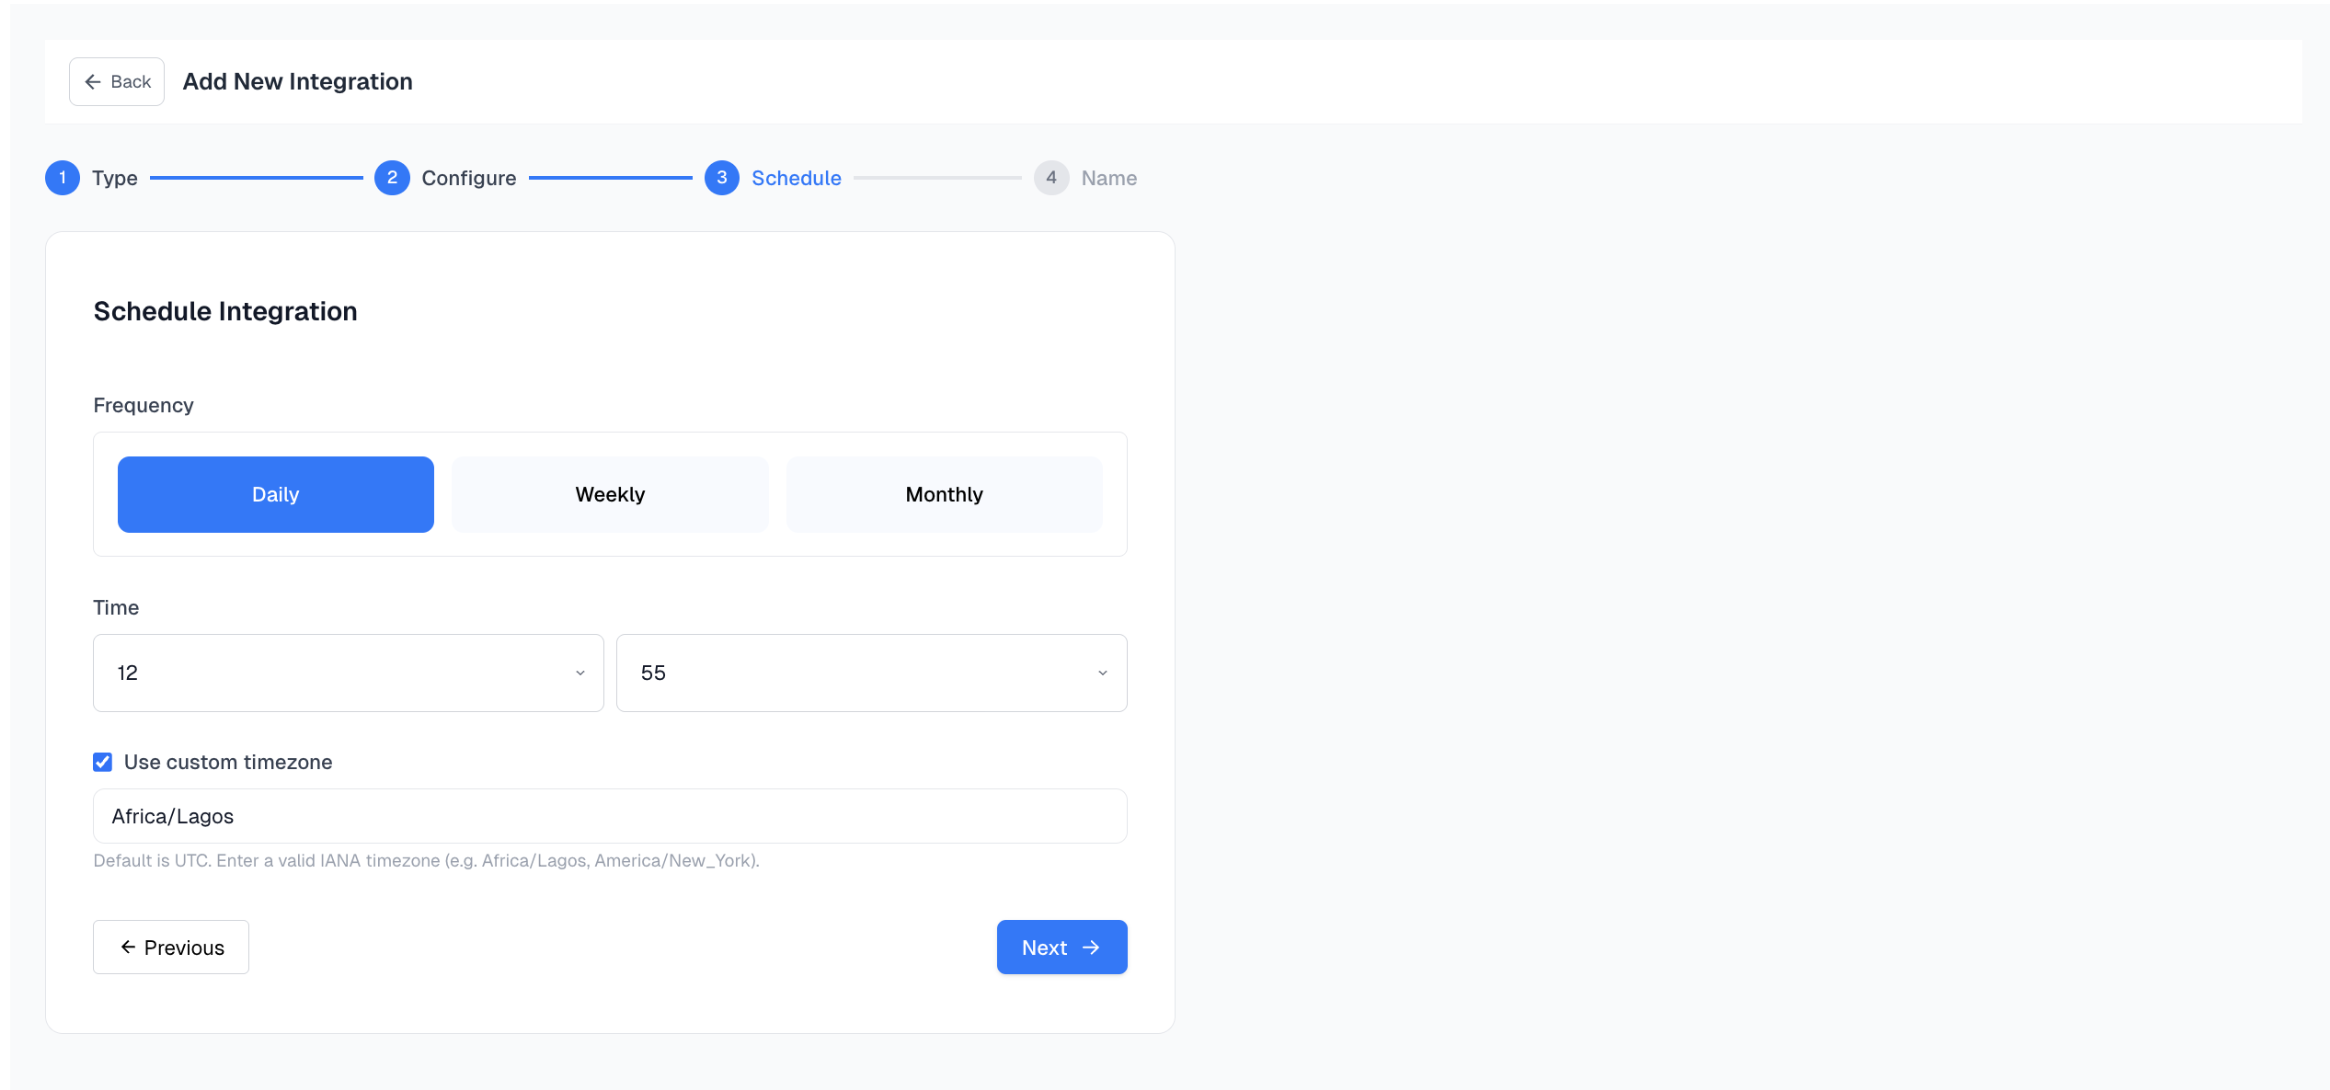
Step 4: Set Your Schedule
Define how often Spidra should send data to Discord.- Daily
- Weekly
- Monthly
Step 5: Name Your Integration
Give your integration a descriptive name e.g”React Job Alerts”. This helps you easily identify it in your integrations dashboard.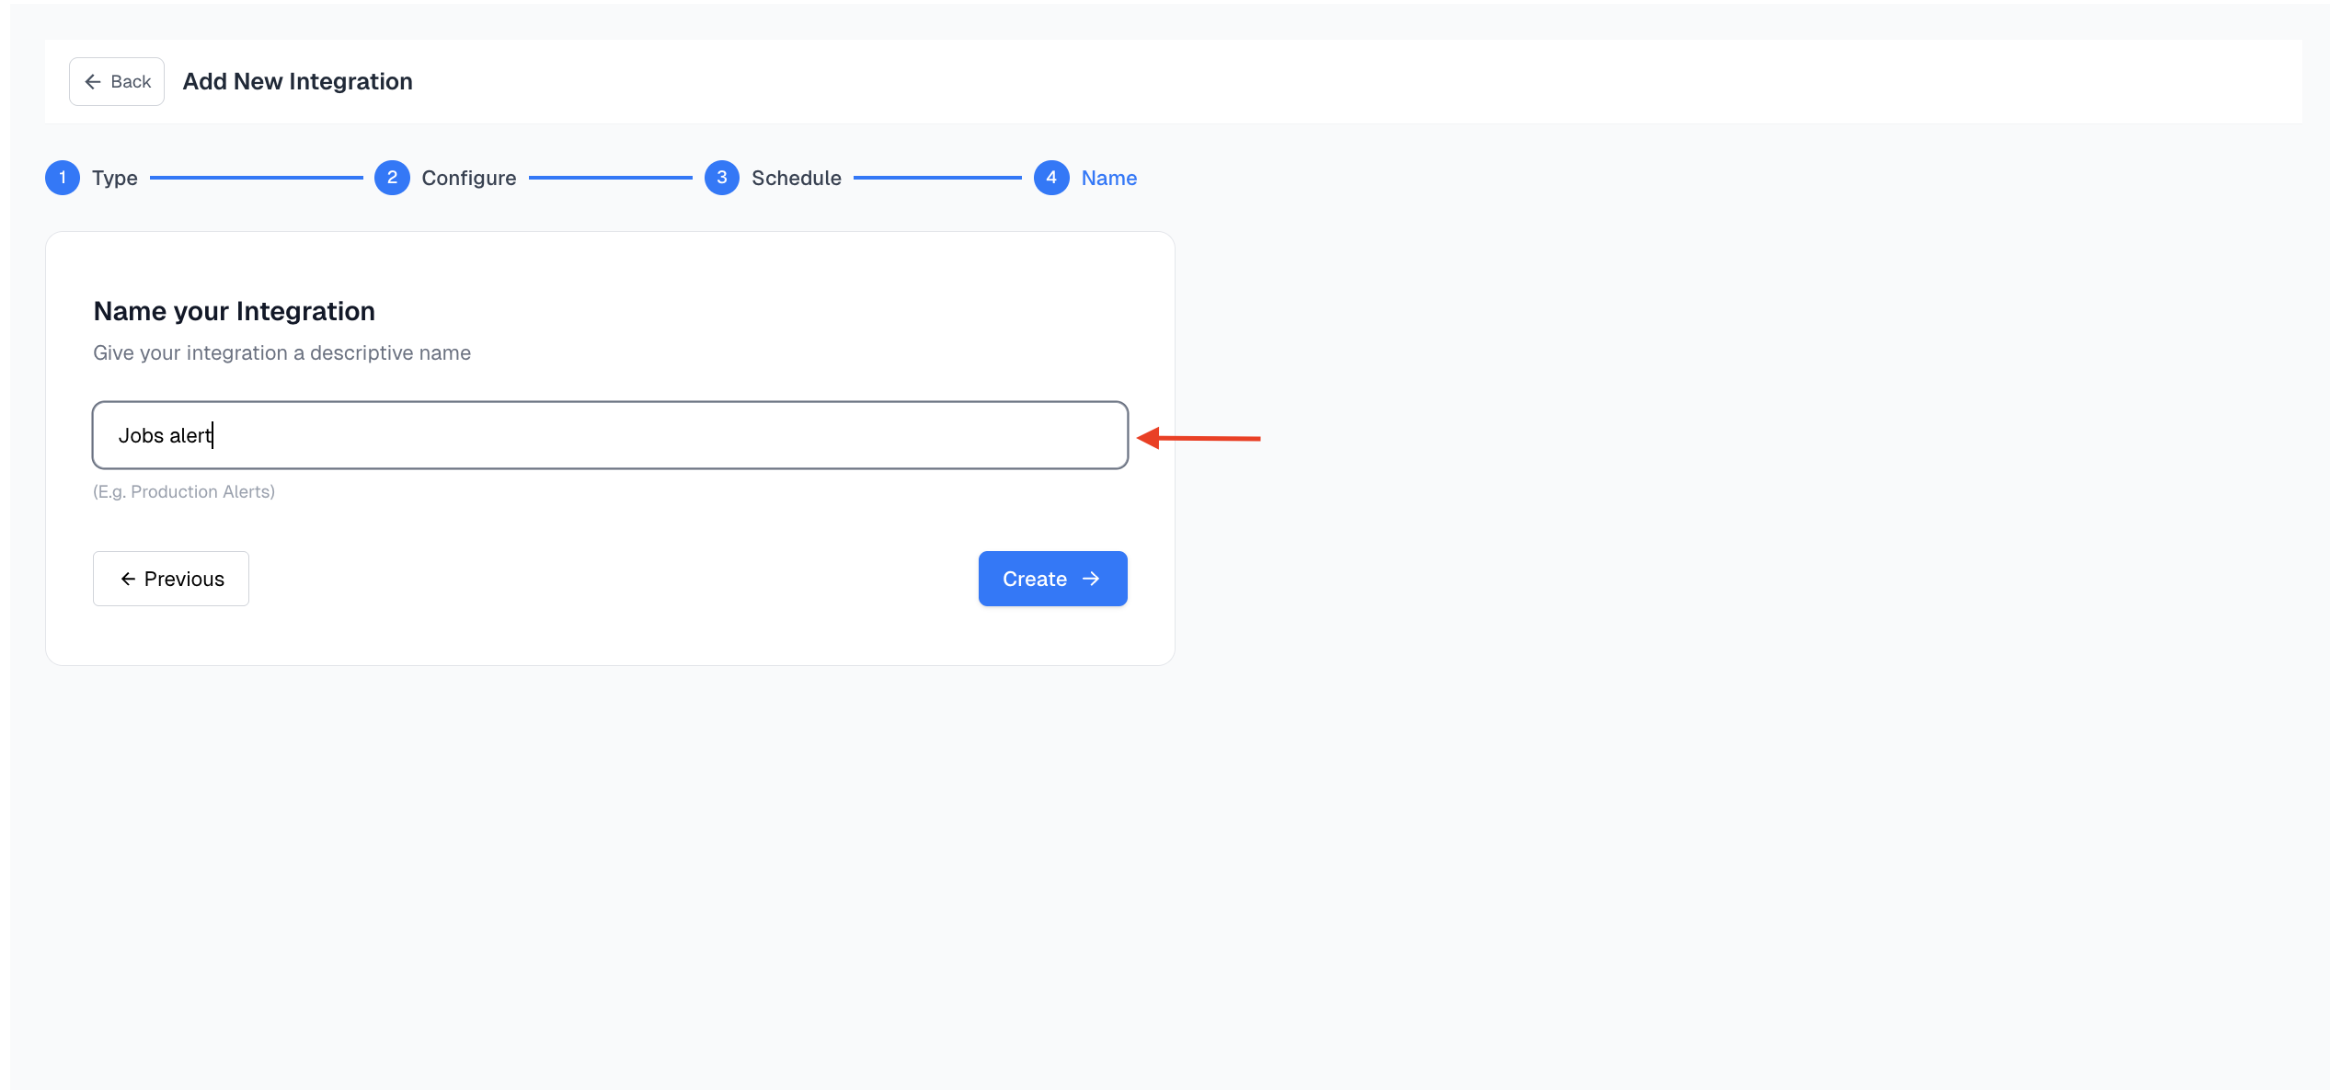
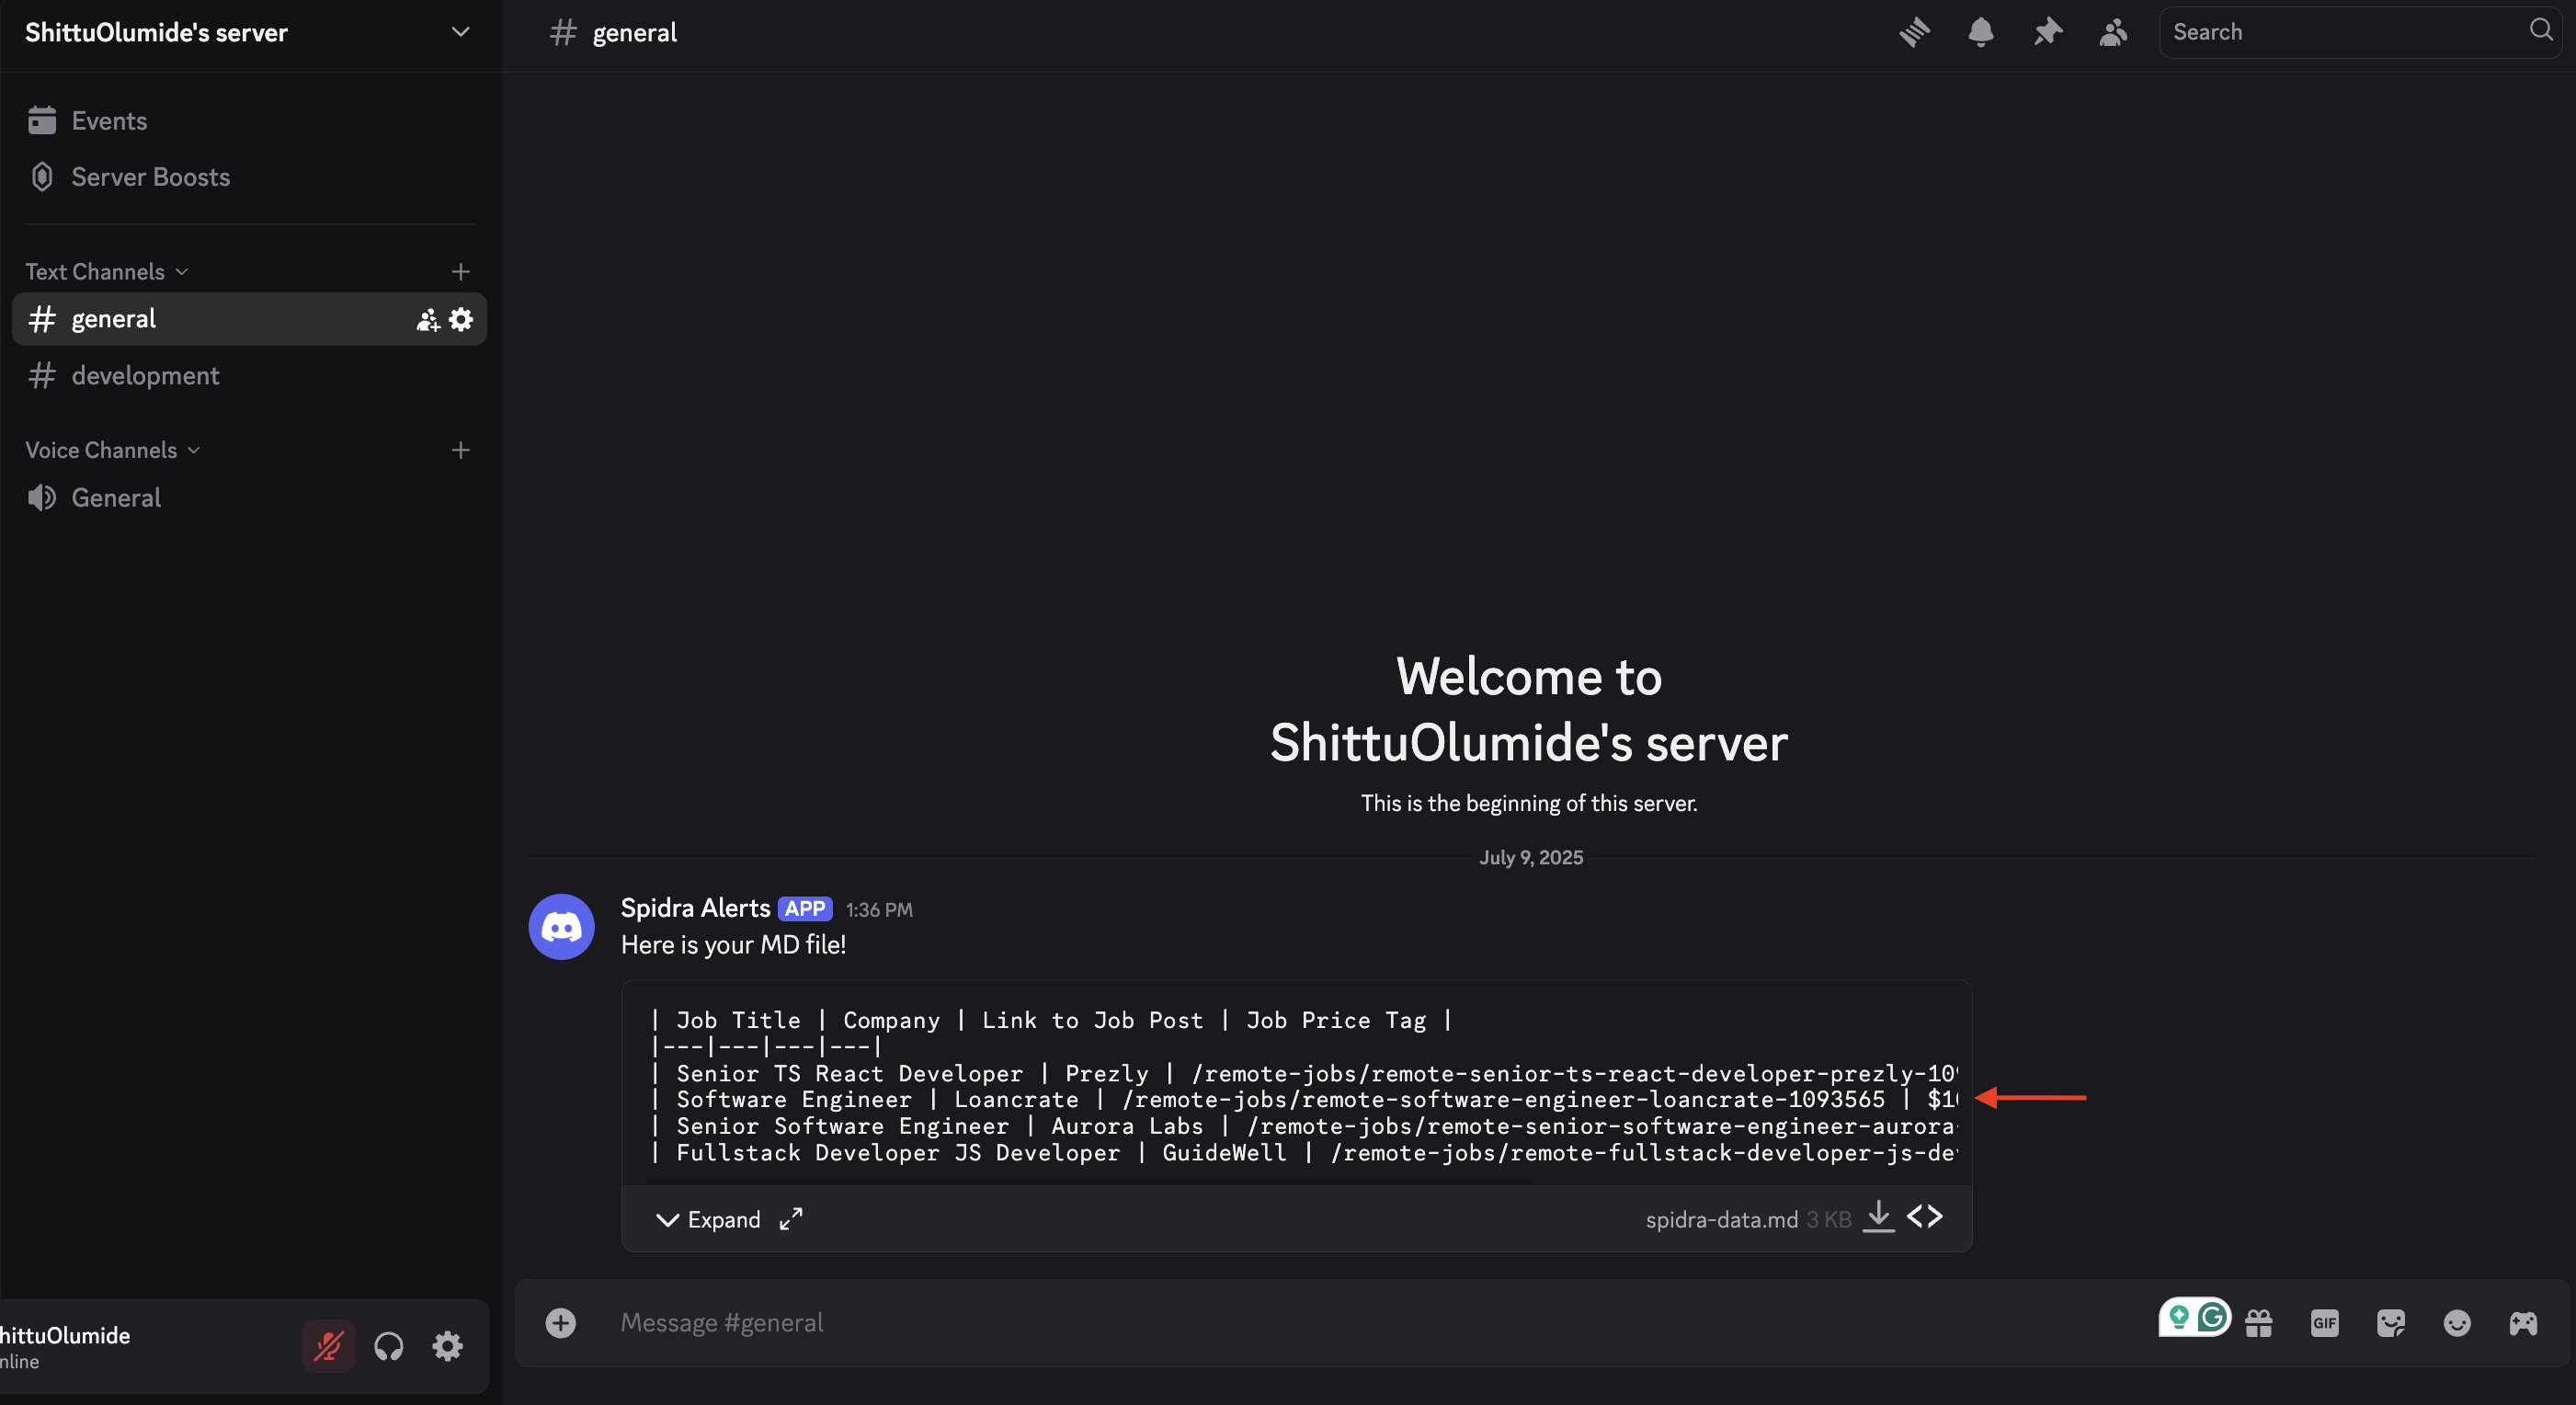
Step 6: Receive Results in Discord
Once your scheduled time is reached, head over to the specified Discord channel, your scrape result will be posted automatically.